
For my final project, I first thought I would be creating a three dimensional wall art piece incorporating simple LED lights as well as different types of LEDs; a light sensor, a microphone sensor for detecting sound, and a timer circuit. I actually did create the main elements out of paper, and also utilized copper tape and coin cell batteries to create successful connections to the LEDs, but my final idea was a little different from my original.
I found inspiration through Jie Qi’s art works that incorporate paper and electronics, for example this pop-up book shown to me by Martin (thanks, Martin!):
And the living wall made in the MIT media lab:
Here is my original idea:

These pictures are unfortunately not of the best quality, but the project on the right by artist Janice Caswell is serving as inspiration for my project. I will (and did) use paper, and other materials if it seems appropriate, to create my installation incorporating LEDs. I thought I would loosely create a web representing connections. This project is very individual, so it can be customized, but for the tutorial, I will be clearly explaining how to create the basis of a project like this. It is easily customizable.
I will keep updating on my process once I really get going-but right now I am waiting for my components to come in the mail-which will be very soon! It will be easier to map out exactly what I am doing once I have everything in front of me.
Update as of December 13, 2015-
So I tested the process of the string abstract technique, and I realized that since I will be utilizing copper tape to connect my LEDs. the technical aspect will not be hidden by my installation as the strings are too thin. So, I have decided to instead create a wall garland that will be easier for anyone to reproduce, and create on their own. It will feature shapes (right now I deciding on whether I should do triangles or circles) illuminated by the LED, which will be in between to sheets of paper. I will have designs on each lit-up shape, and right now I am thinking of constellations or images of the night sky.
I was really inspired by these garlands: http://miavril.bigcartel.com/products produced by Virginie Sannier-Dorémieux who is actually from Toulouse, France! I will not be sewing the garlands, but simply attaching fishing line or string between the shapes. I have already designed and engineered how it will all work, and now I just have to put it all together.
Here is how my final project all came together:
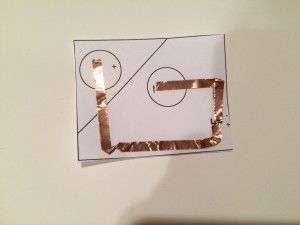
Originally, was struggling to come up with an idea to use with my LEDs. I knew I wanted to make something with lights, but I was not sure what. So, after researching more projects and seeing Jie Qi’s work with paper circuits and circuit stickers: (http://technolojie.com/circuit-stickers/), I was inspired, so that’s how I came up with the idea of a paper star light-up LED garland. In order to make this, I ordered online LED stickers, 3 volt coin cell batteries, and copper tape. As soon as all my components came, I started to experiment, and made different connections, like this one:

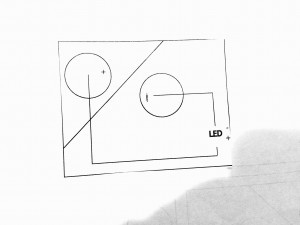
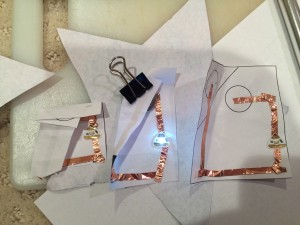
but I realized I did not know what I was going to make with this parallel circuit, and I knew I had to go simpler if I wanted to make something successful. So, I decided on the simple paper circuit LED. I created my own template that would fit inside my stars:
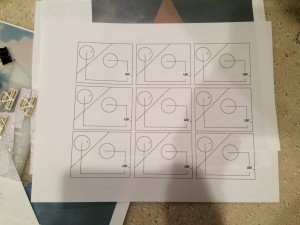
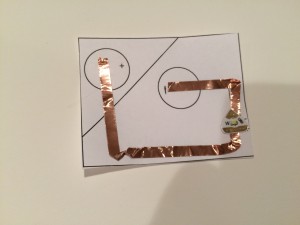
and used it inside all 10 of the paper lights I created. After getting the right size to fit inside the star shape, I developed my LEDs.
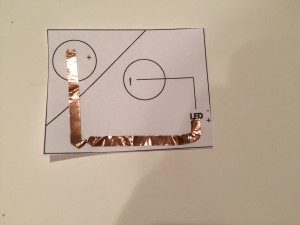
Placing the copper tape to create the correct connections, and then adding the LED sticker and battery:
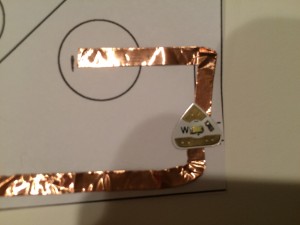
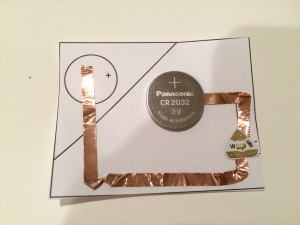
And then, I tested the connection by pressing on the battery, and most of the time, the circuit worked well. Some of the time, I realized I folded the copper tape too much or not as well as I could have, so the connection was weak. Then I just re-made the circuit, and learned from my mistake.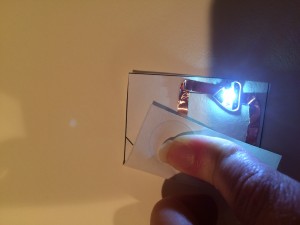
And then, after testing, I taped the battery into the circuit. Of course, soldering would have been the best way to affix the battery to the copper tape, but I do not have a soldering iron. Actually, at first, I was going to use a glue gun to glue the battery to the copper tape. But after researching this, I quickly learned that because the glue is hot, it weakens the connection and is a horrible way to connect circuits! So, I decided on tape. I made sure it did not touch the copper tape as the strongest tape I found turned out to be silver. Like I said before, I would have preferred to solder, but this was the only option for me as I am working from home. However, the tape worked extremely well and provides an excellent way to keep the battery in the circuit.
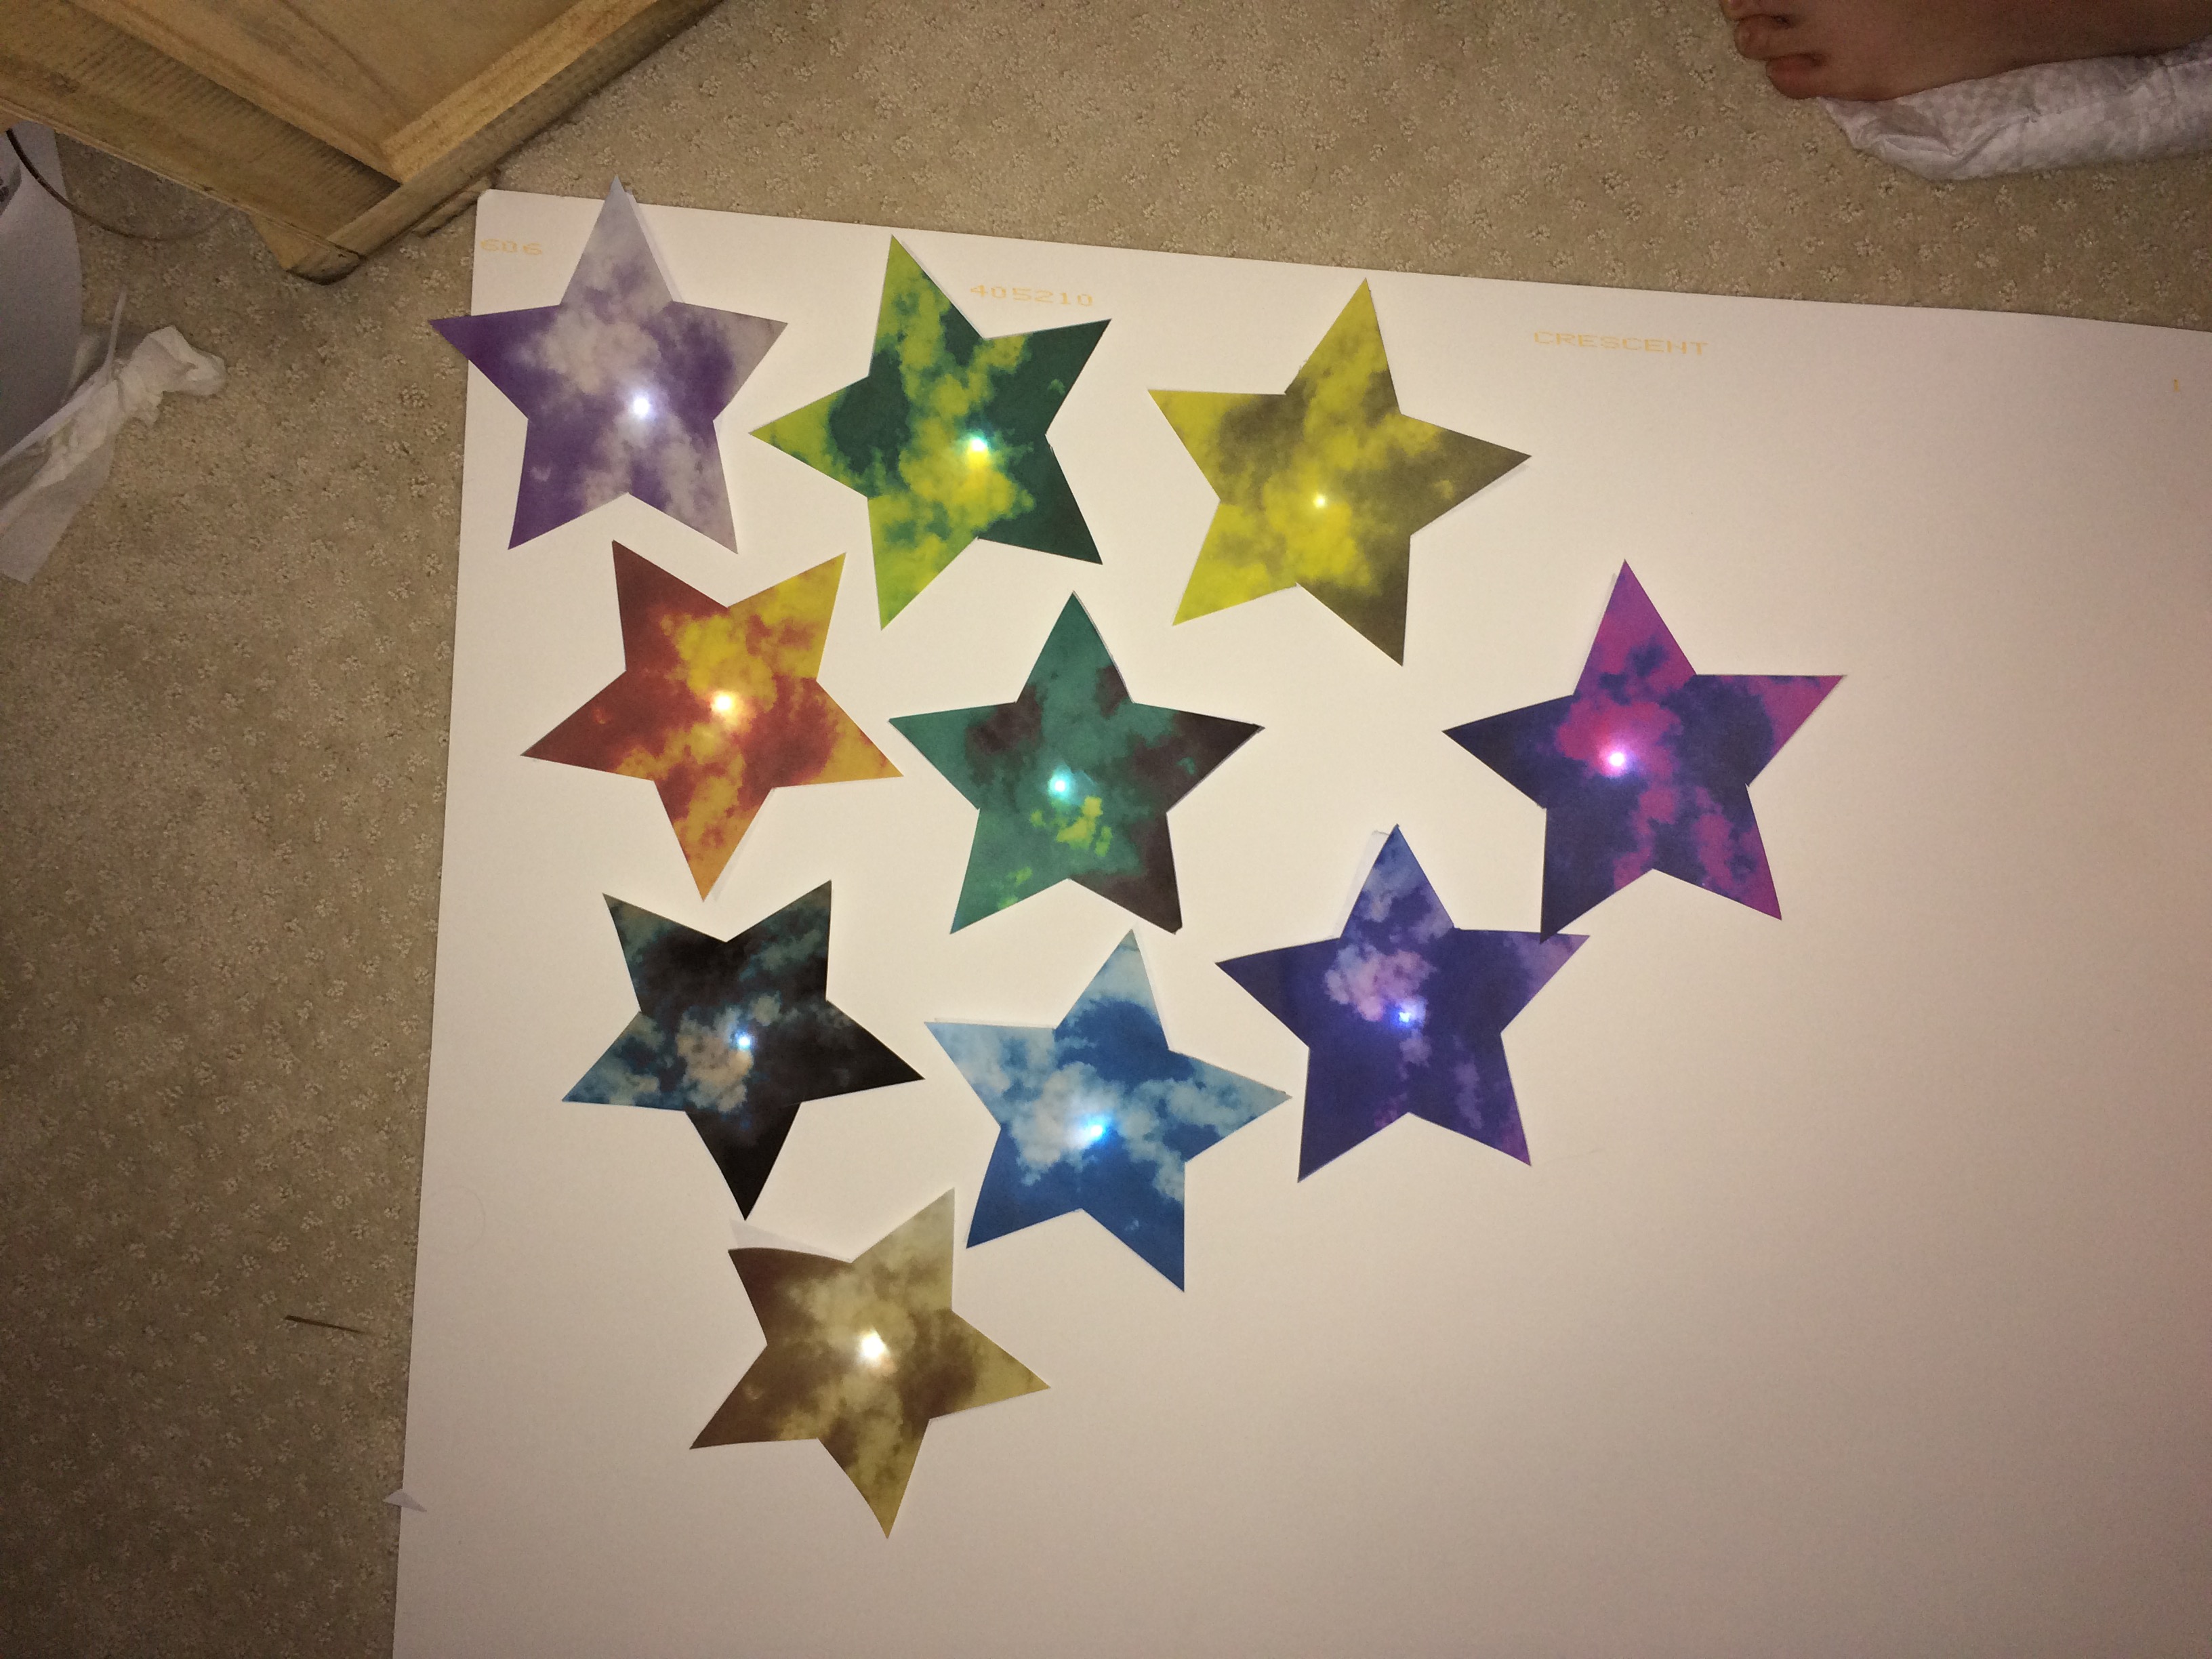
So I decided to make 10 stars, so I had to make 10 paper circuits. I ended up with around 14 because some were having issues, or stopped working. And before I even came up with the official circuit, I had many prototypes:
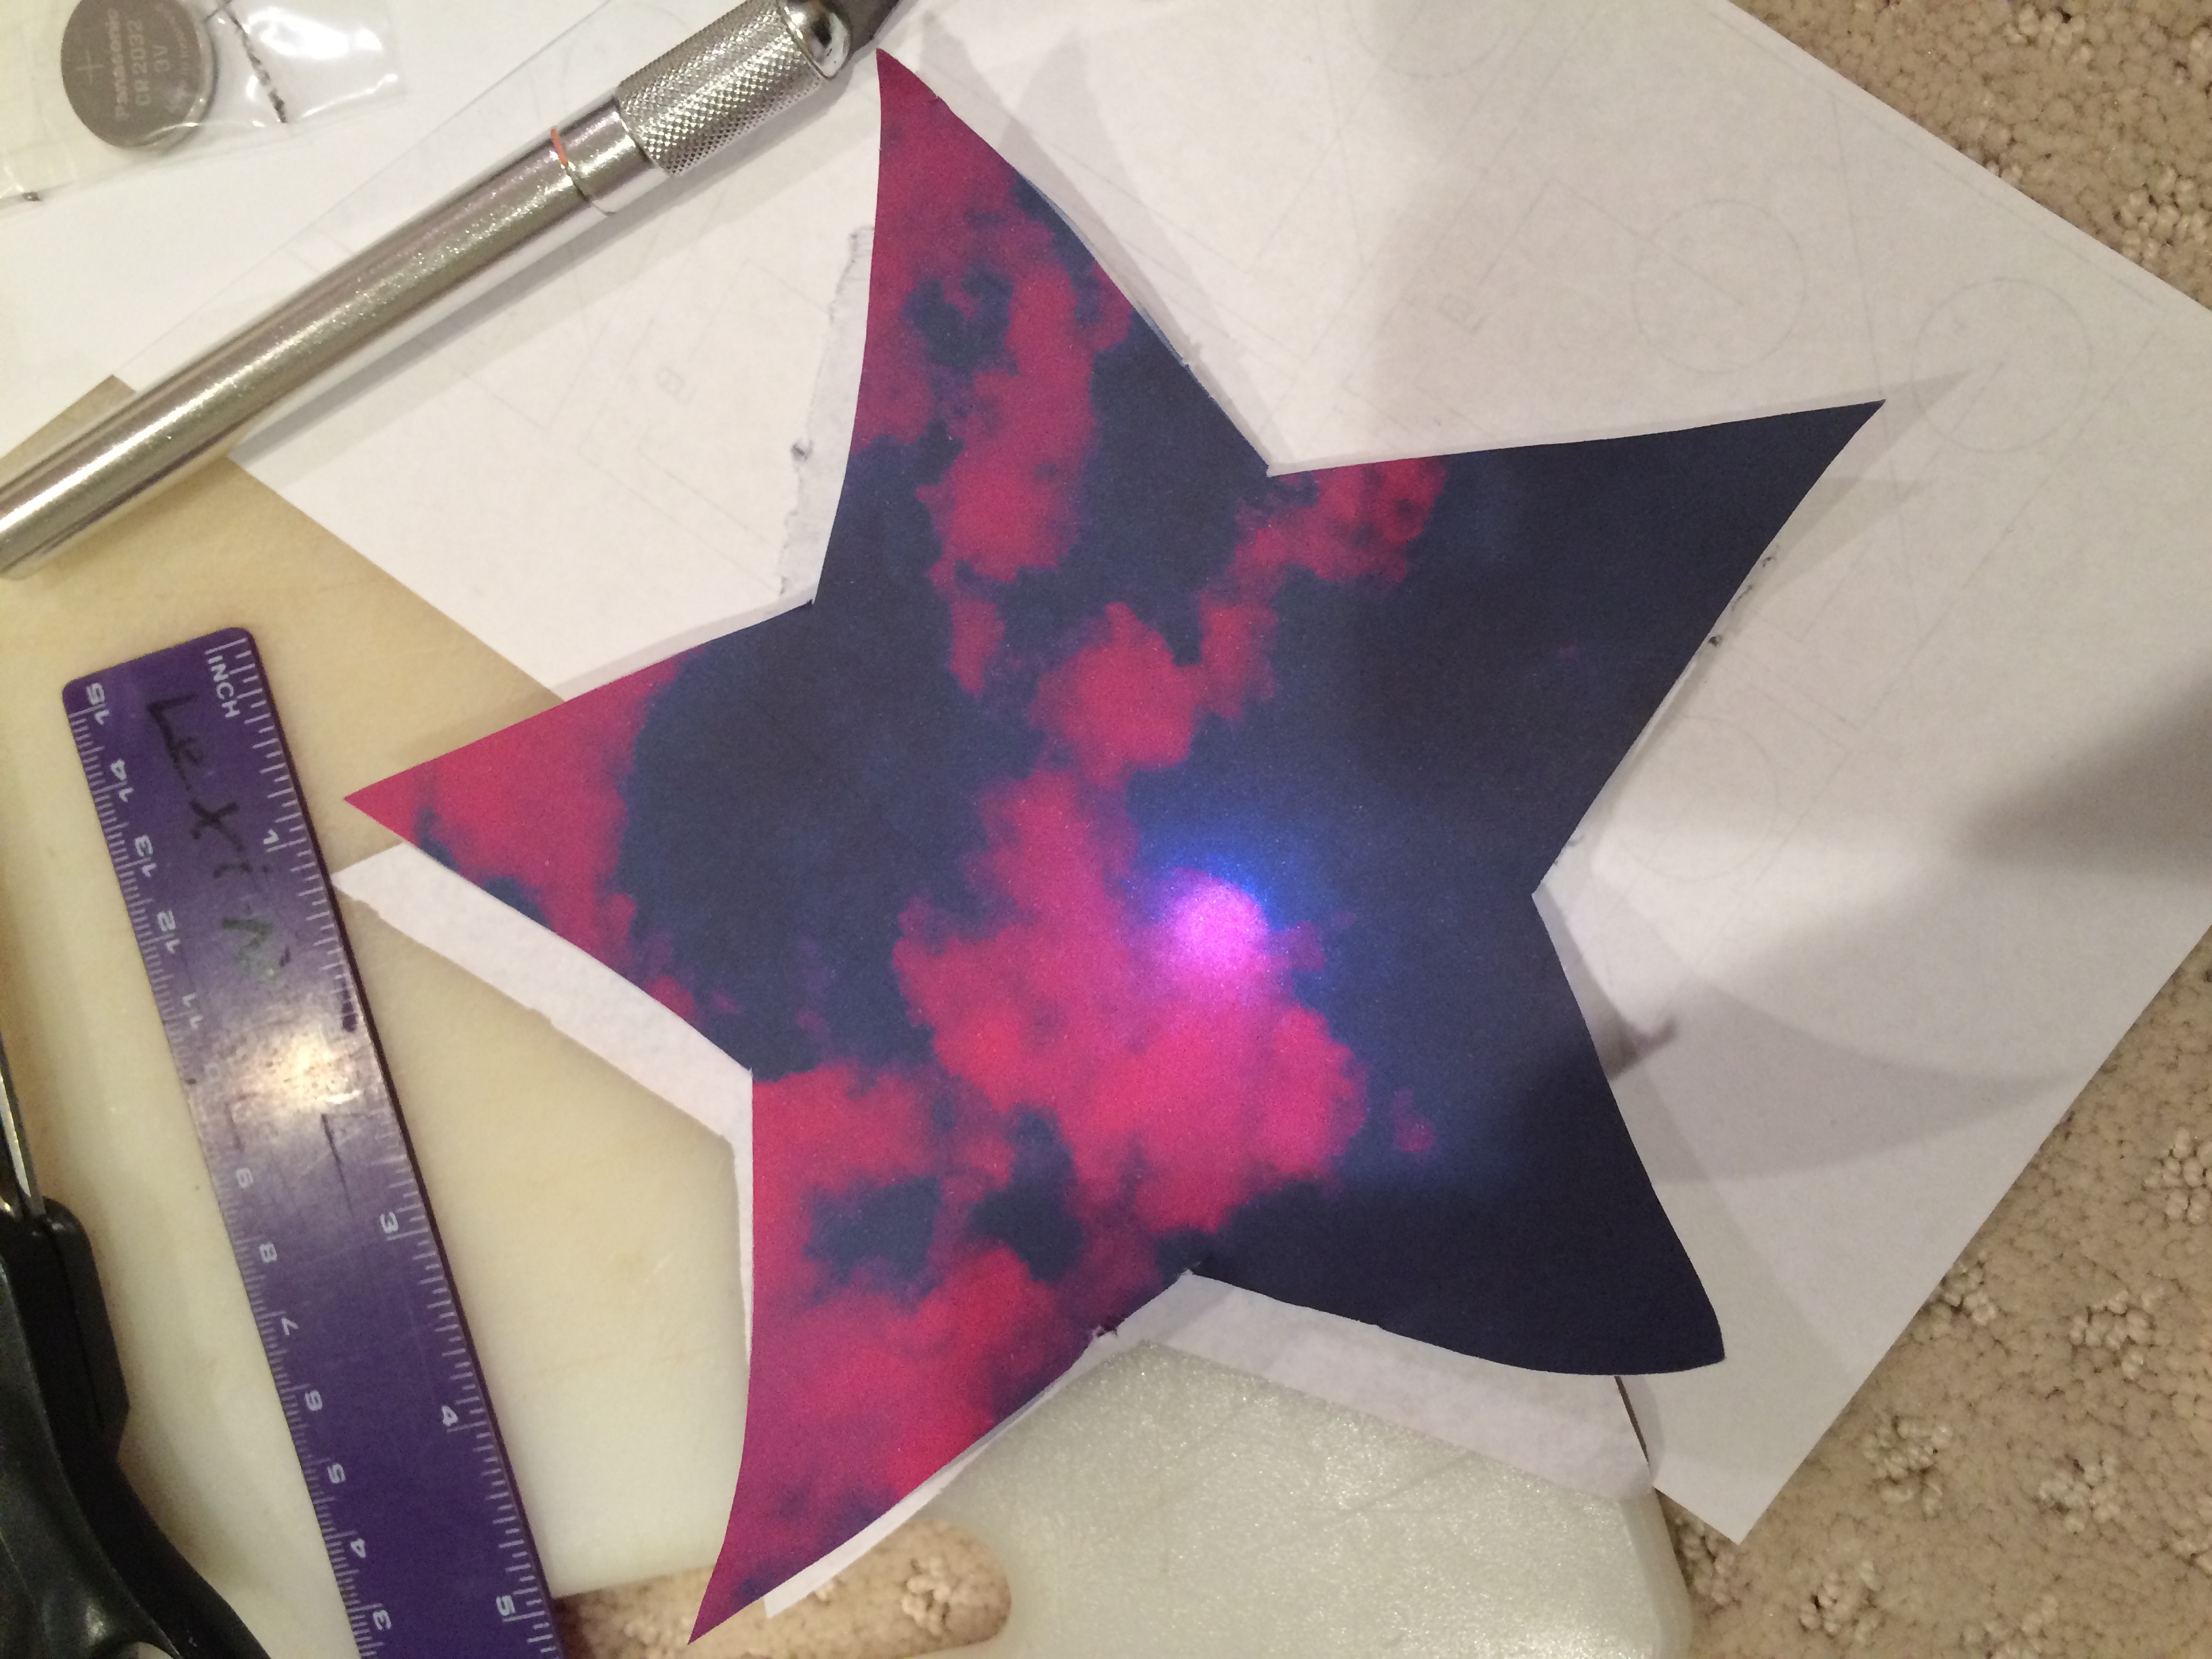
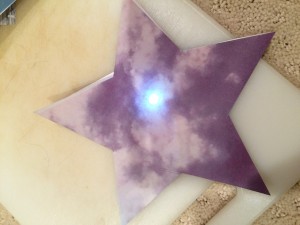
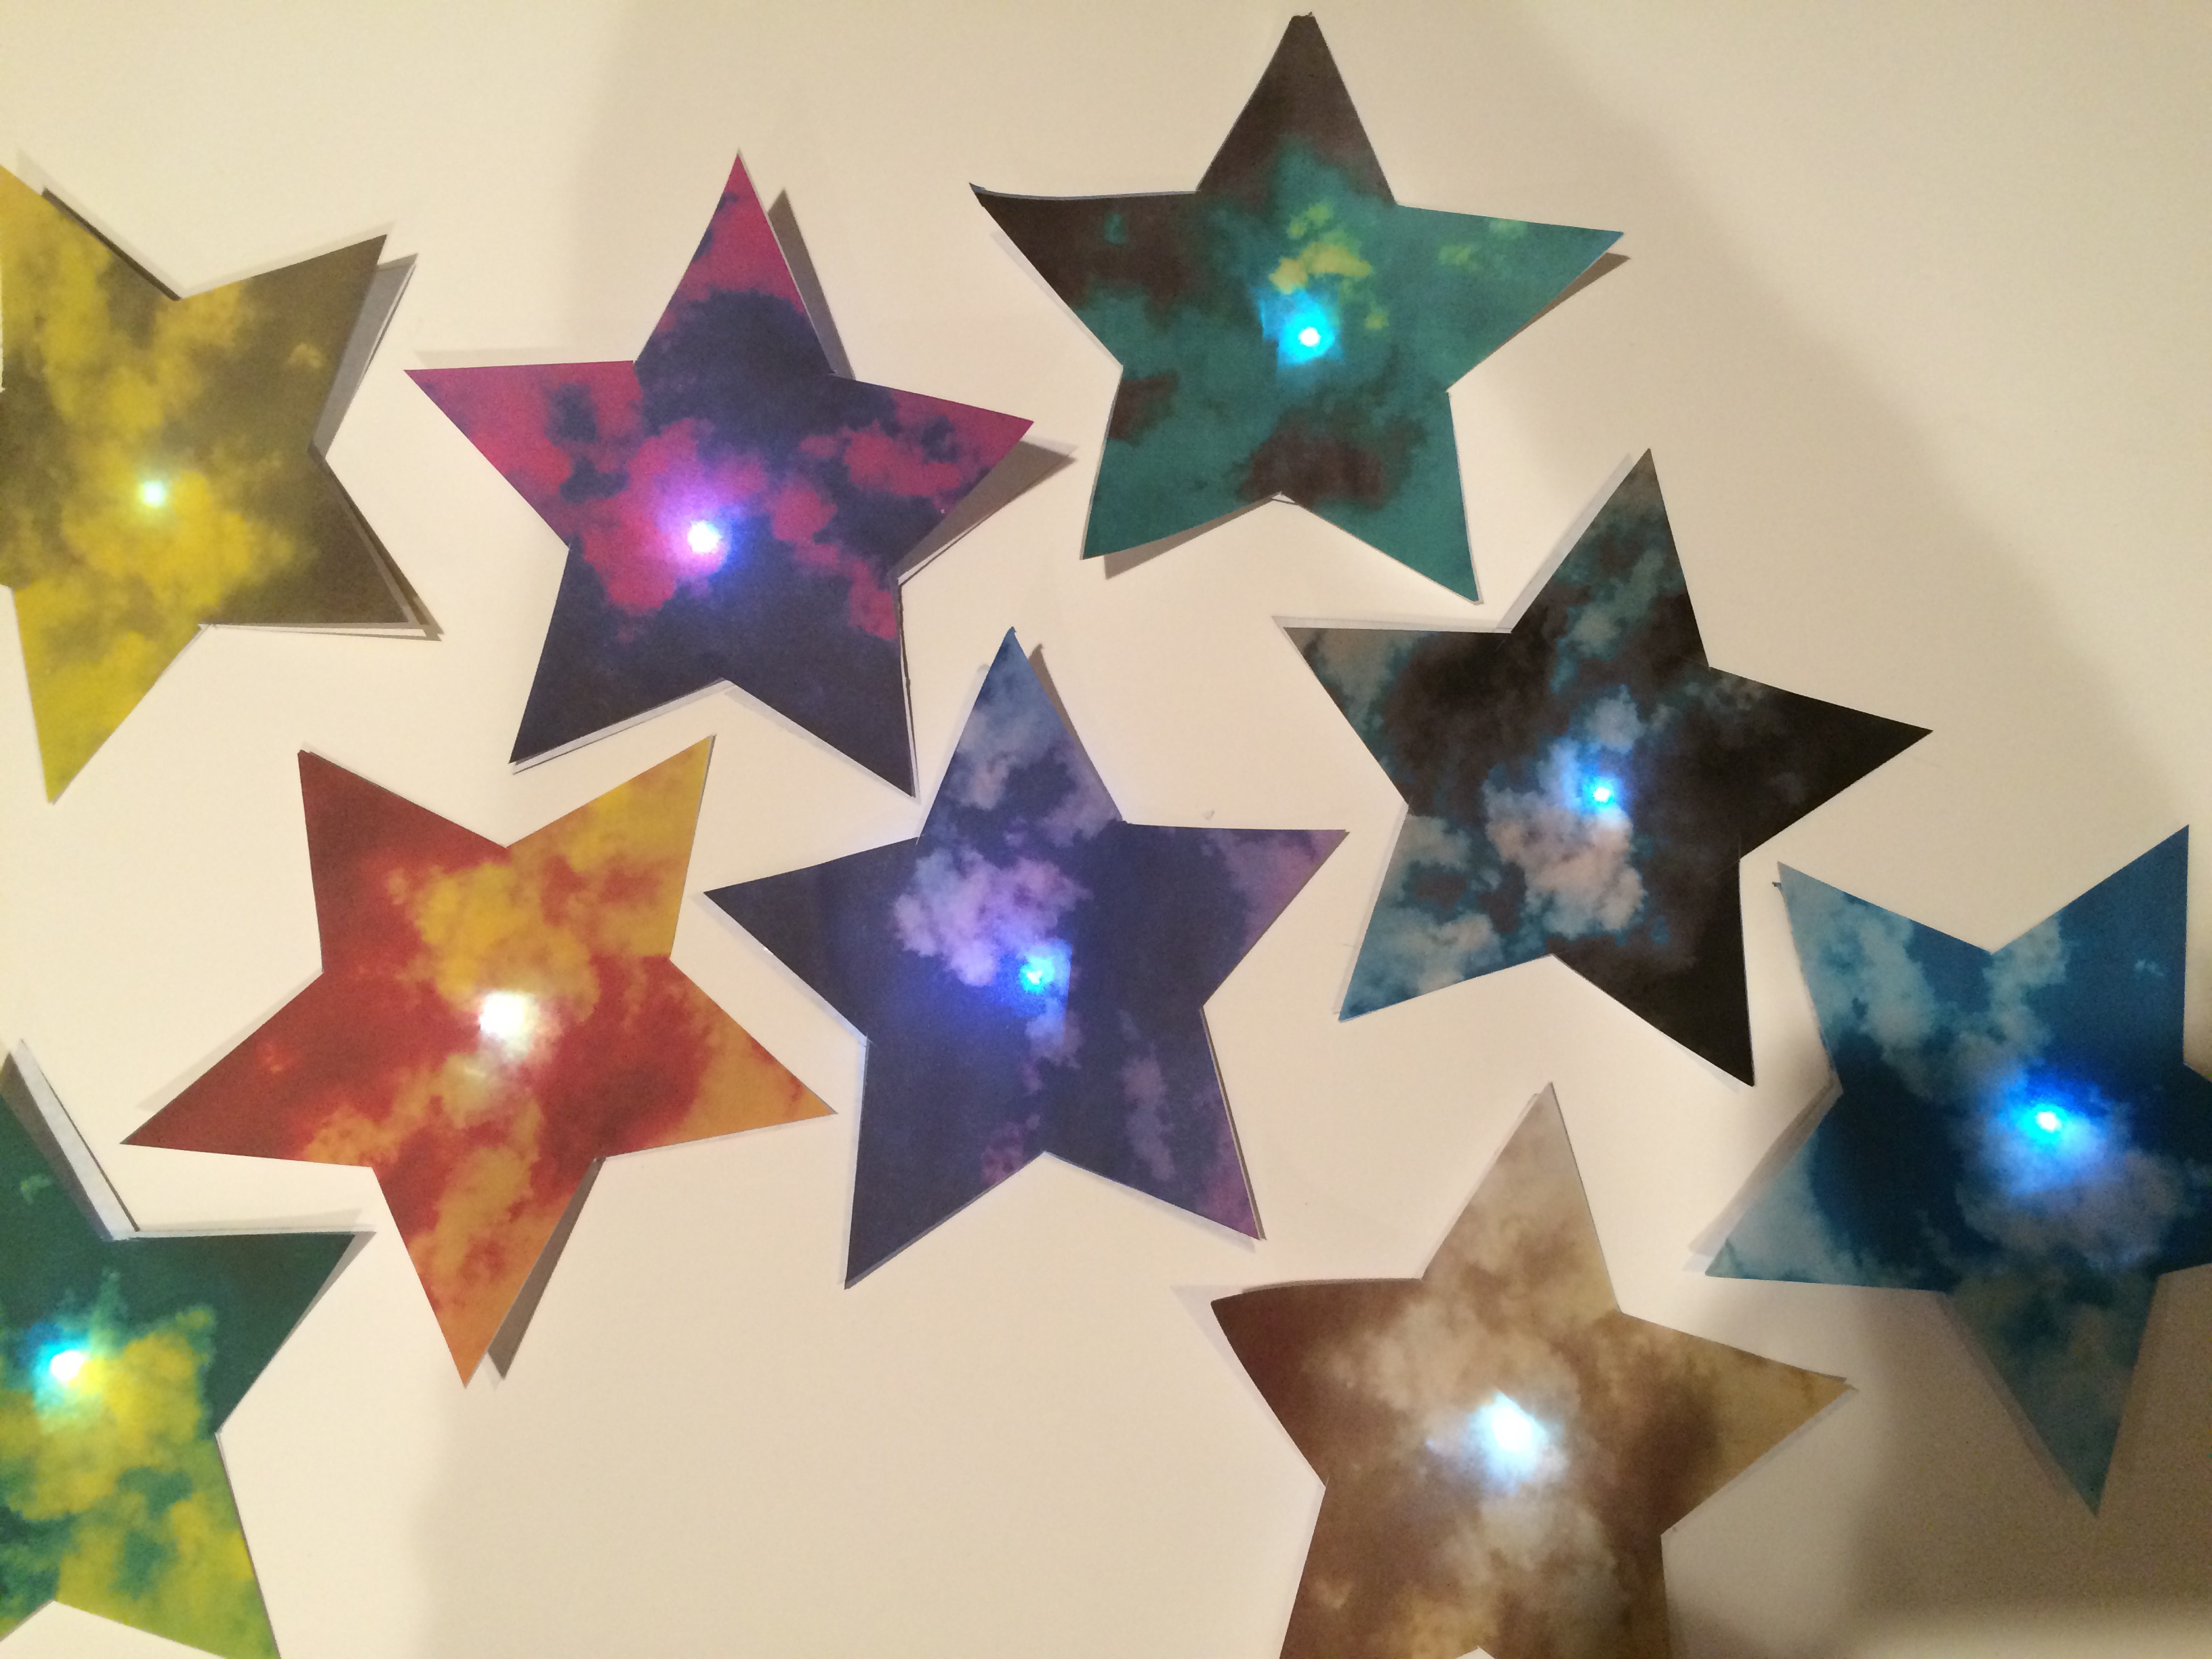
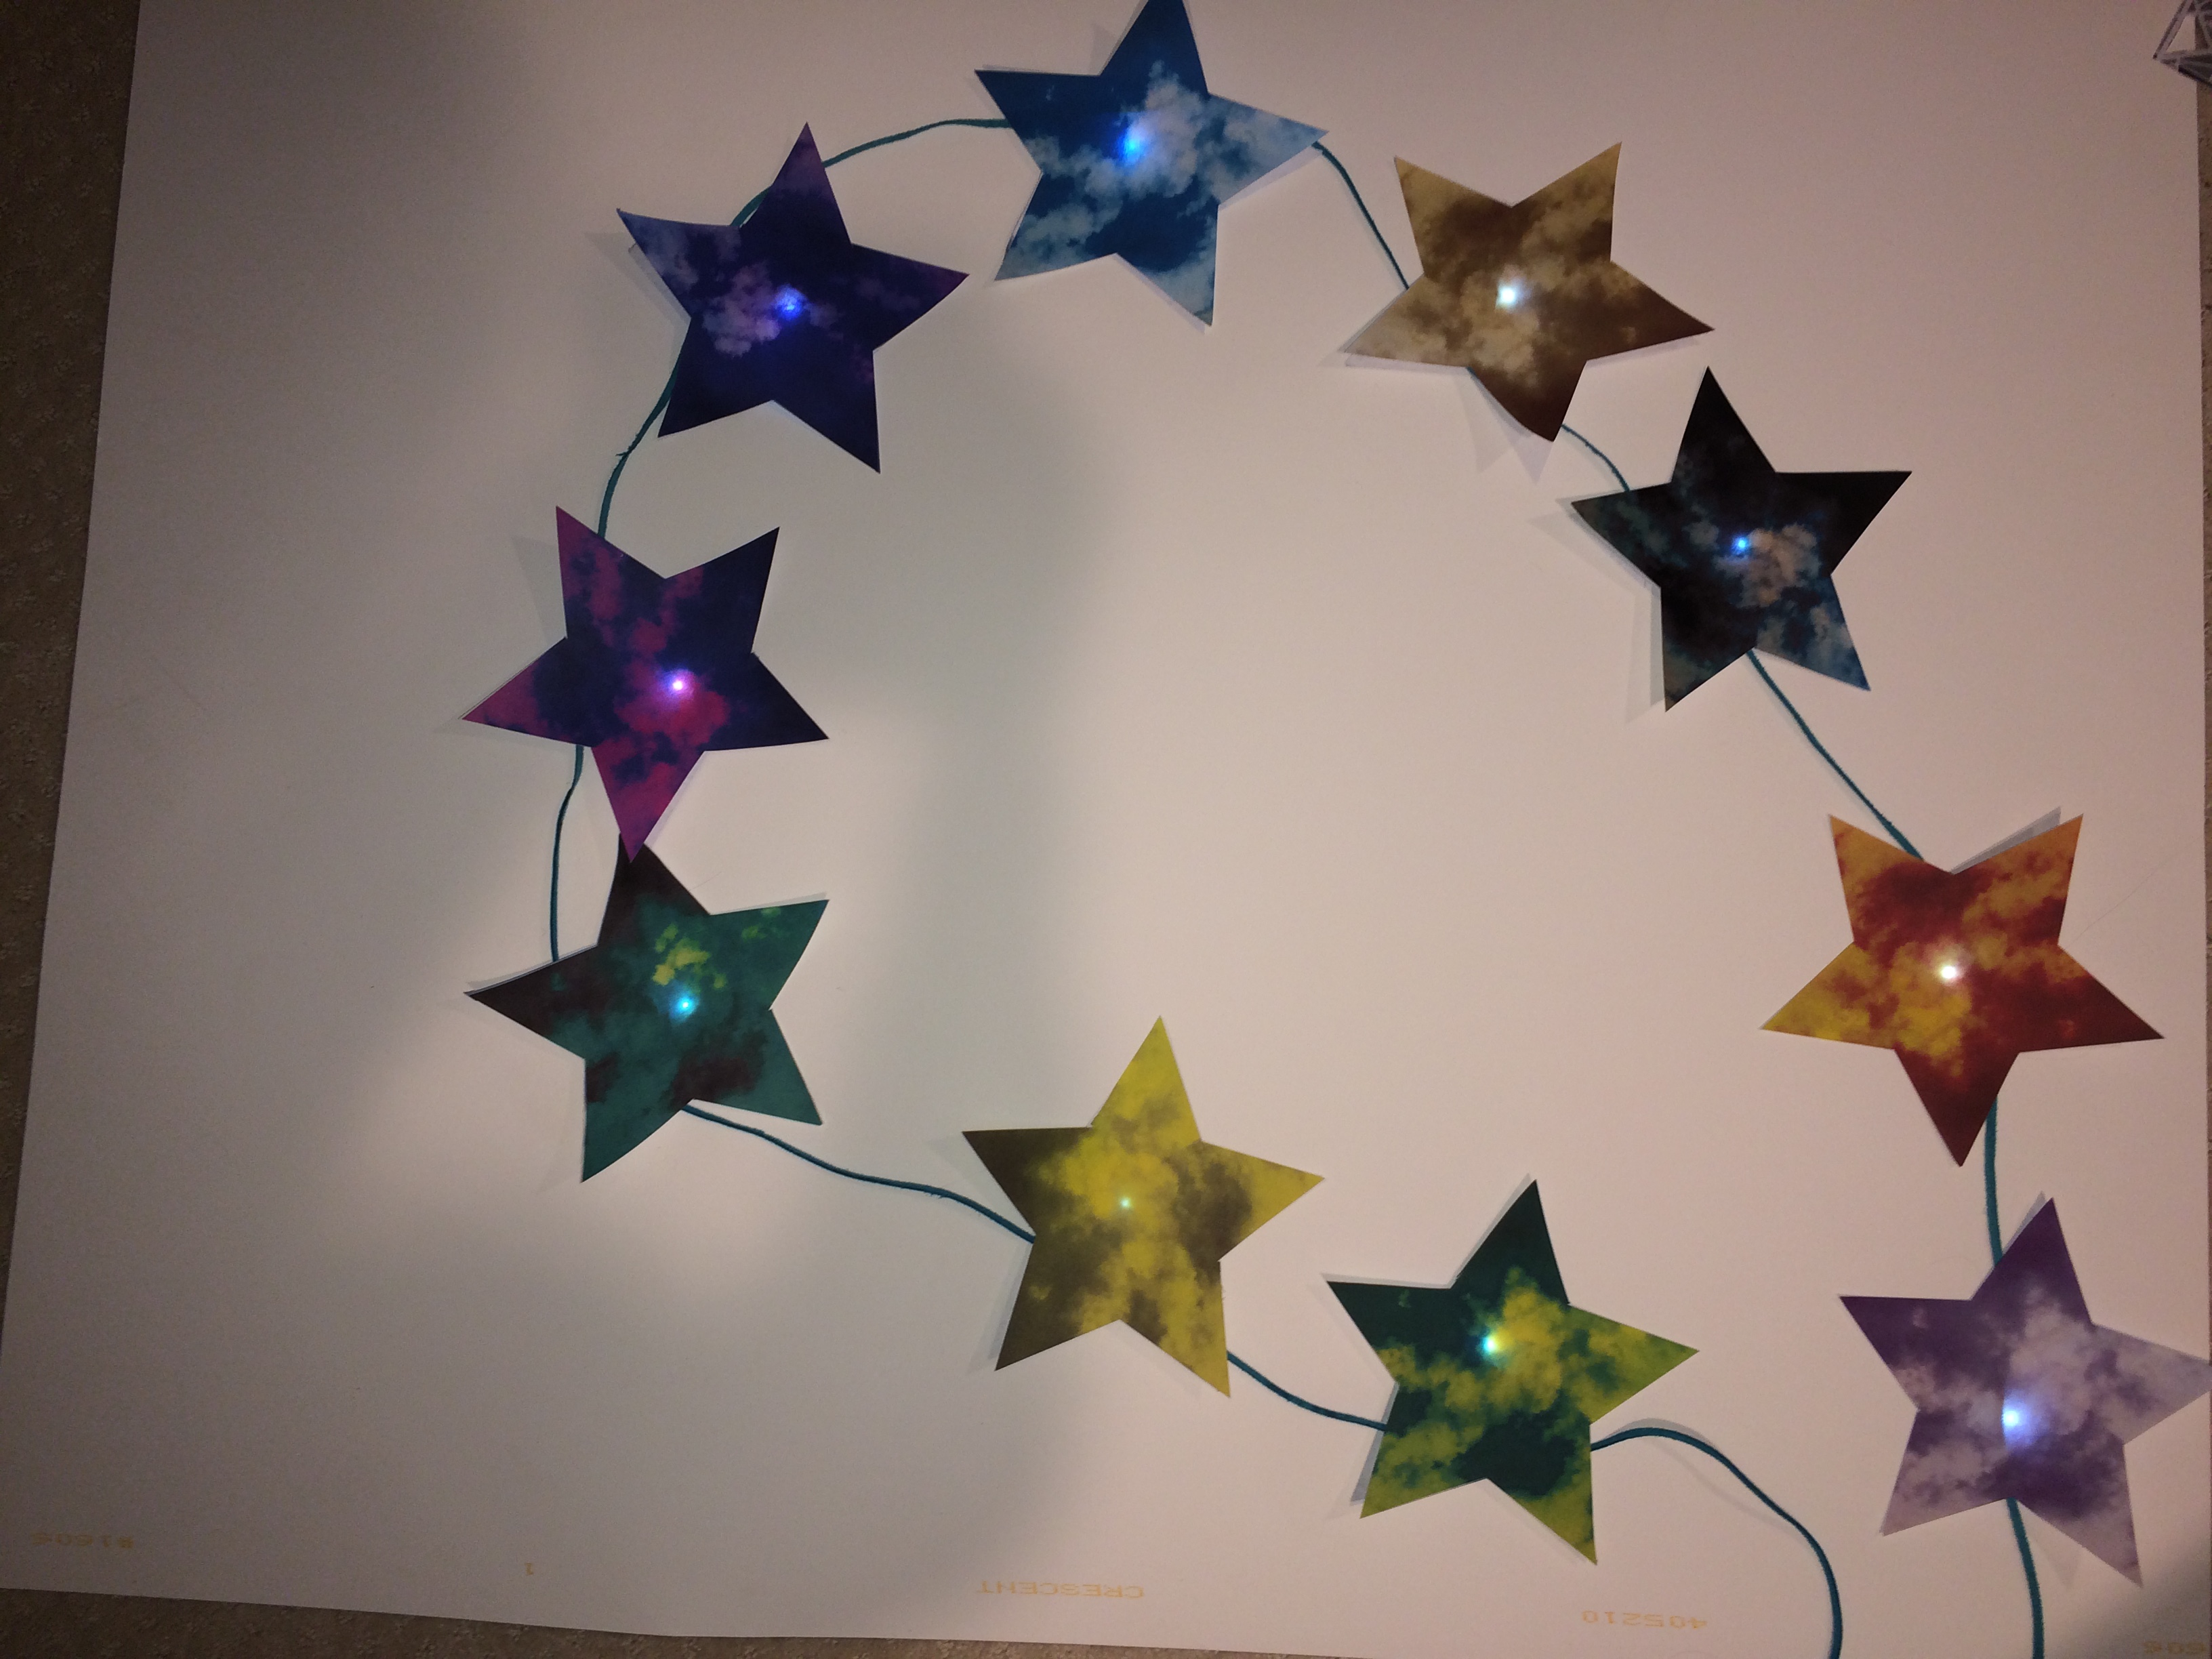
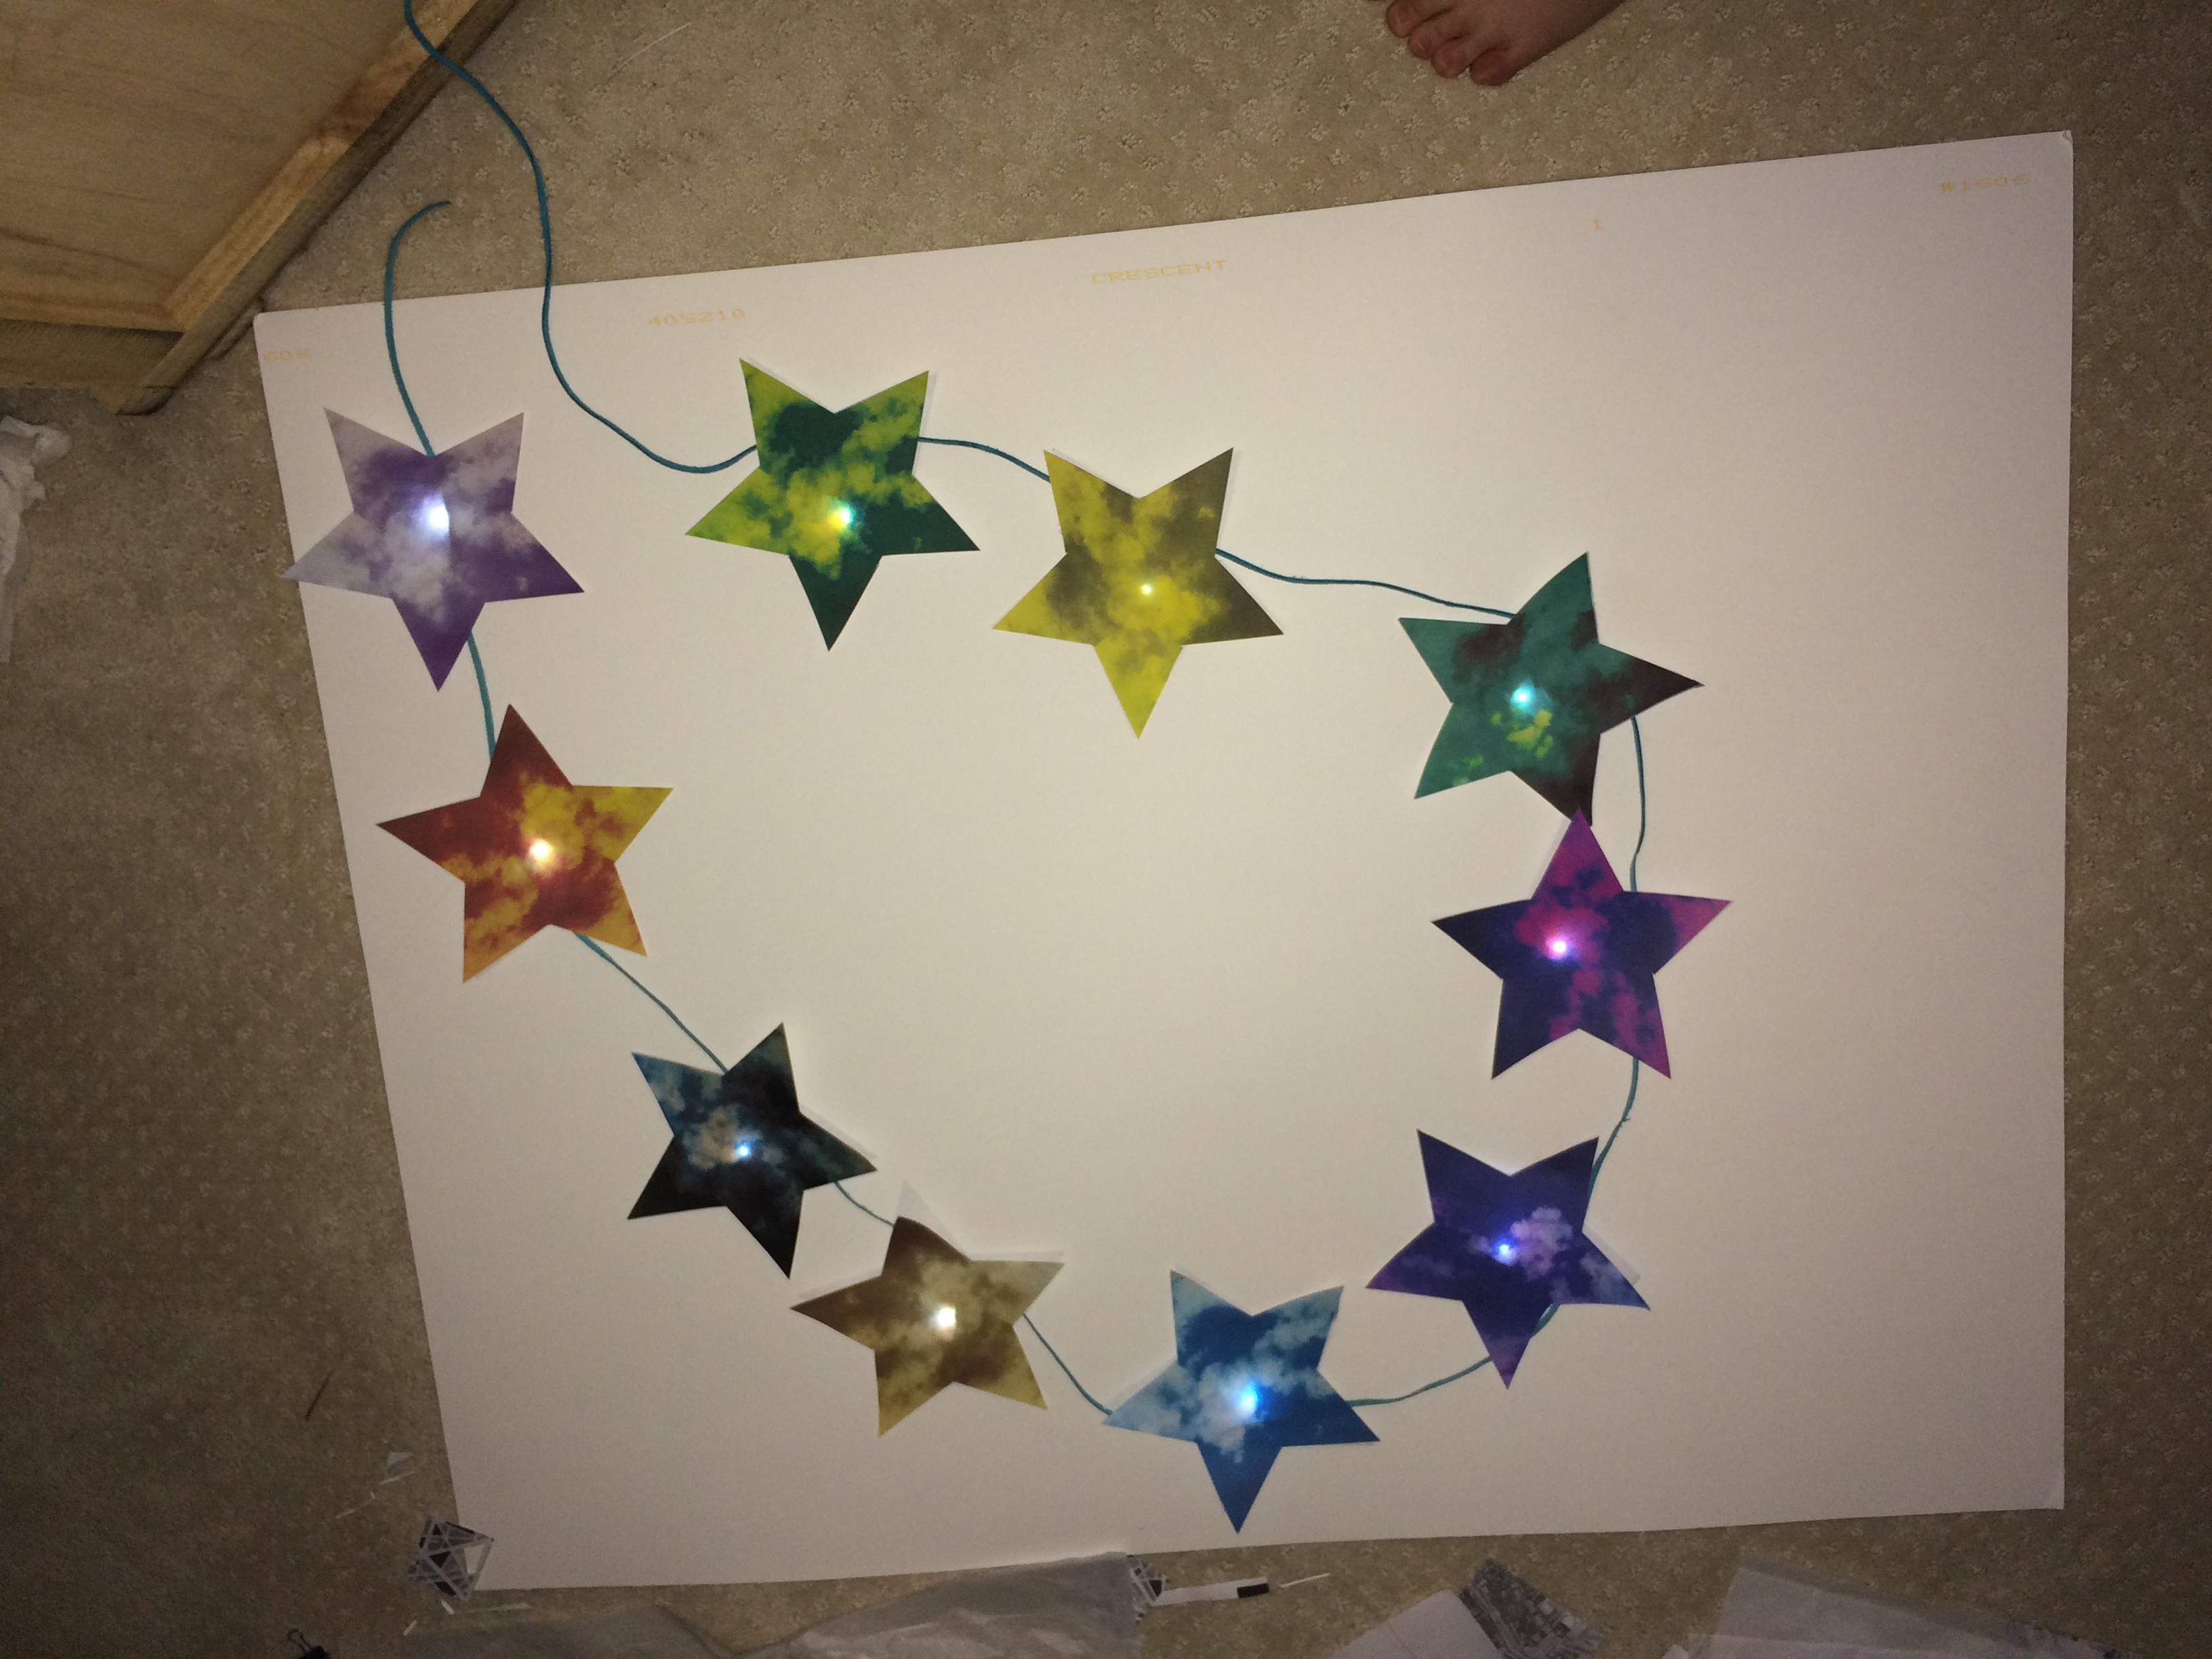
Next, after I tested and decided on an appropriate circuit for my stars, I printed out my multicolored stars and taped the circuit to them, using double-sided tape. I designed the stars myself, using my own photograph of clouds and remixing it with different colors, so each star is a different shade.
Here are the 10 stars I created in Illustrator :


I thought that printing on card stock, or thicker paper, would be a great idea because then the stars would be very durable, but once I experimented with the thicker paper on top of the LED, I learned that the LED was not visible because the paper was so thick. So, I used plain printer paper, which is super thin, but allowed the light to shine through.

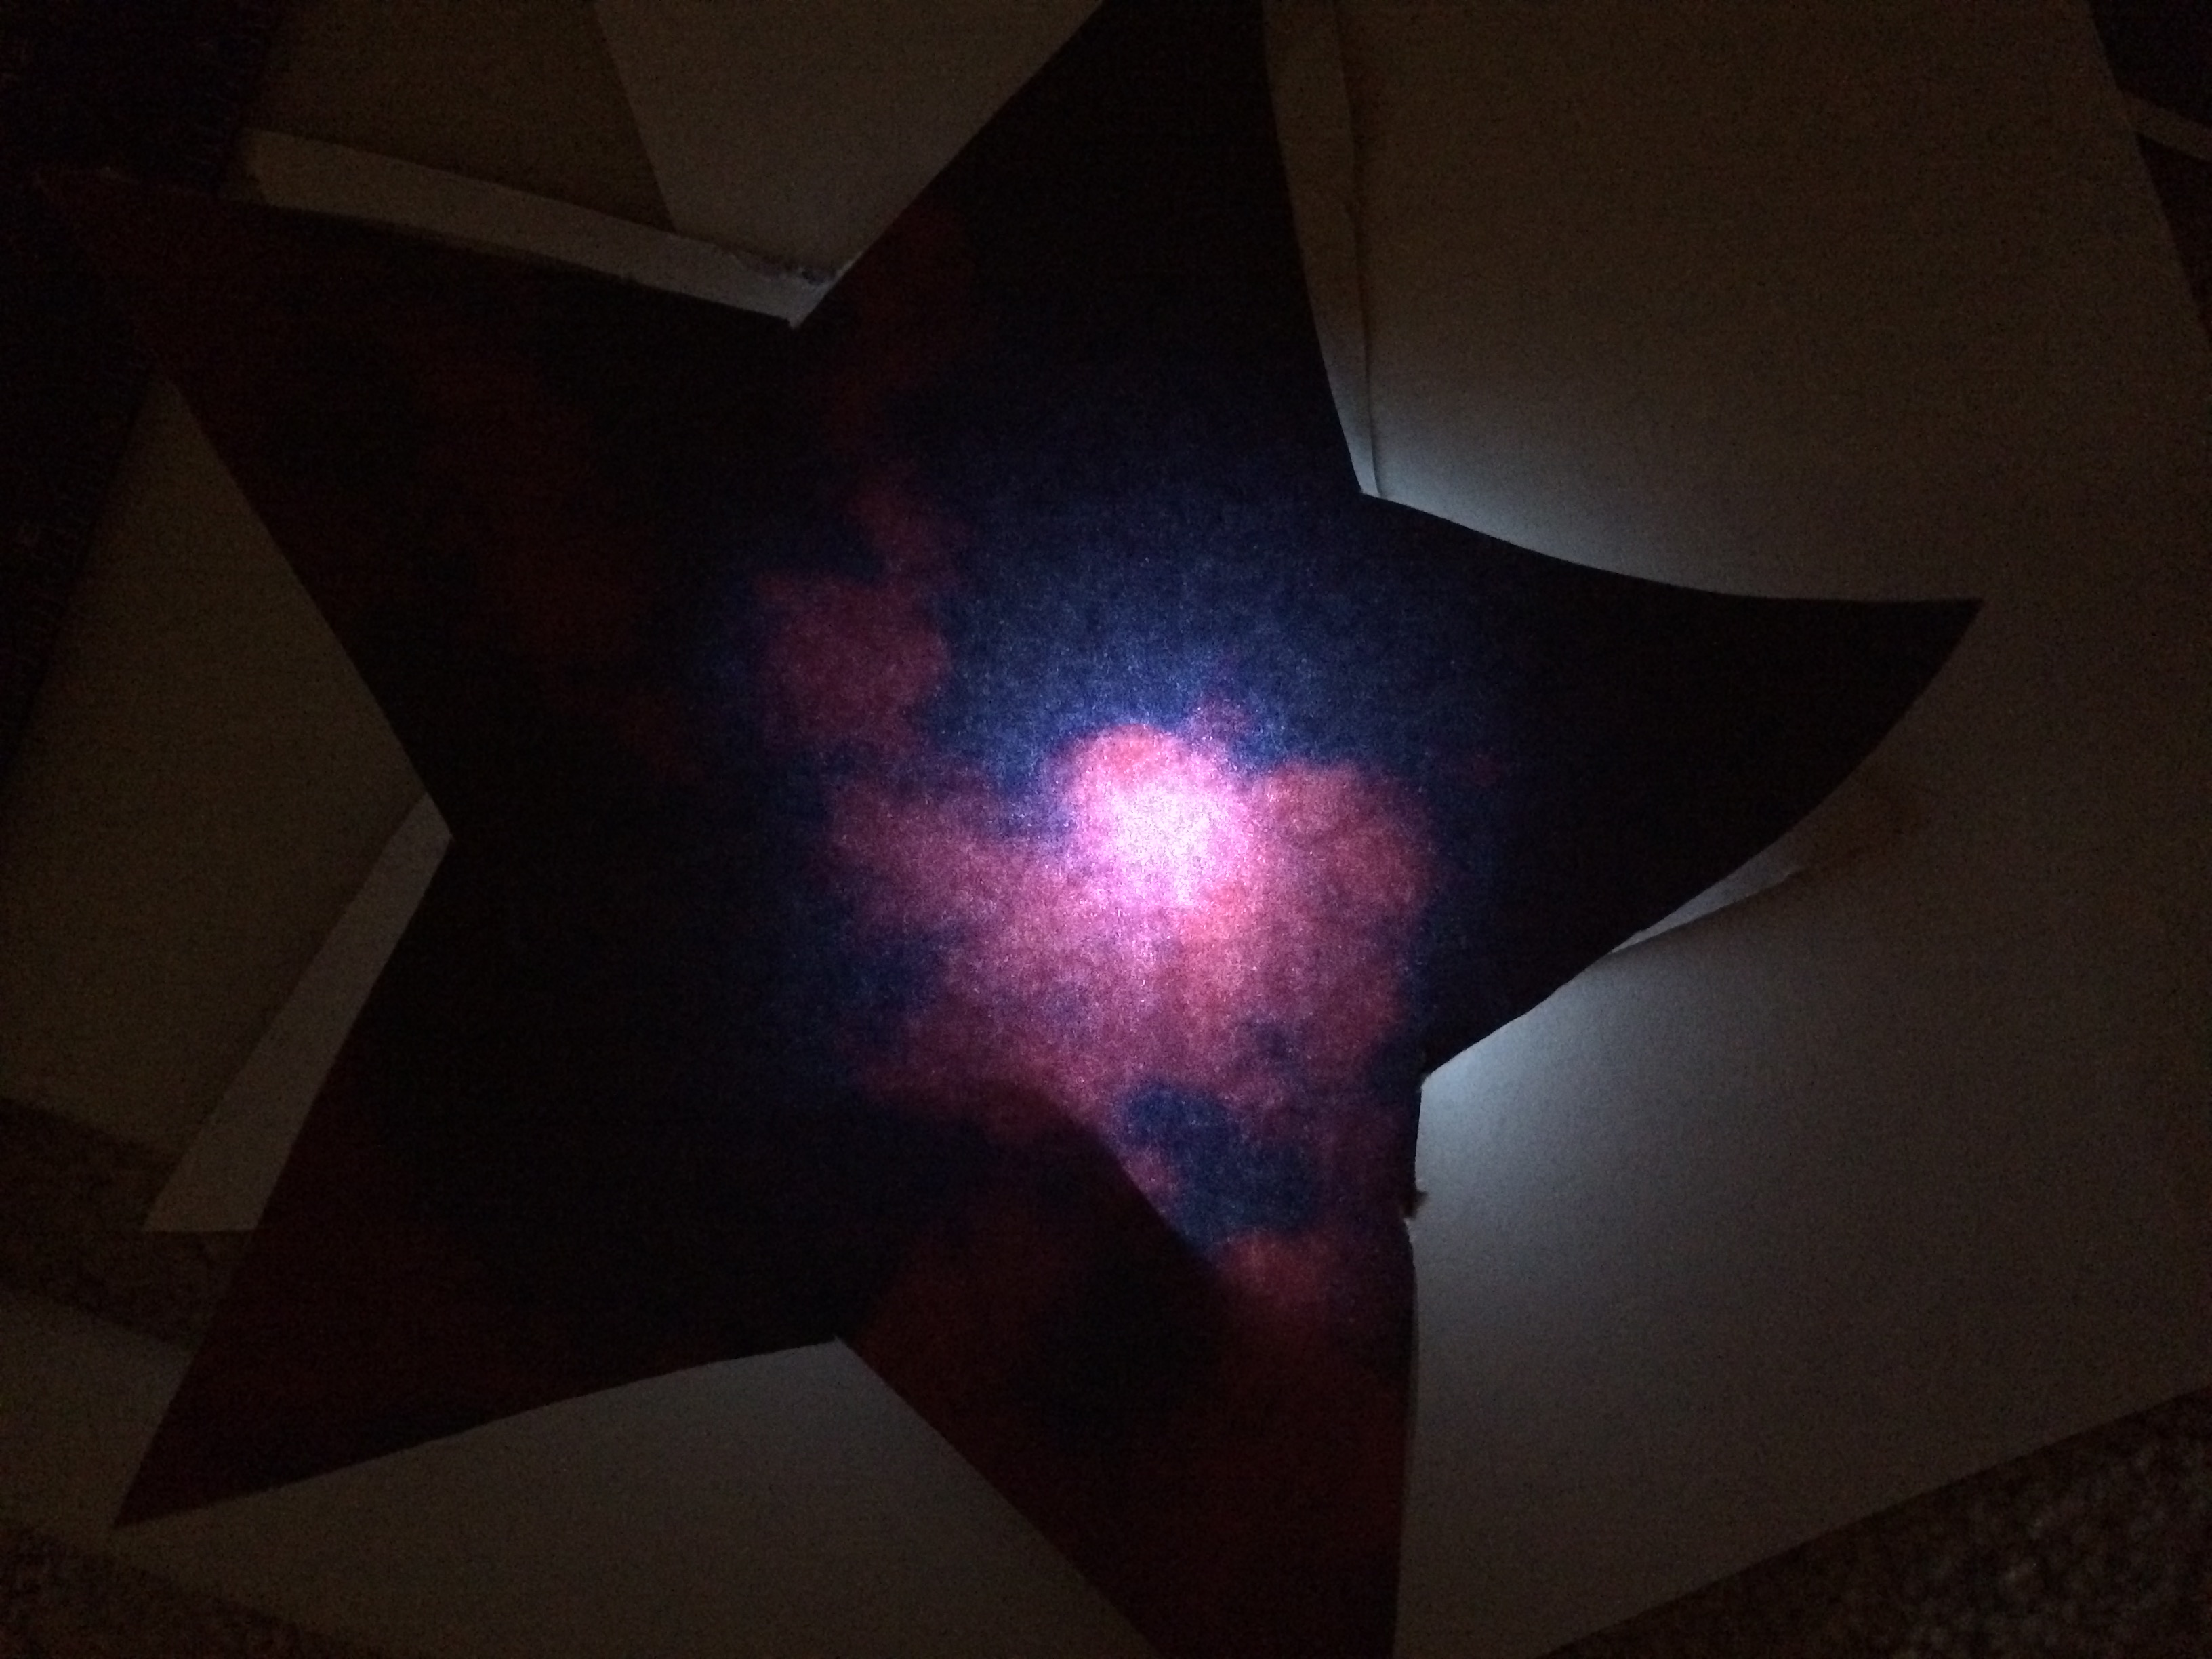
After I taped all the paper circuits to the stars, this is what they looked like:


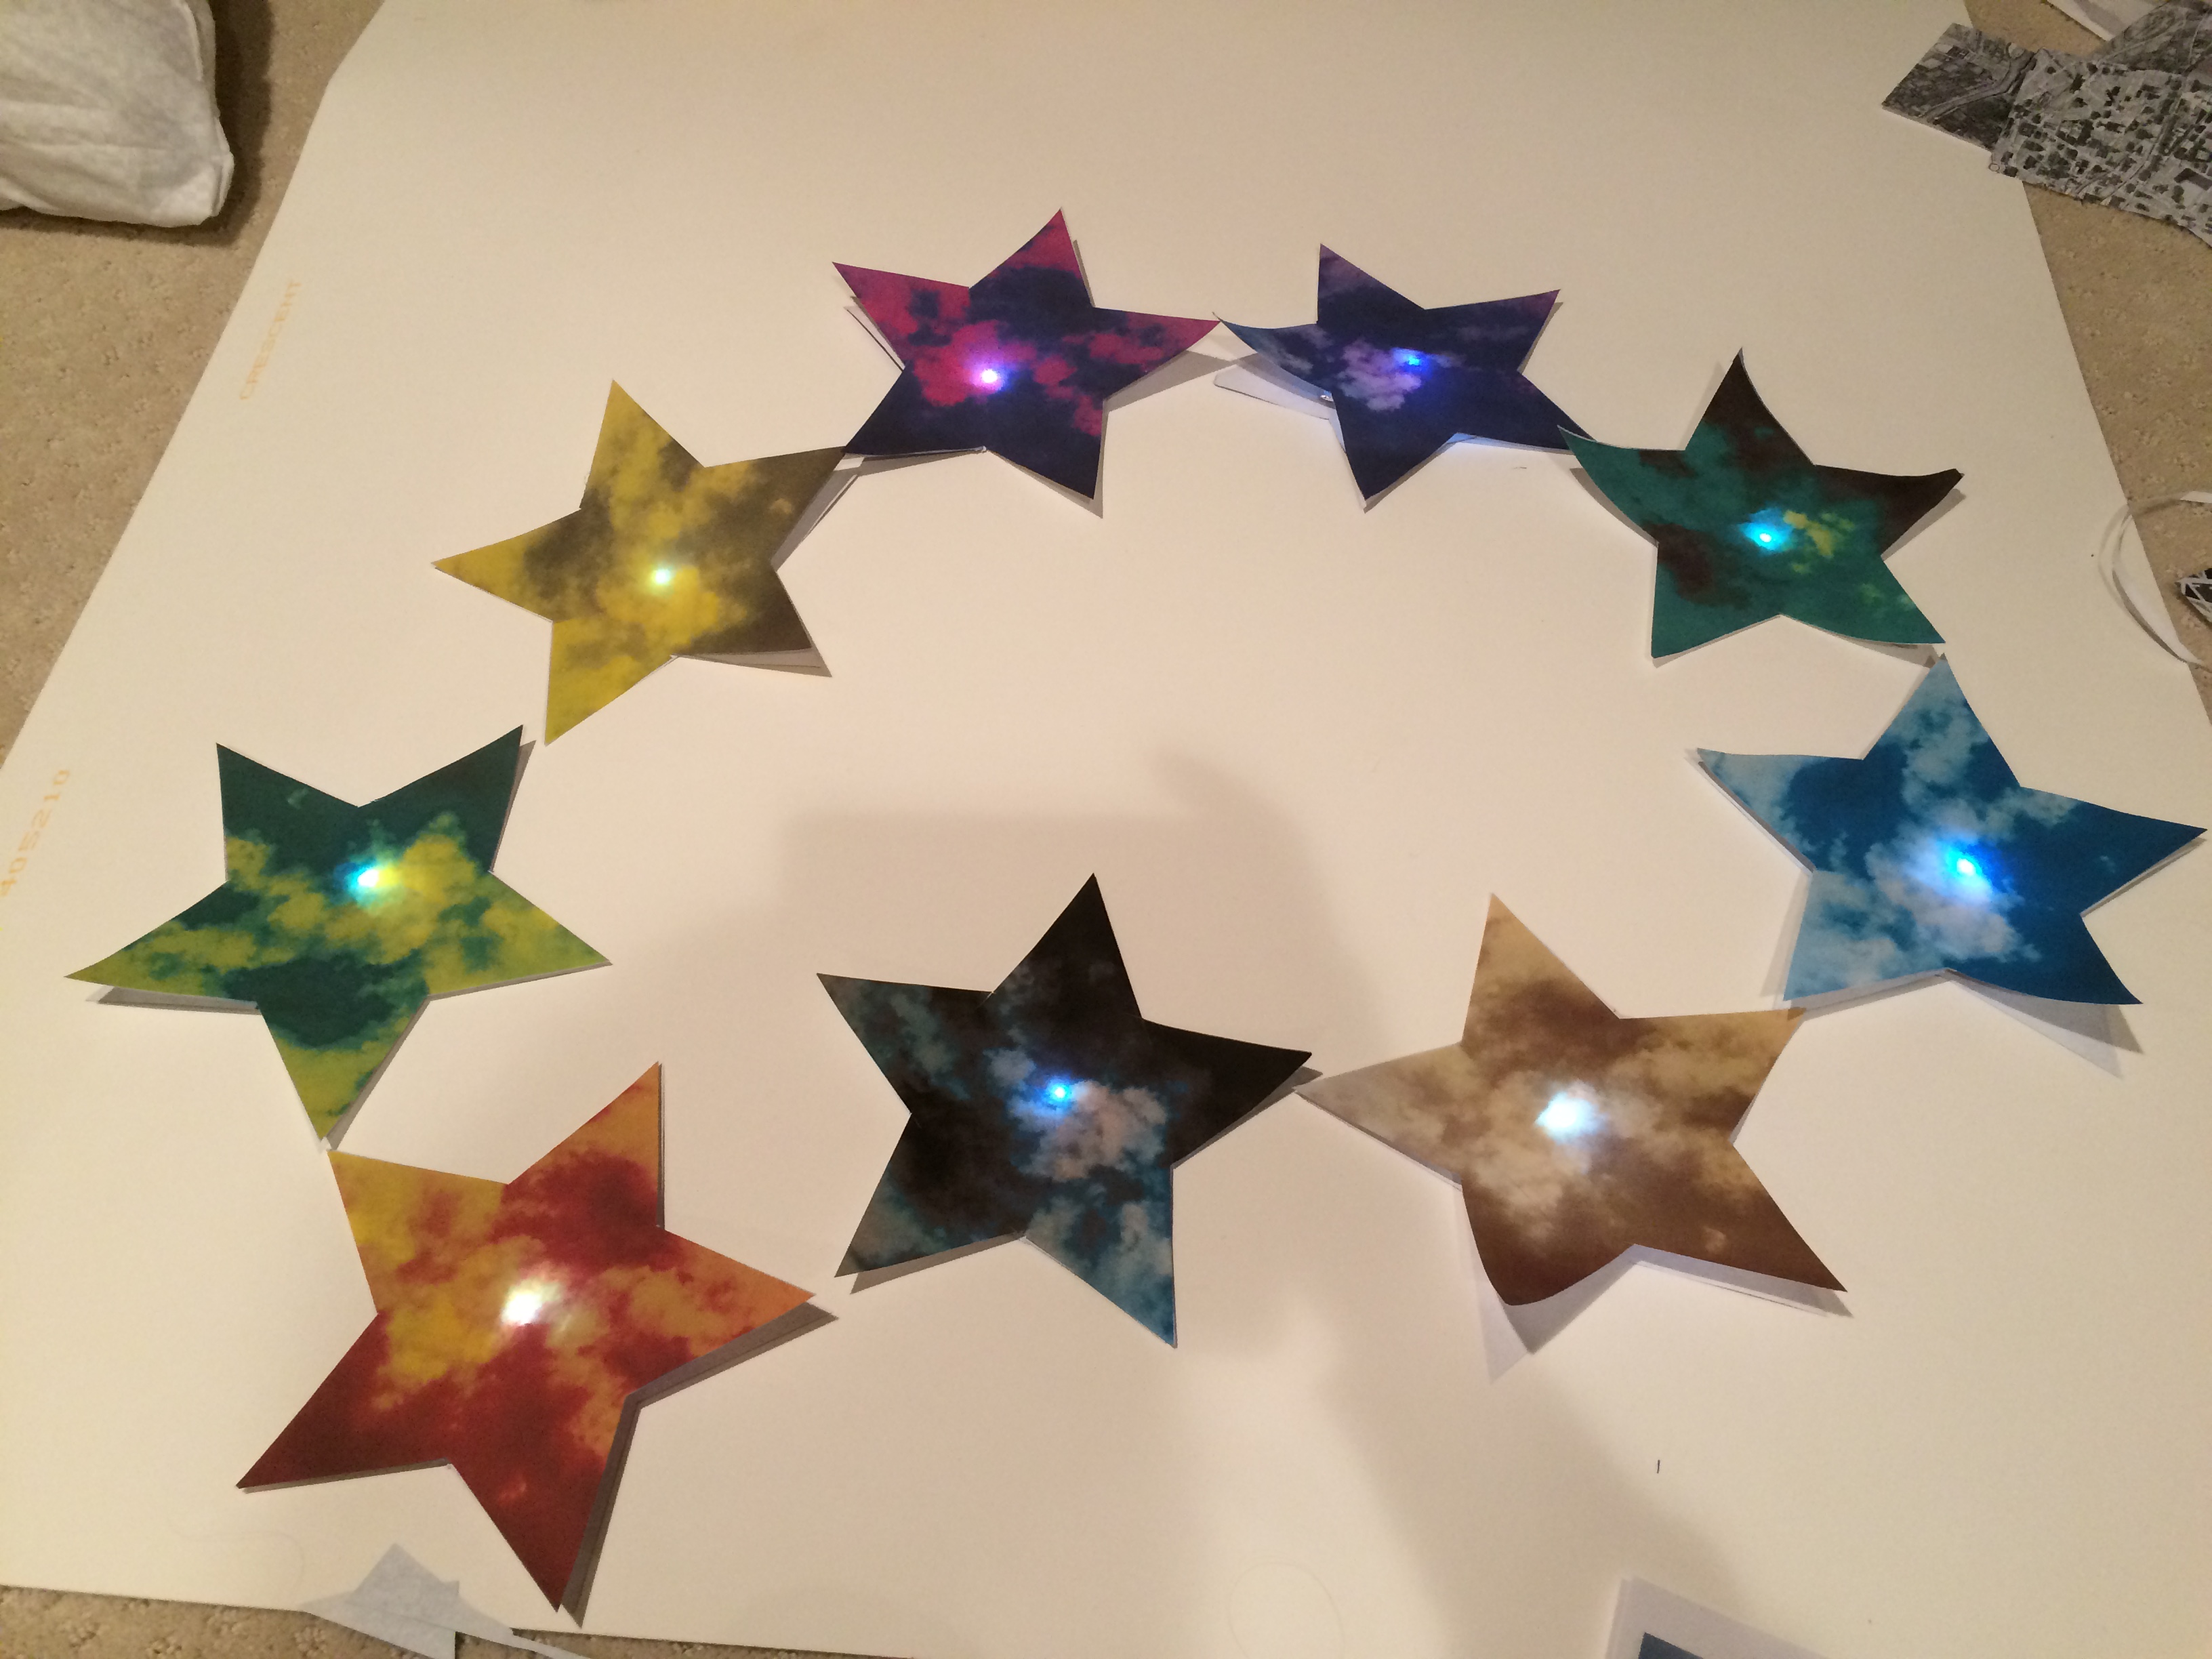
After looking at my stars all lit up and successfully working, I started creating the garland. I tried a blue suede thread just for a test:

But, ultimately, the best choice in hanging material was clear fishing line, so the stars appeared to be floating:
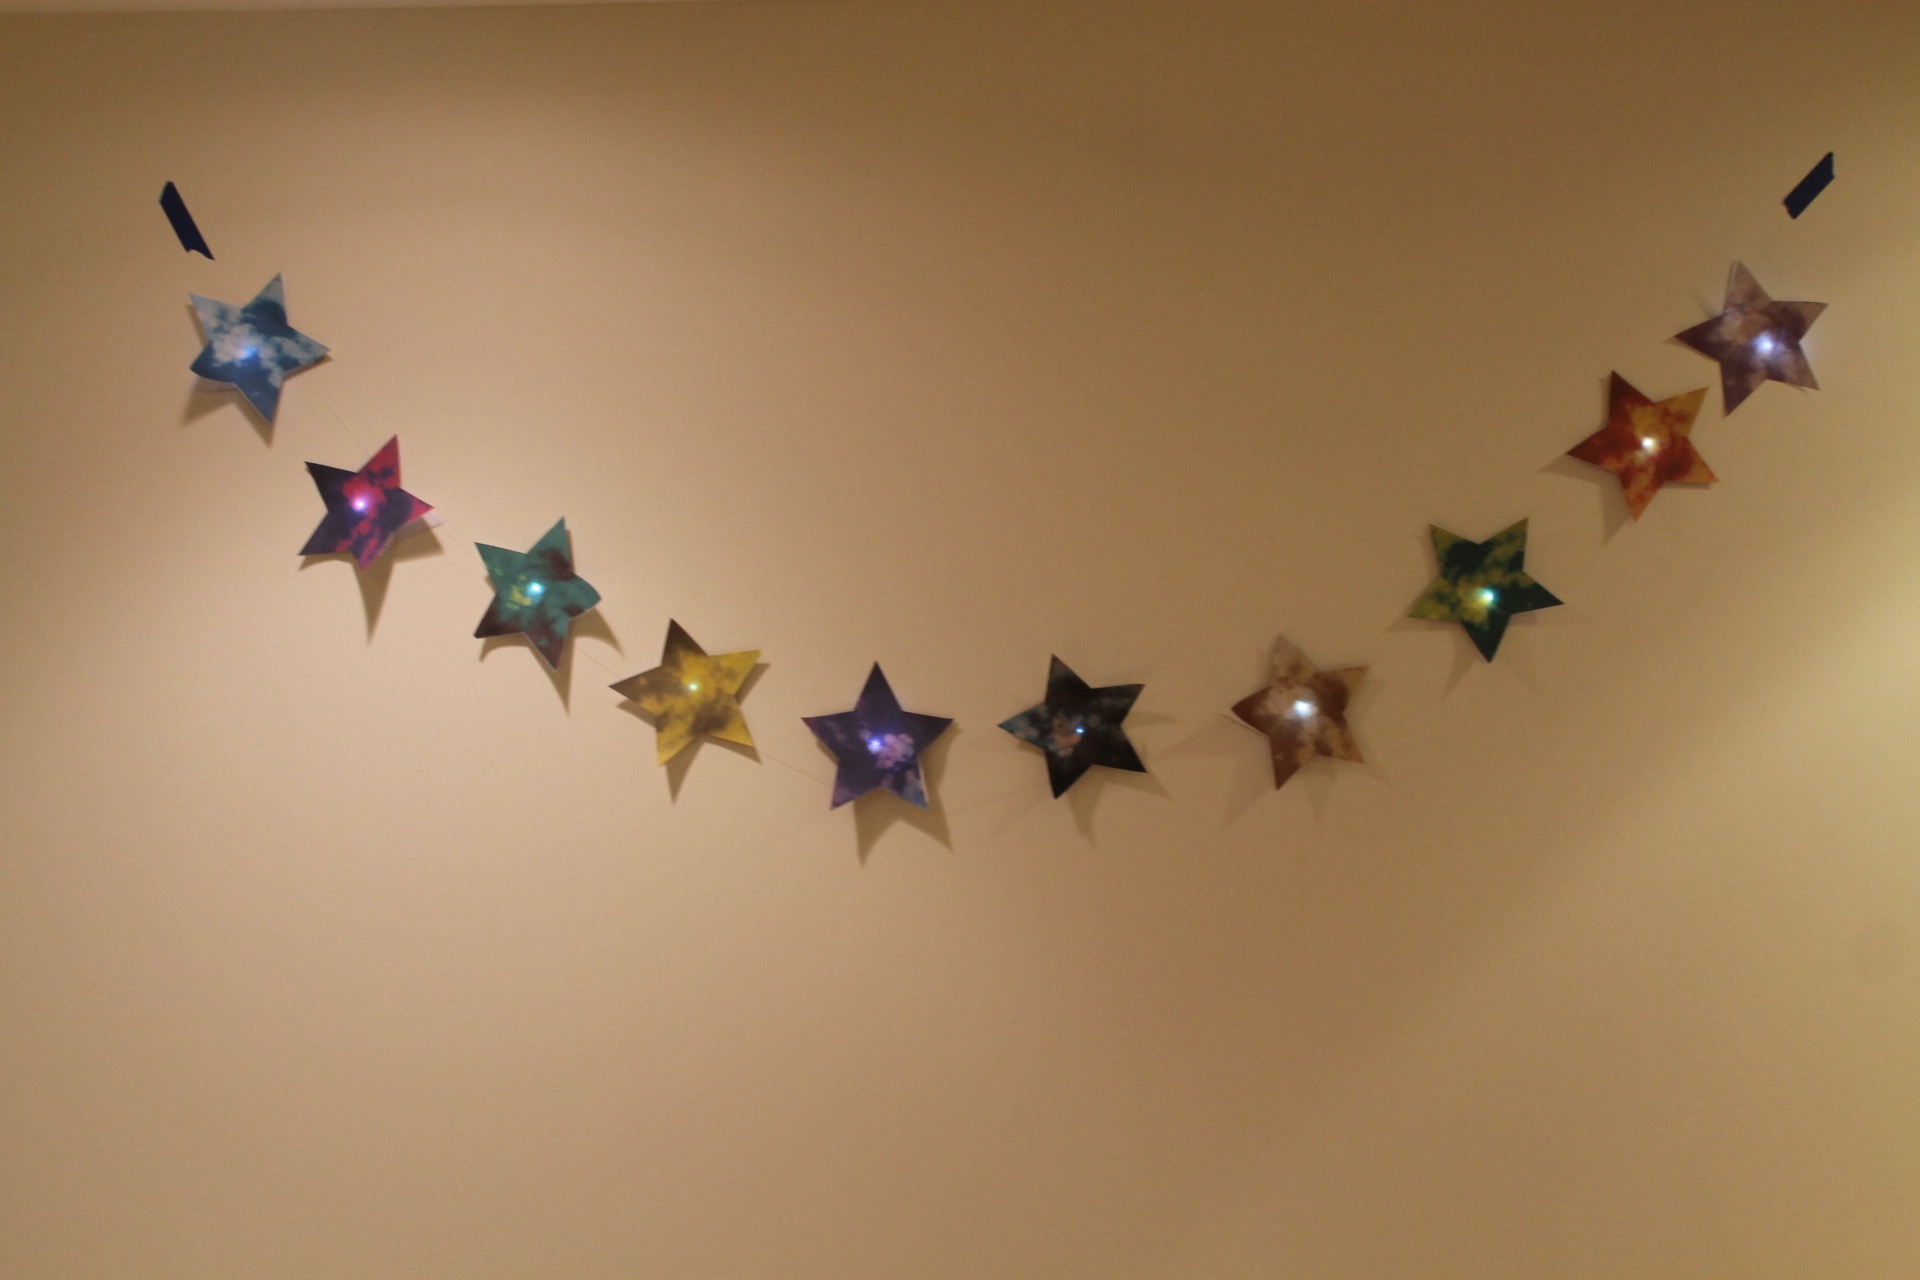
I had to tape the garland on the wall using painter’s tape, which is blue, because I did not have any other method that wouldn’t take the paint off the walls of my house.
After I took final photos of the garland, I discovered that when I took pictures of it in the dark, they blurred and created a real beautiful light painting effect. So, if anyone decides to make this in the future, it is not just a pretty light fixture to make, but the LEDs also allow for very successful light painting via long exposure photography. You just have to take photographs with a long exposure, and the results are pretty awesome and unexpected because the LEDs actually leave bright, multicolored trails.
One example of the light painting (and more in video down below):

Overall, the development of this project took a long time, and I really was struggling to figure out a really successful project, but I feel like I accomplished something really well-made. I am proud of it and hoping maybe someone will make it themselves!
Click here to view my Instructable.
And here’s a link to a video documenting my project and the light painting images I created:
I couldn’t do this project without the inspiration of Ji Qie, the help of Martin Debie, and the most helpful websites: digikey.com, chibitronics.com, http://miavril.bigcartel.com/products, and http://technolojie.com/circuit-stickers.