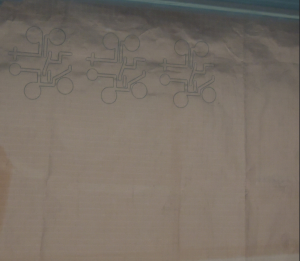
So, this week we made garments with the textilo little board that we created ourselves. In order to create the textilo, we first laser cut a 5cm circular disc of neoprene. We first used the heat press to fuse together the glue paper with the conductive fabric, and then laser cut the textilo pattern out of the conductive fabric.
We then took off the pieces of conductive fabric that were not needed, and were left with the textilo pattern. It stuck onto the neoprene because we had previously fused the glue paper onto the back of the fabric. I also needed to re-iron the fabric onto the neoprene to make sure it stuck….
After securing the textilo fabric onto the neoprene, I soldered. OR at least attempted! Honestly, I struggle with soldering. I actually have experience with it from an engineering camp in middle school, but I had a hard time then, and I guess I still do.

My attempt at soldering all the components.
Anyway, I tried my best with this, and it turned out that some of the connections were broken on the board, or just not soldered as fully as they could have. I first tried to connect the broken connections with connective thread, but that still didn’t work! 

You can see where I tried to connect the two with the connective thread above. But it did not work after I kept testing it (second picture)


More testing
So, Martin (thanks so much Martin!) helped me to solder the connections correctly. I also cut the wires on each component so they would be shorter, so they did not interfere with other connections. Even after this, however, my sensor did not work when we tested it. We tested it with the multimeter, with an official sensor, and we still got nothing. Eventually, we figured out that one of the alligator clips were broken! That just shows that sometimes things will go wrong, and you just have to keep investigating to figure out what the problem really is.

Using a sensor to test and see what was actually wrong

After Martin helped solder and correctly sewing the connective thread
So, after getting help and soldering my board, I figured out how I was going to position everything on my garment. I created a pocket to store the battery (which is huge, but I wanted to make sure I would have enough room). I originally wanted it to work so that when you press the pocket that would be on your stomach, it would make the speaker sound-like your stomach was rumbling. However, I had more issues than I thought, so I just had to make it simple, and the textilo and battery fit inside the pocket, but the sensor is on the outside of the pocket.

So, after sewing the pocket and finally figuring out what the problem was with my board and got the speaker to work, I soldered the speaker and battery wires to the board. I tried to sew them on, but I was extremely unsuccessful and just decided to try soldering. It seemed to all work, except when I tried to solder the positive red wire connected to the battery onto the textilo. The solder burnt the connection, and so I tried to solder it closer to the center of the board, but I think that is what created the short circuit.

My soldering of the battery and speaker…you can see the positive red wire is soldered in the wrong place (at least I think that is what caused my issue).

Close up view
However, I still kept pushing forward, and sewed my garment together to create a full project. I sewed my sensor on with connective thread, and the textilo board onto the shirt above the pocket. In the end, the short circuit made the 555 component heat up, so I had to unplug the battery. Though it may not work now, I do understand how it would work and I have a video of it when it all worked:
And here is the shirt after everything was sewed on:


I used connective thread to connect the sensor to the board, but there was a short circuit, so it did not correctly work in the end. It made sound, but not in the way I wanted it to. I did get it to work at one time, and I learned a lot so I will definitely work on my soldering skills in the future.


