My original idea for this hack was to create something that enhanced the experience of cooking while using an online recipe without getting food all over your laptop. My idea was to use a thin plastic plate that is easy to clean and of course can endure flour, sauce – you name it!
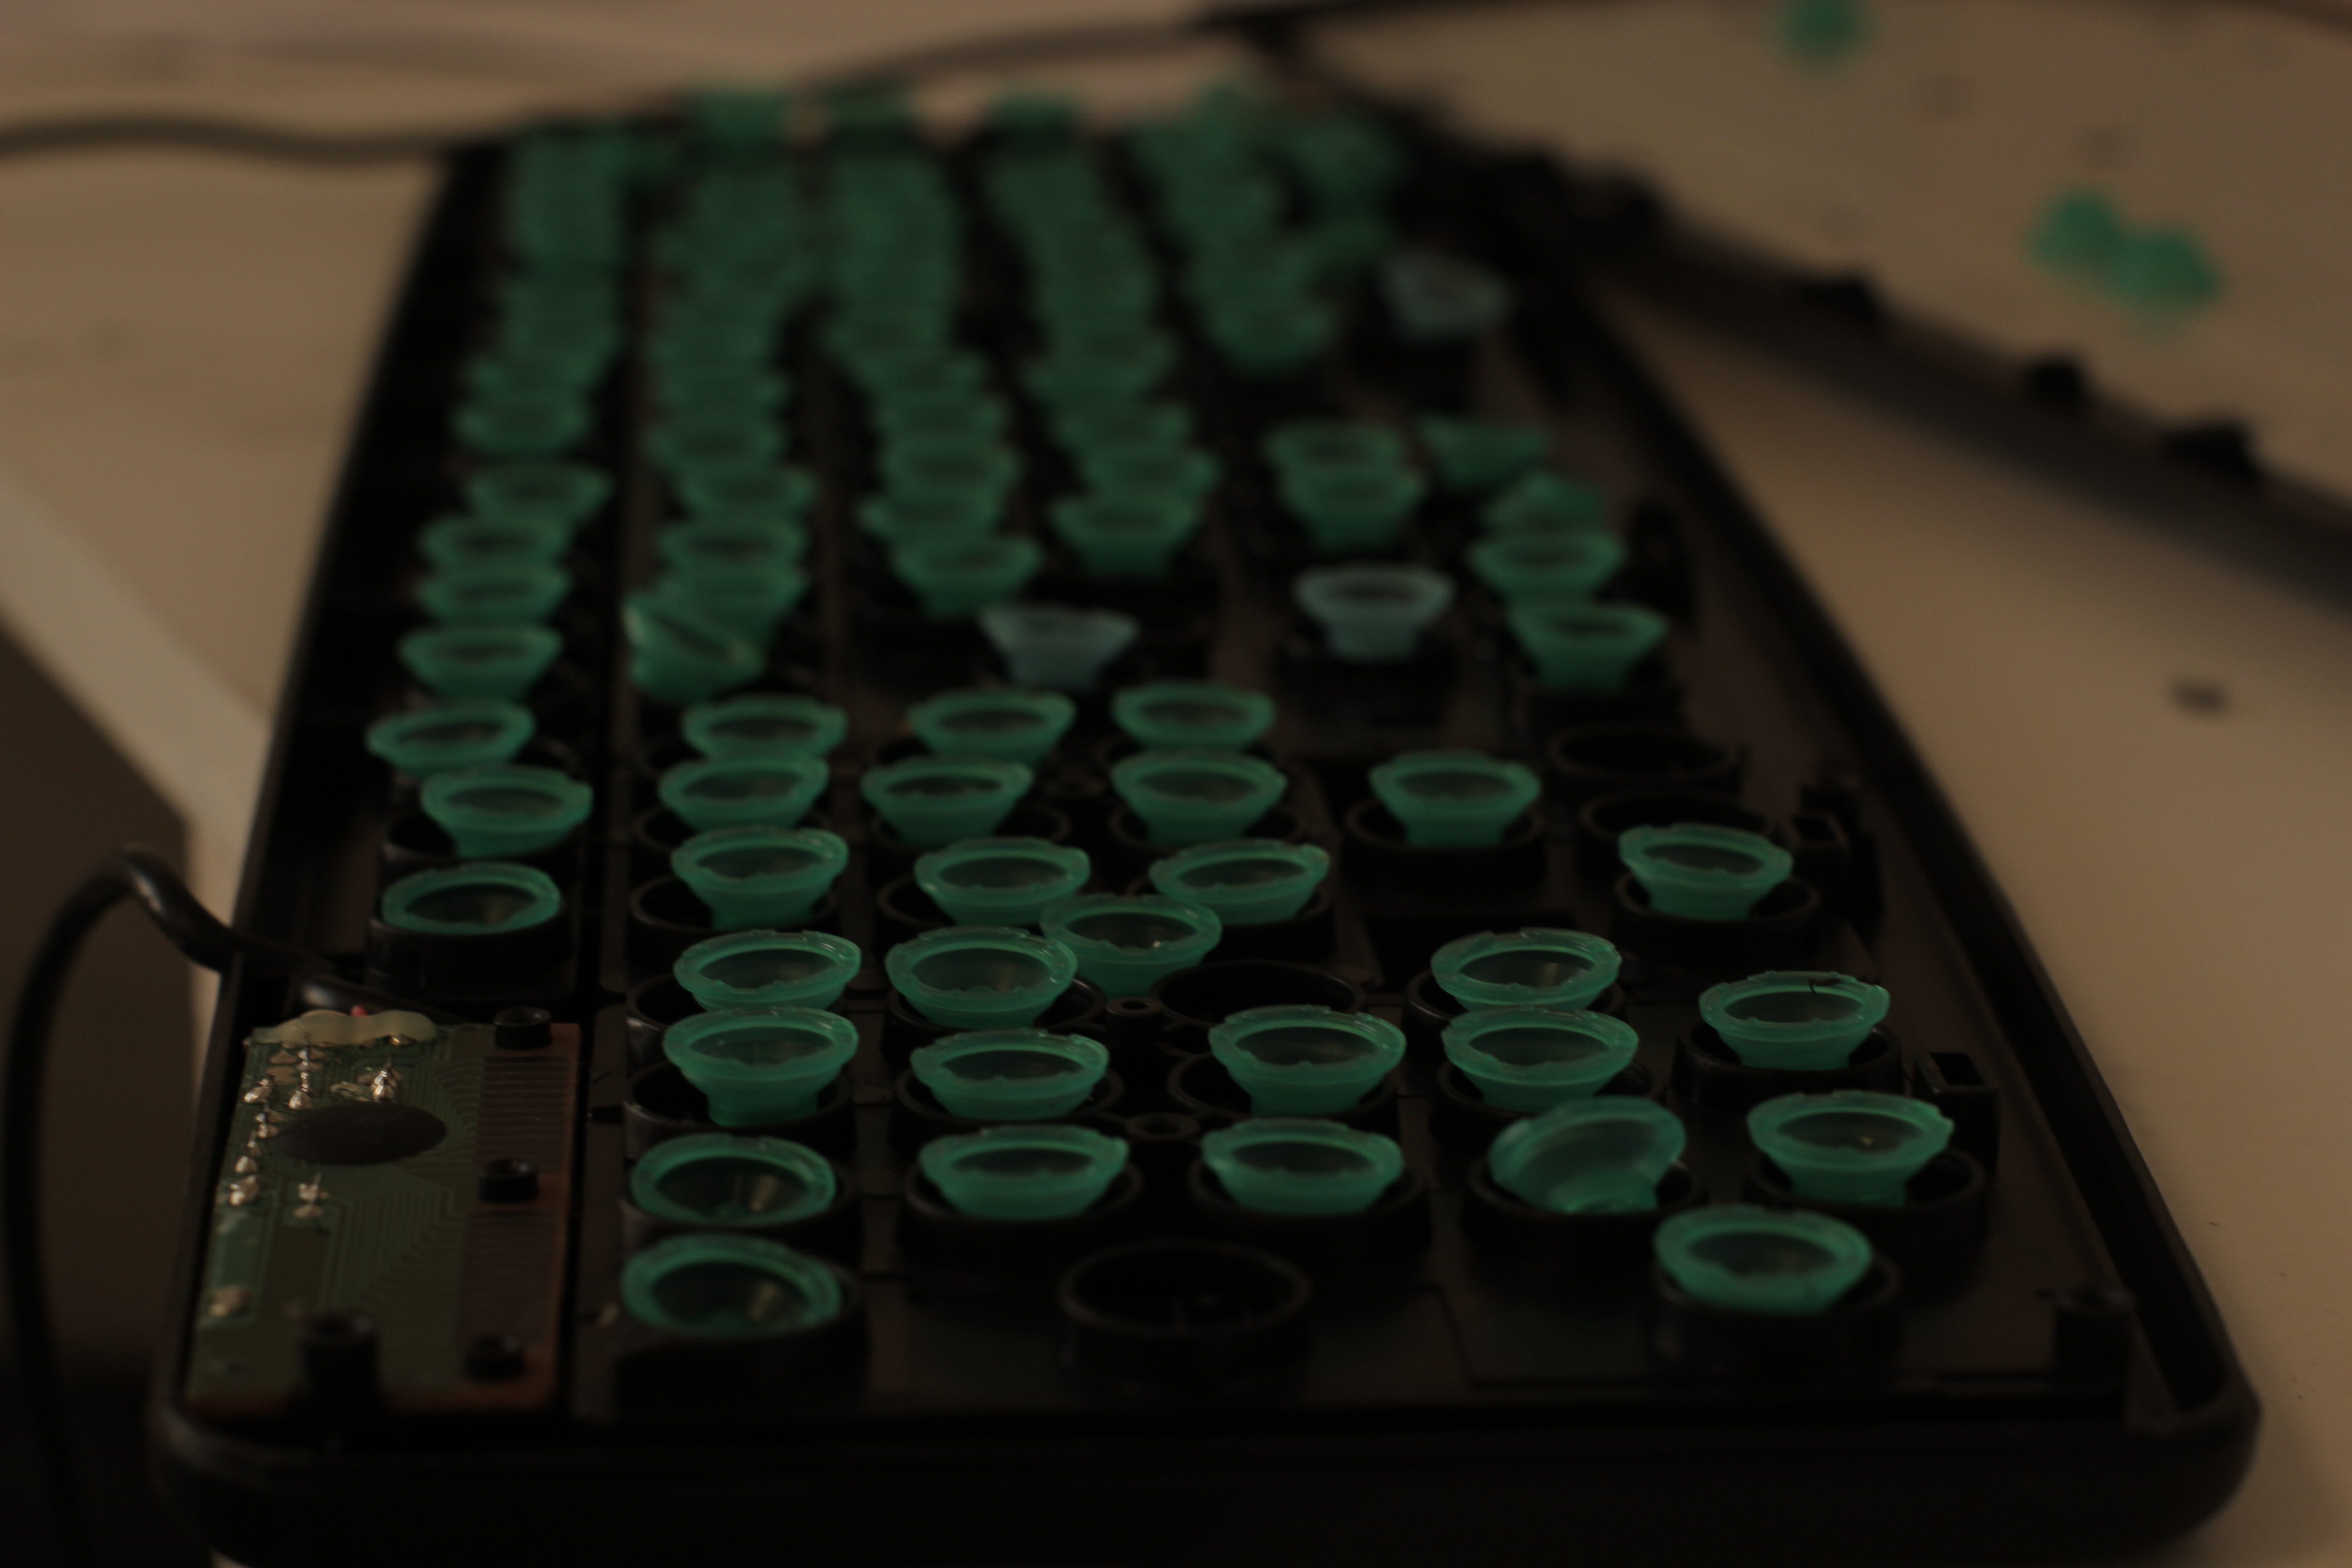
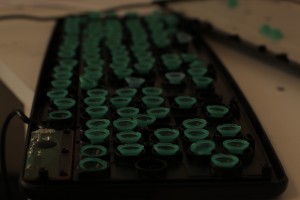
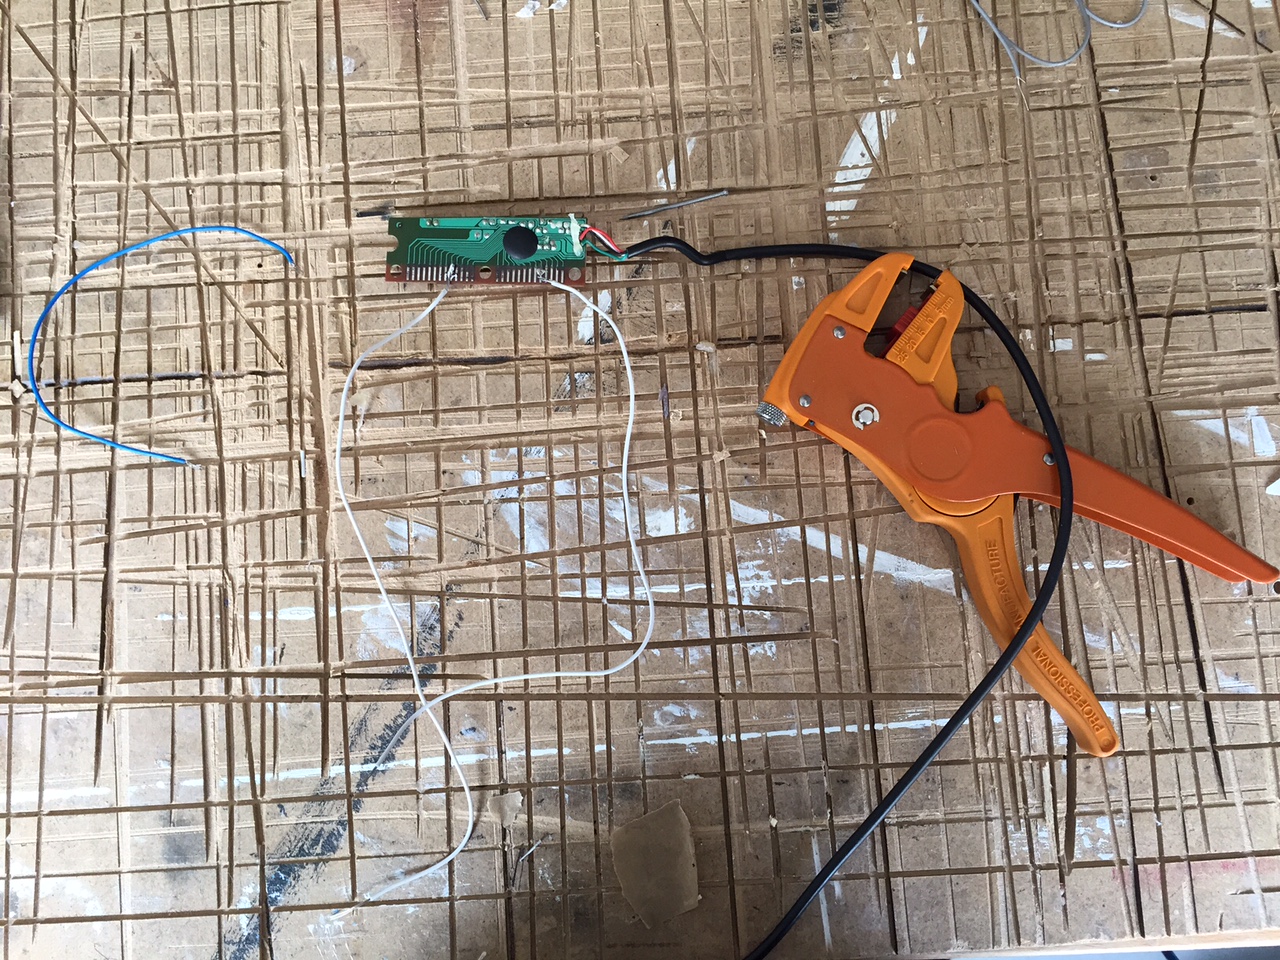
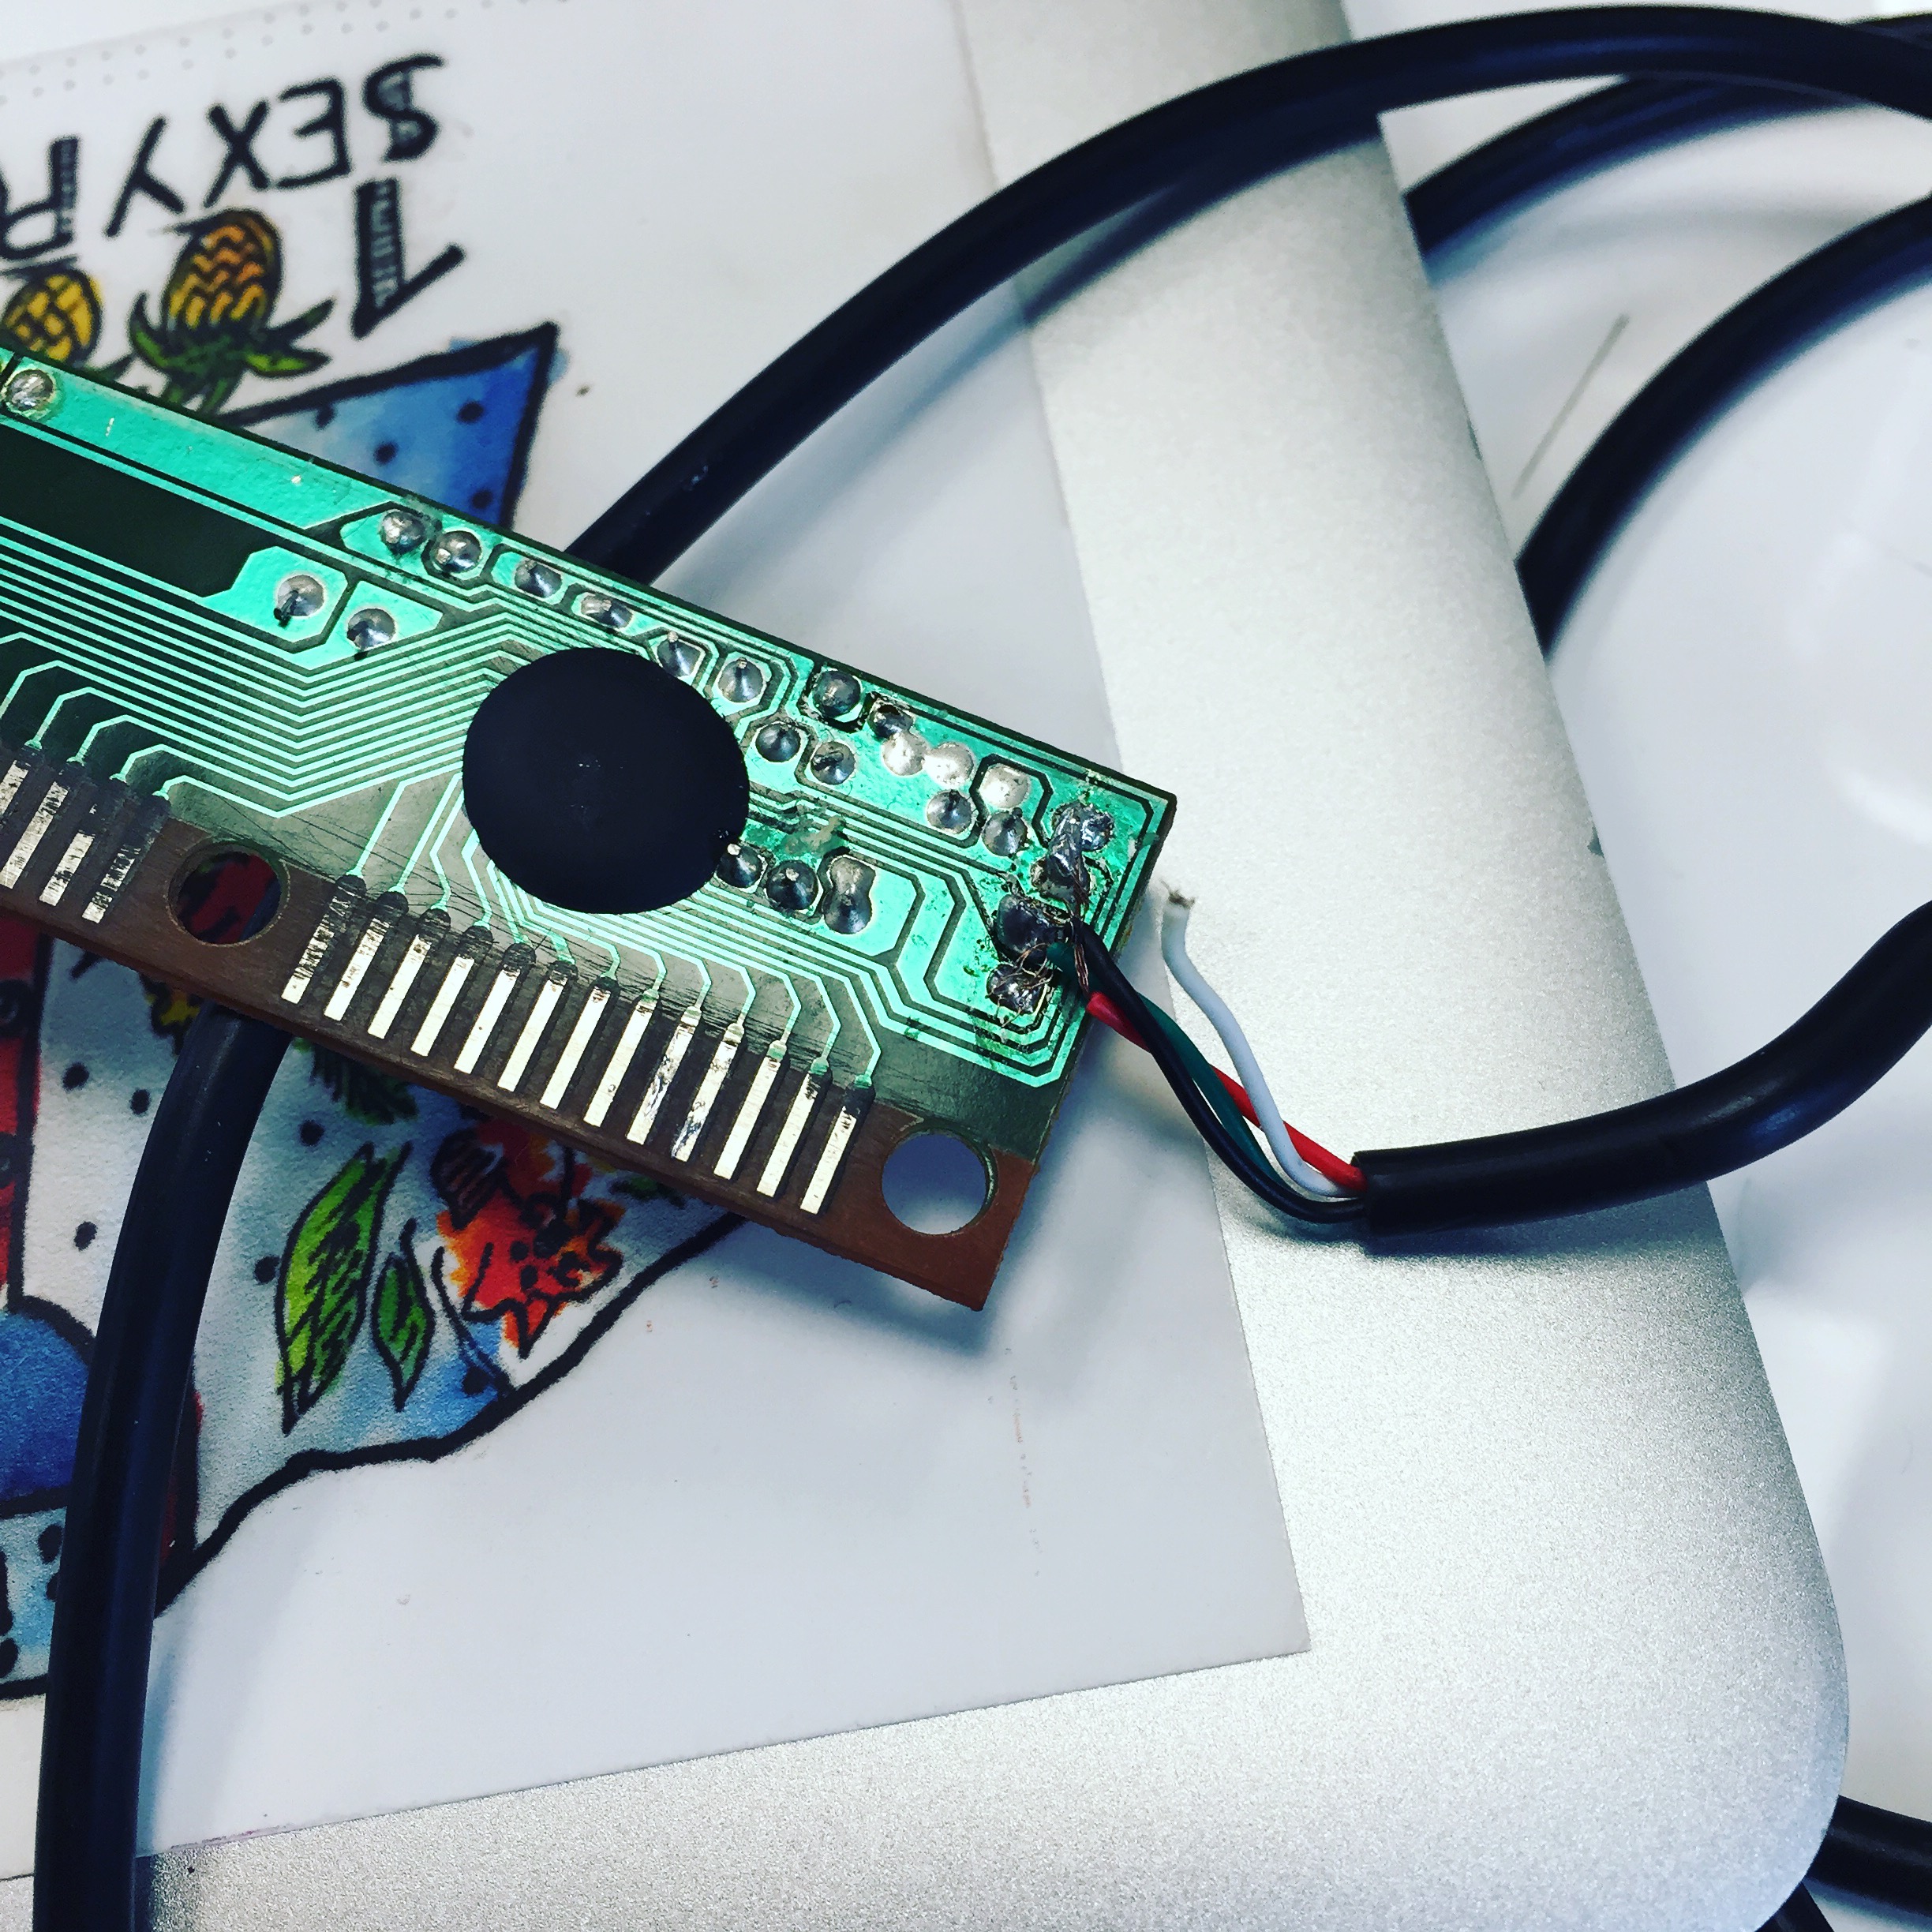
Step 1. Unscrew you keyboard and find the pcb controller and remove it from the keyboard. Then you want to gently sand the silver keys. Be careful not to sand off too much!
Step 2. Connect the pcb controller to a computer and begin searching for usable keys.
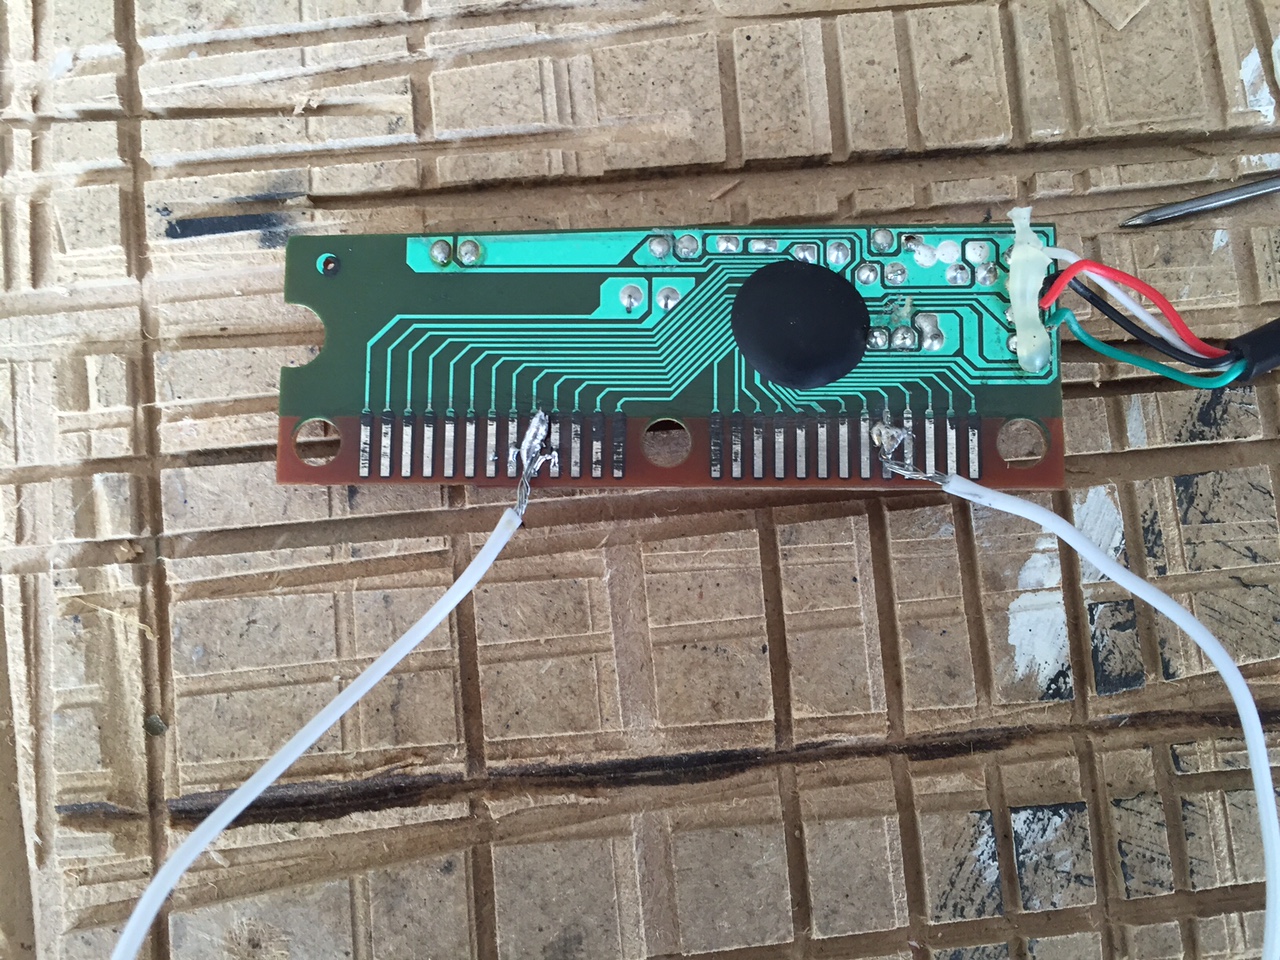
Step 3. Solder wires on the key combination you would like to emulate.
Step 4. Connect this to an object you would like to use to control the key combination chosen.
Unfortunately after connecting my wires to the key combination I had found, which in this case it was the space key which would allow you to navigate down the recipe page, the delicate pcb controller wires disconnected.
After multiple failed attempts of re-soldering the pcb connectors I was feeling quite defeated.
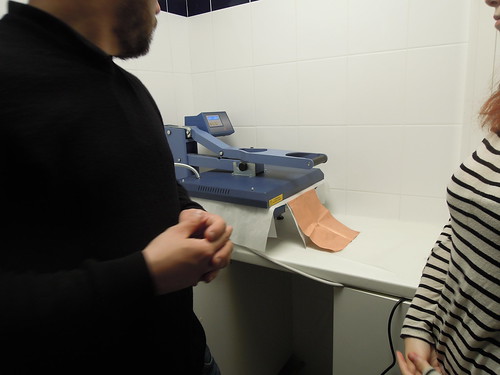
Using heat press to the school set up to 100° for 40 sec to stick the fusible glue paper to the conductive fabric.
To cut the neoprene, we use the felt setup.
To cut the conductive fabric (flectron) with the fusible glue paper, choose balistic nylon thickness 0.20mm and +50% vector cutting.
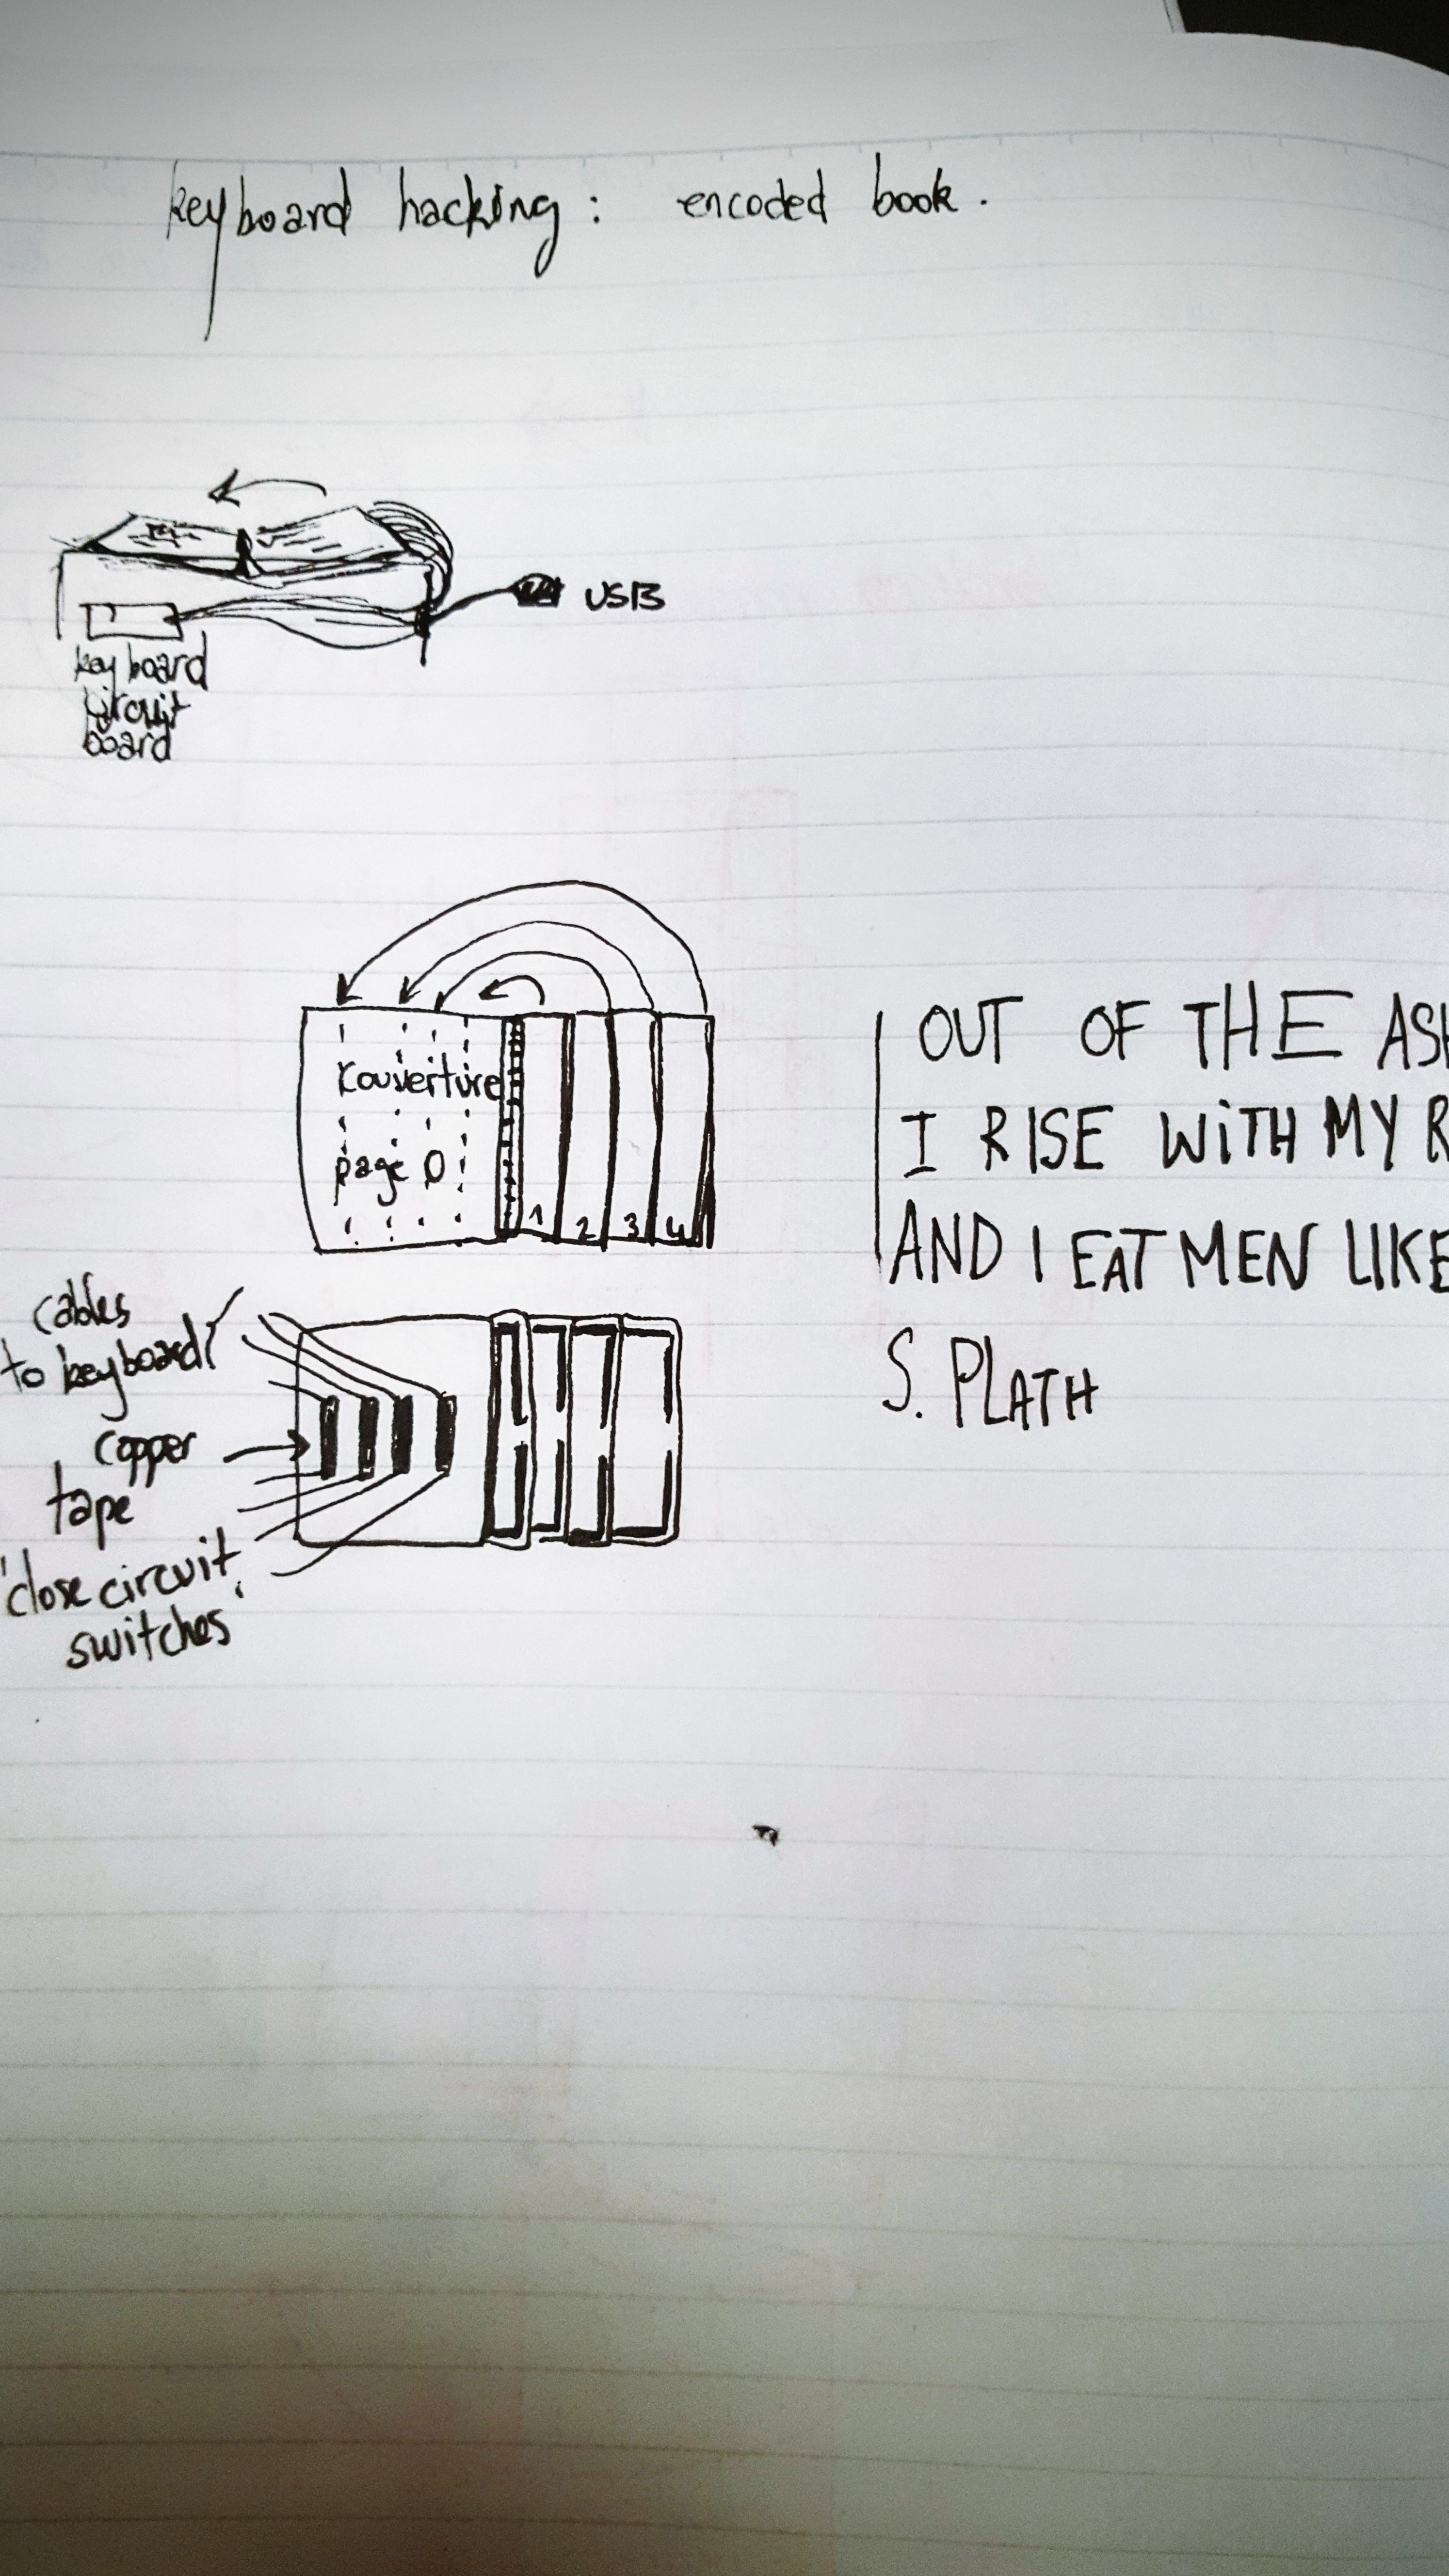
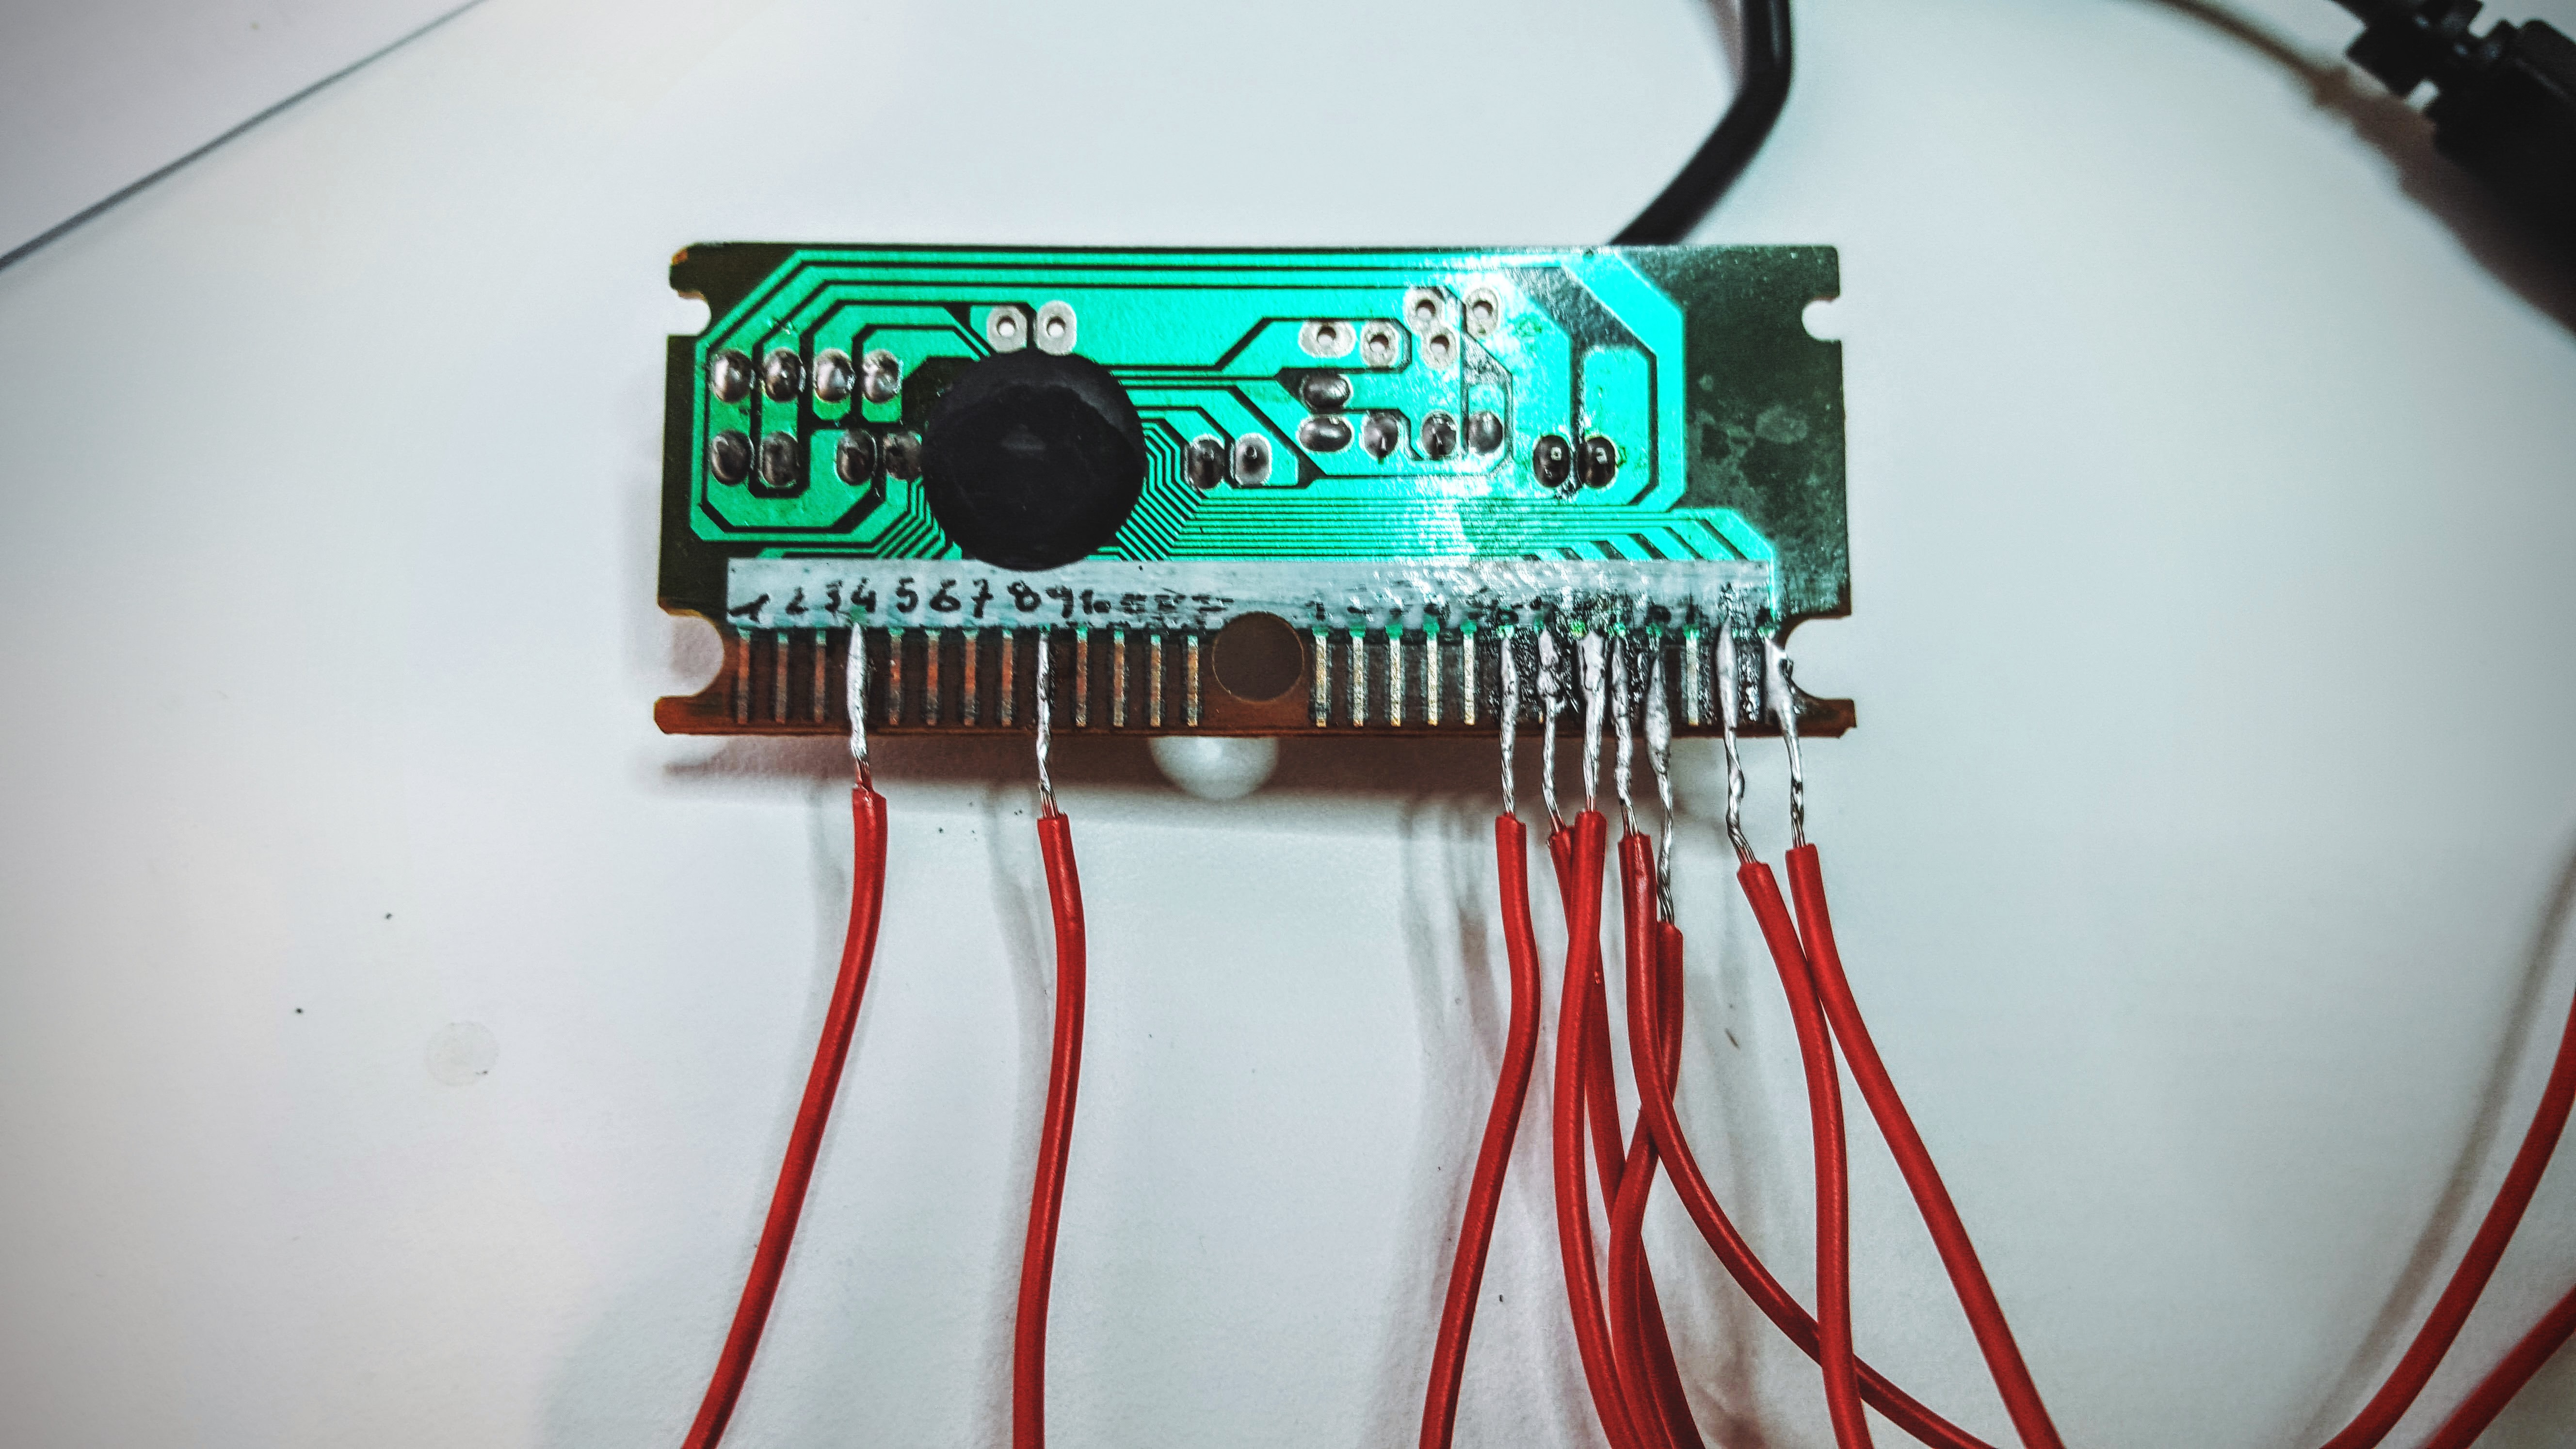
First step: Open the keyboard, take the circuit board out with the USB cable. Sand off delicately the black varnish on the straight lines at the bottom of the circuit board.
Second Step: Open a text edit page and test “line combinations” . One cable links one line from the left and one line from the right. Note down the combinations found.
Step 3: Build the project. Encoded Book is a project that creates an electronic book. It is built out of pages with no meaning, a set of letters and signs that follow each other without any recognizable pattern.
As you turn the pages of the book, the contact is made with the keyboard, and a story appears on the screen.
I chose to display a tiny poem written by Sylvia Plath:
“Out of the ash I rise with my red hair And I eat men like air…”
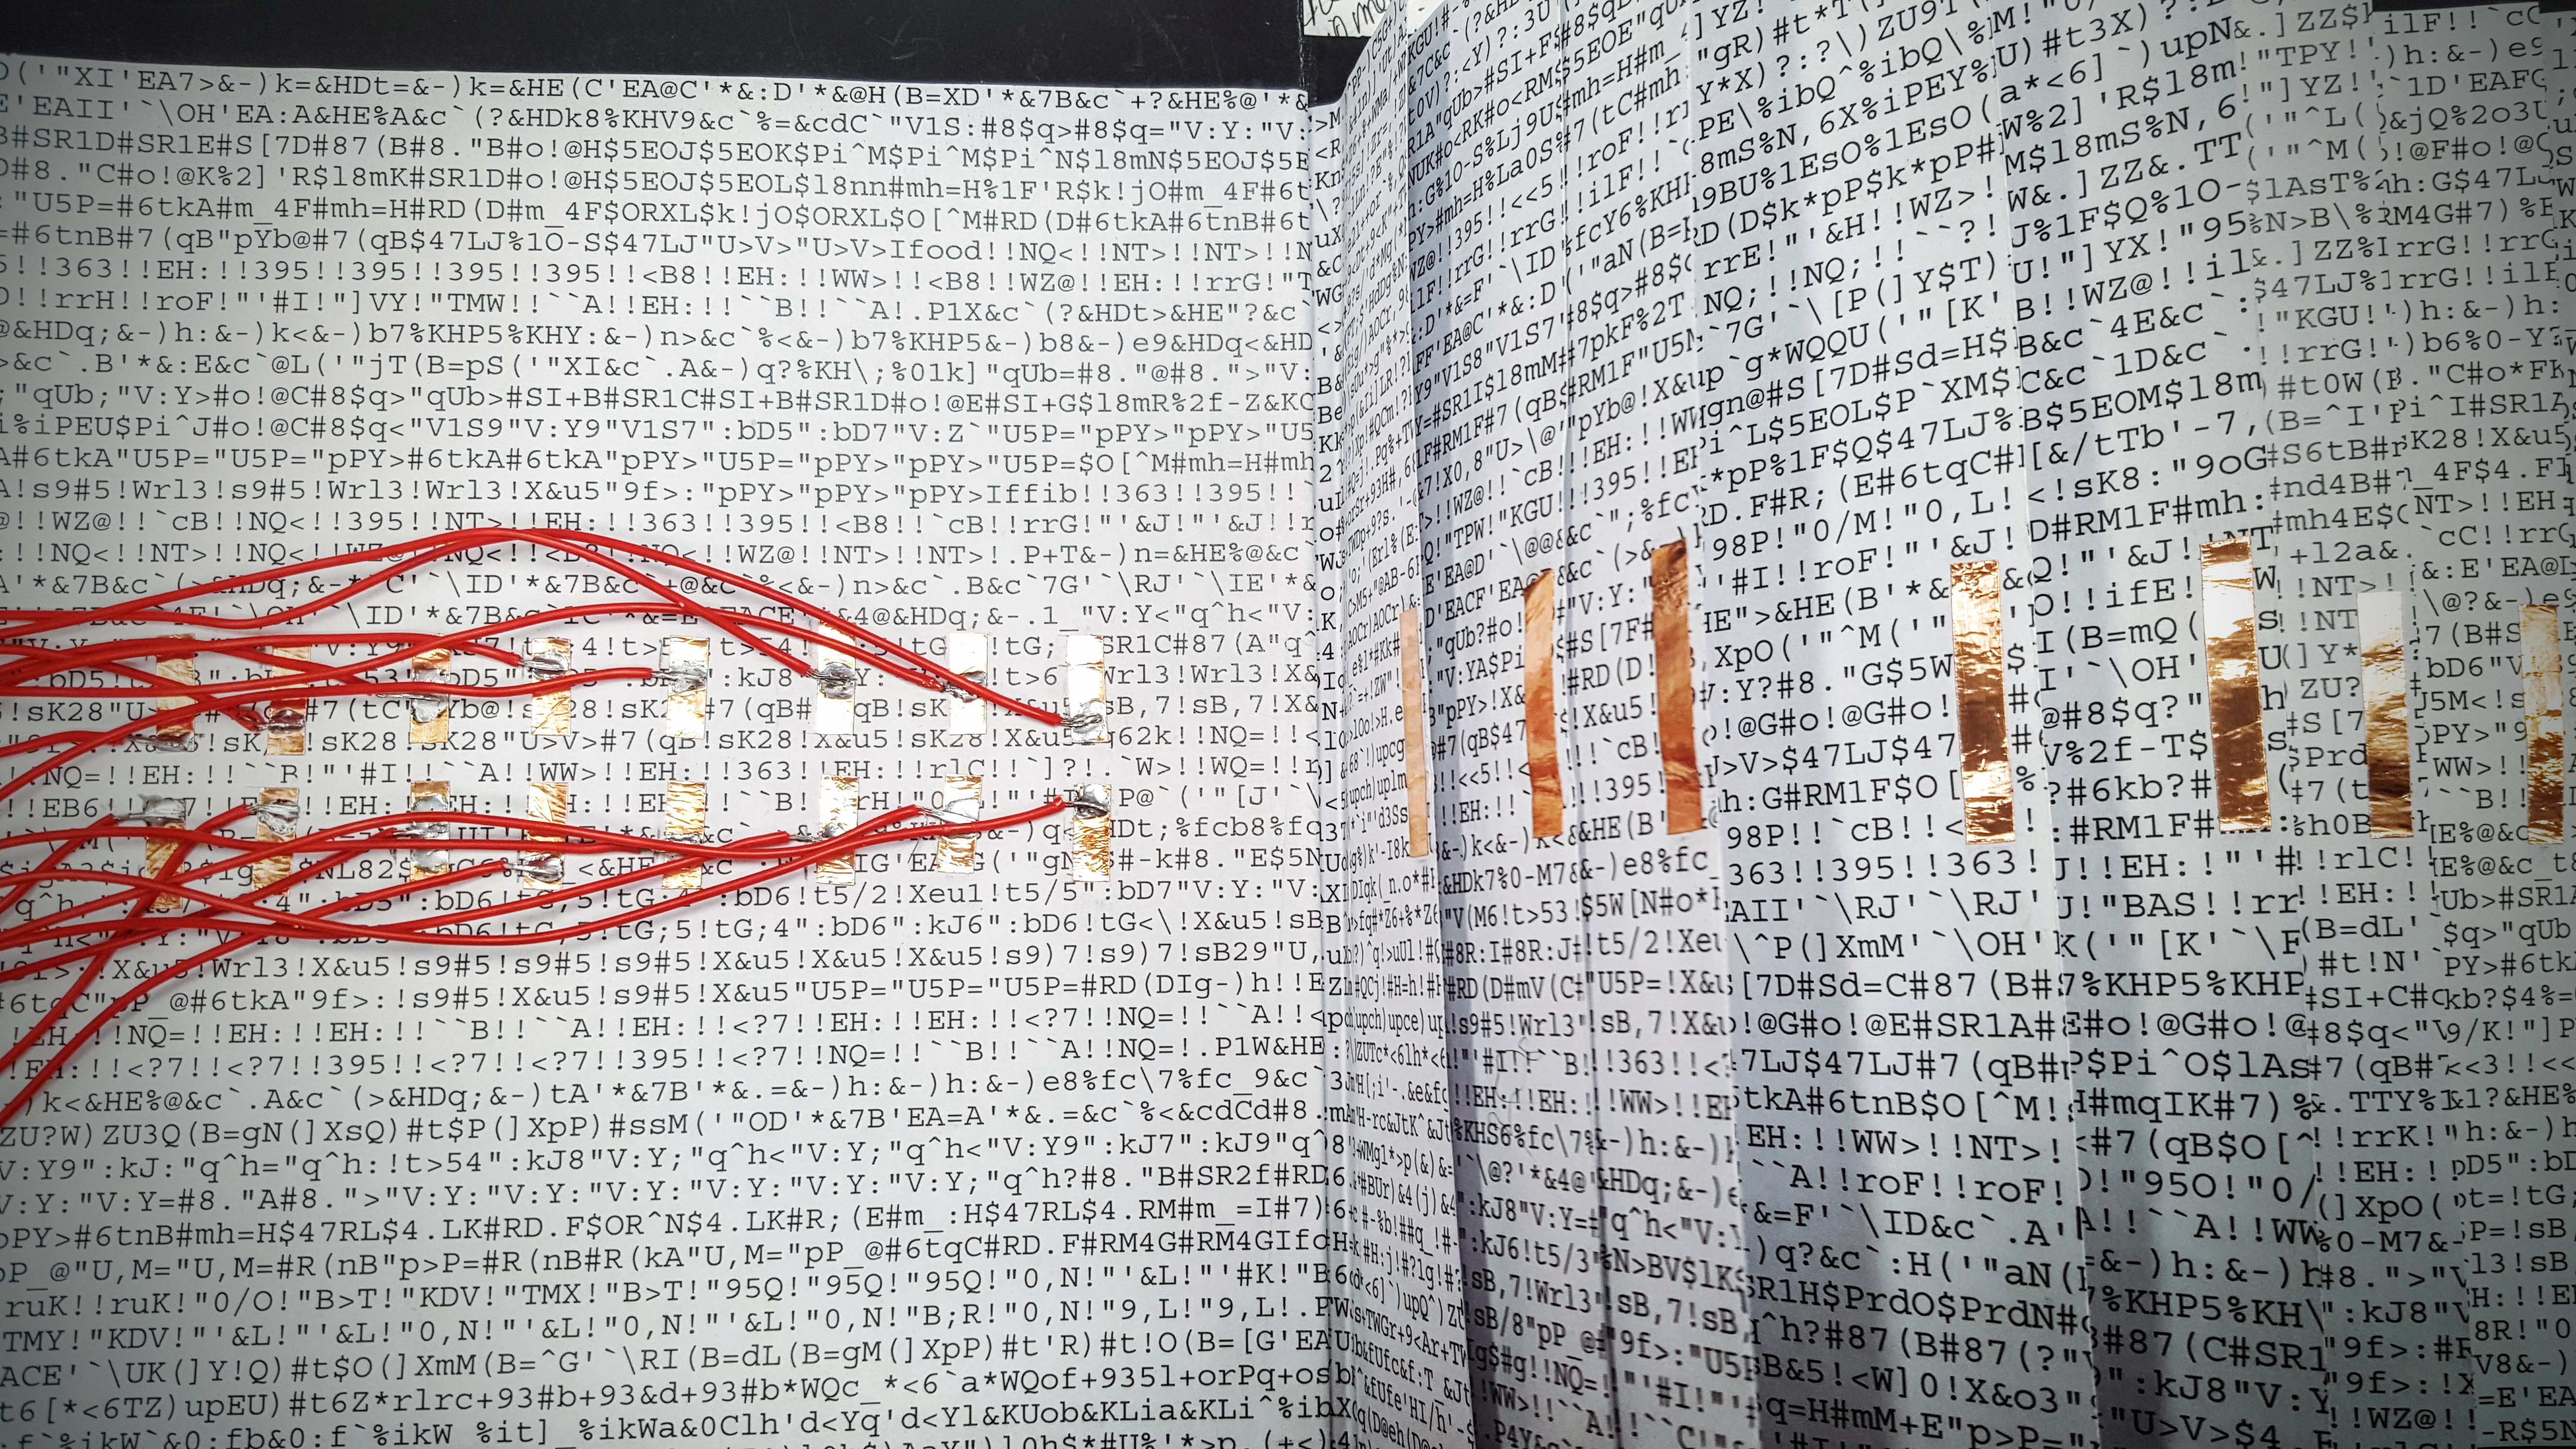
The book is binded, and between each page I built a circuit that is then glued down. The only thing shown is two parts of copper tape that will be used as a switch as the pages are turned.
This is the right way to put the copper tape, after realizing my circuit was still opened when turning the pages (duh):
Each page is attached to the correspondant combination of lines on the keyboard circuit board.
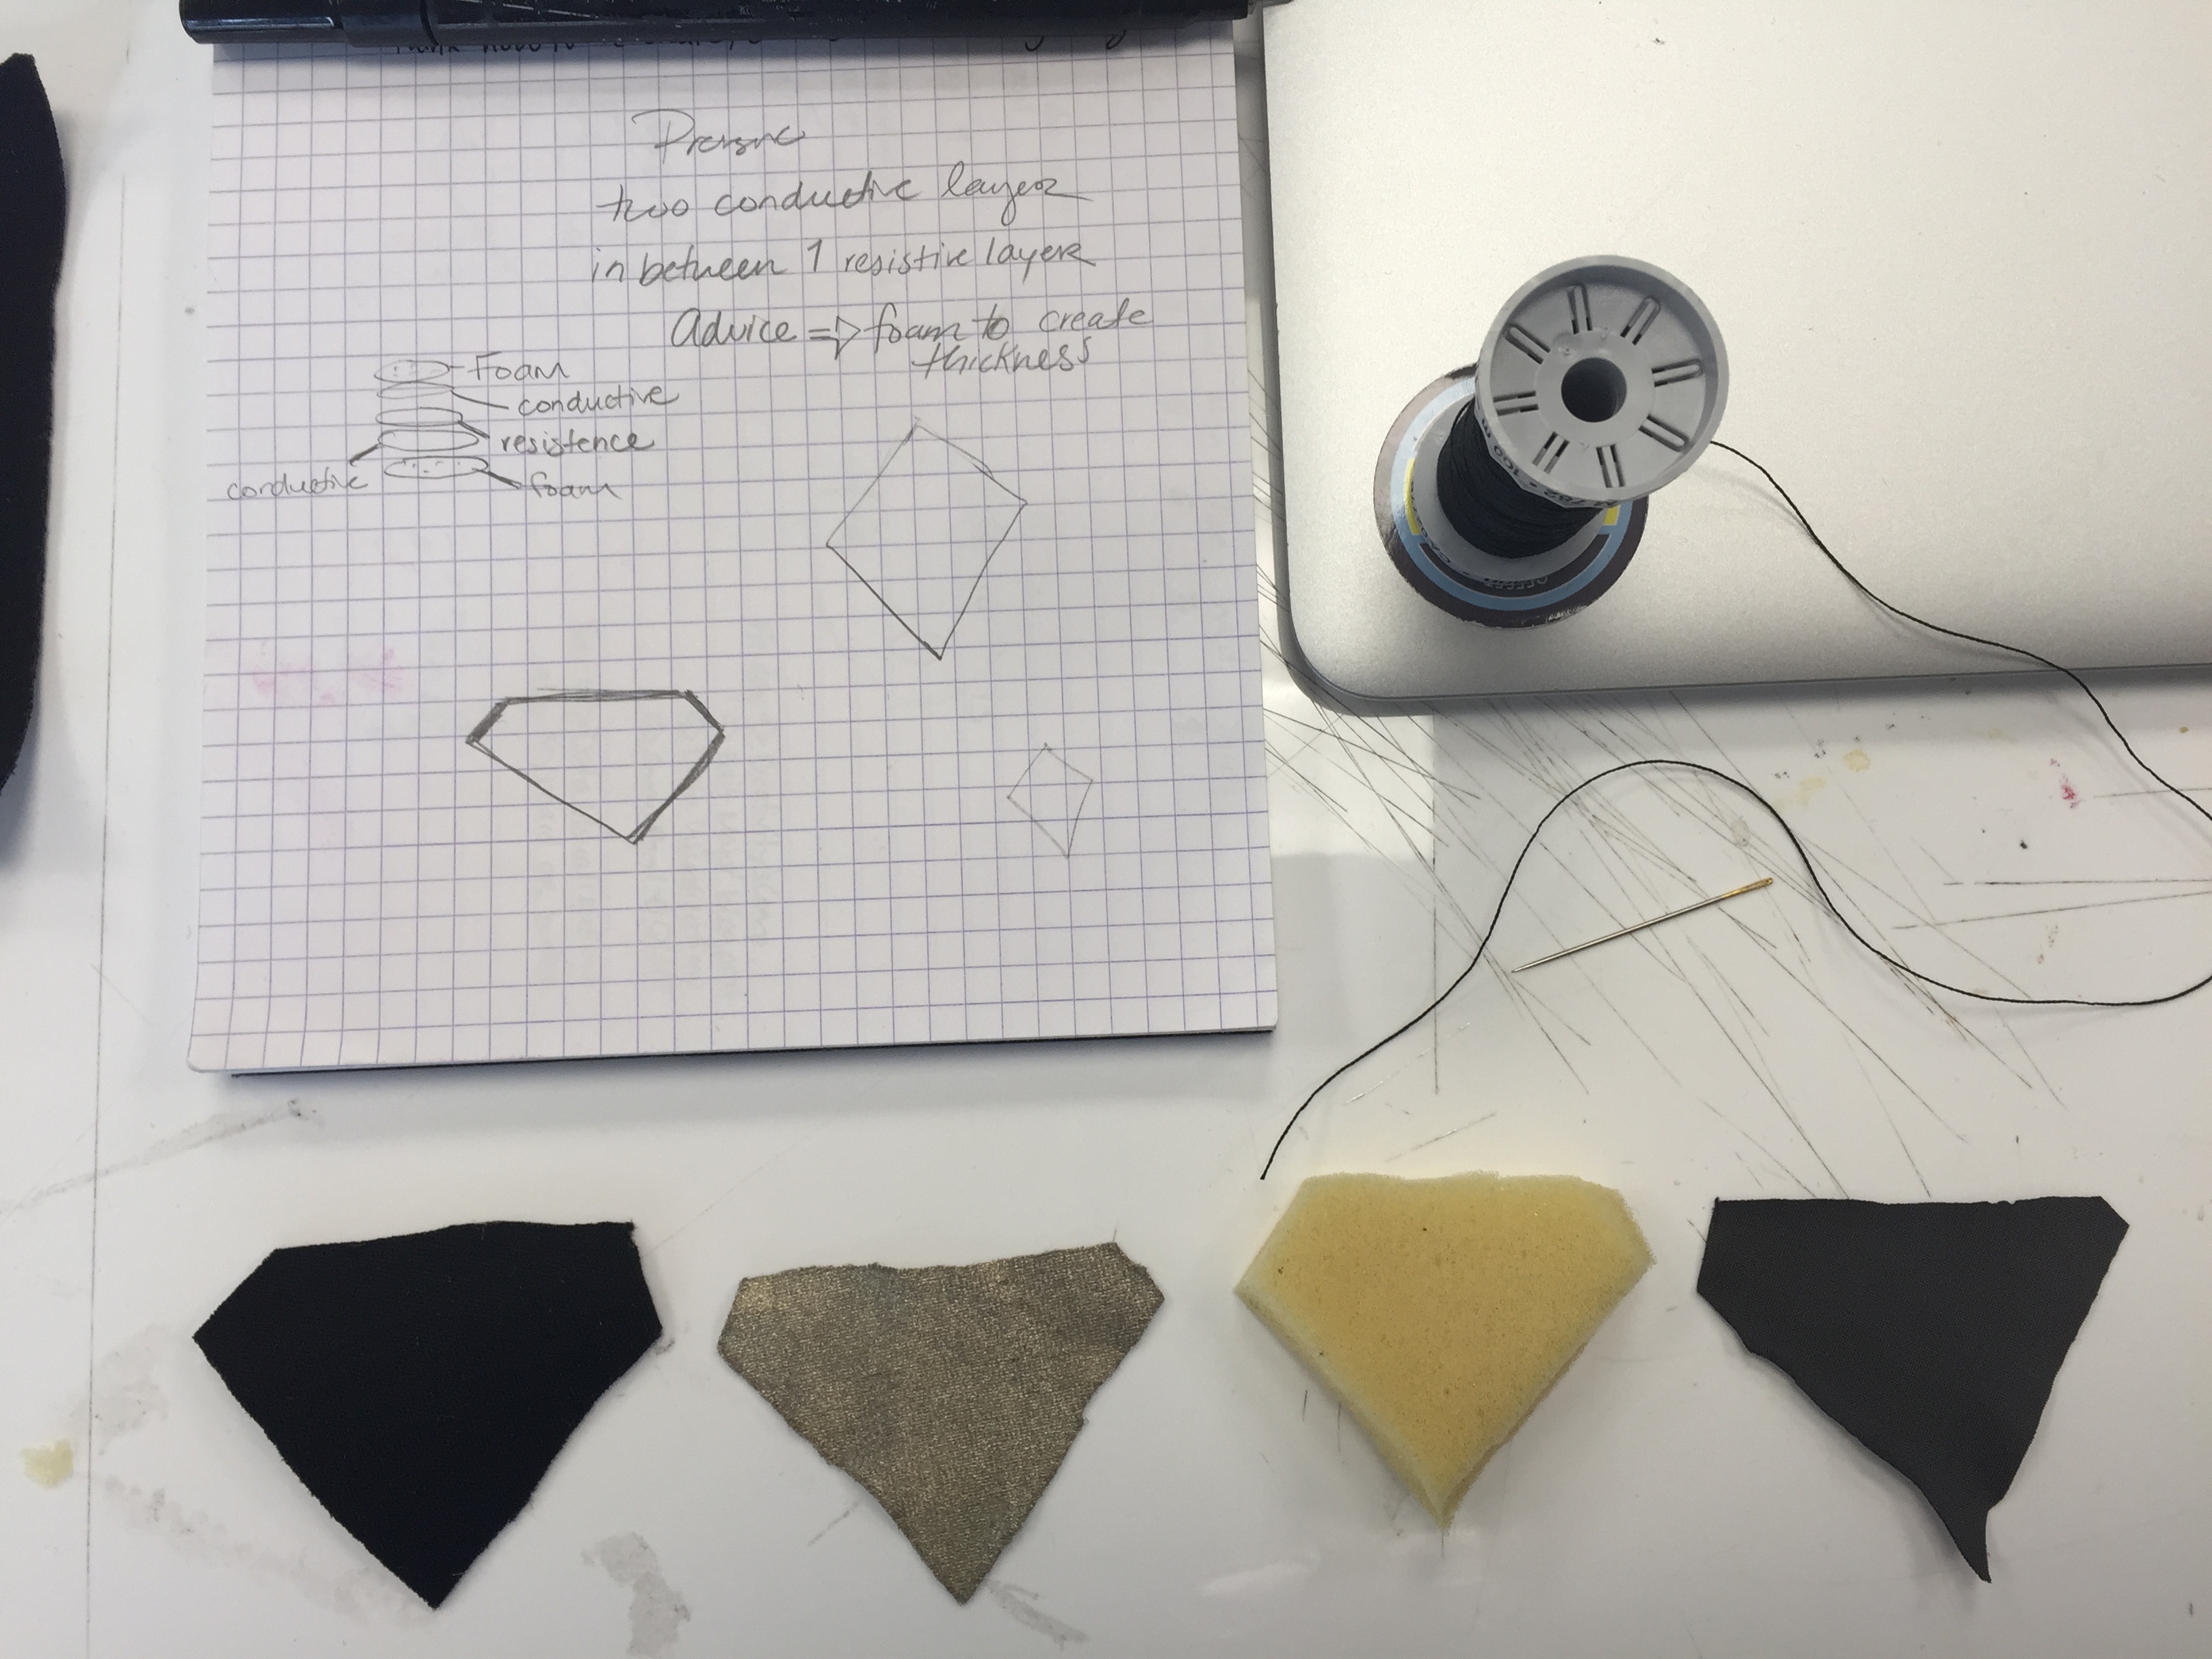
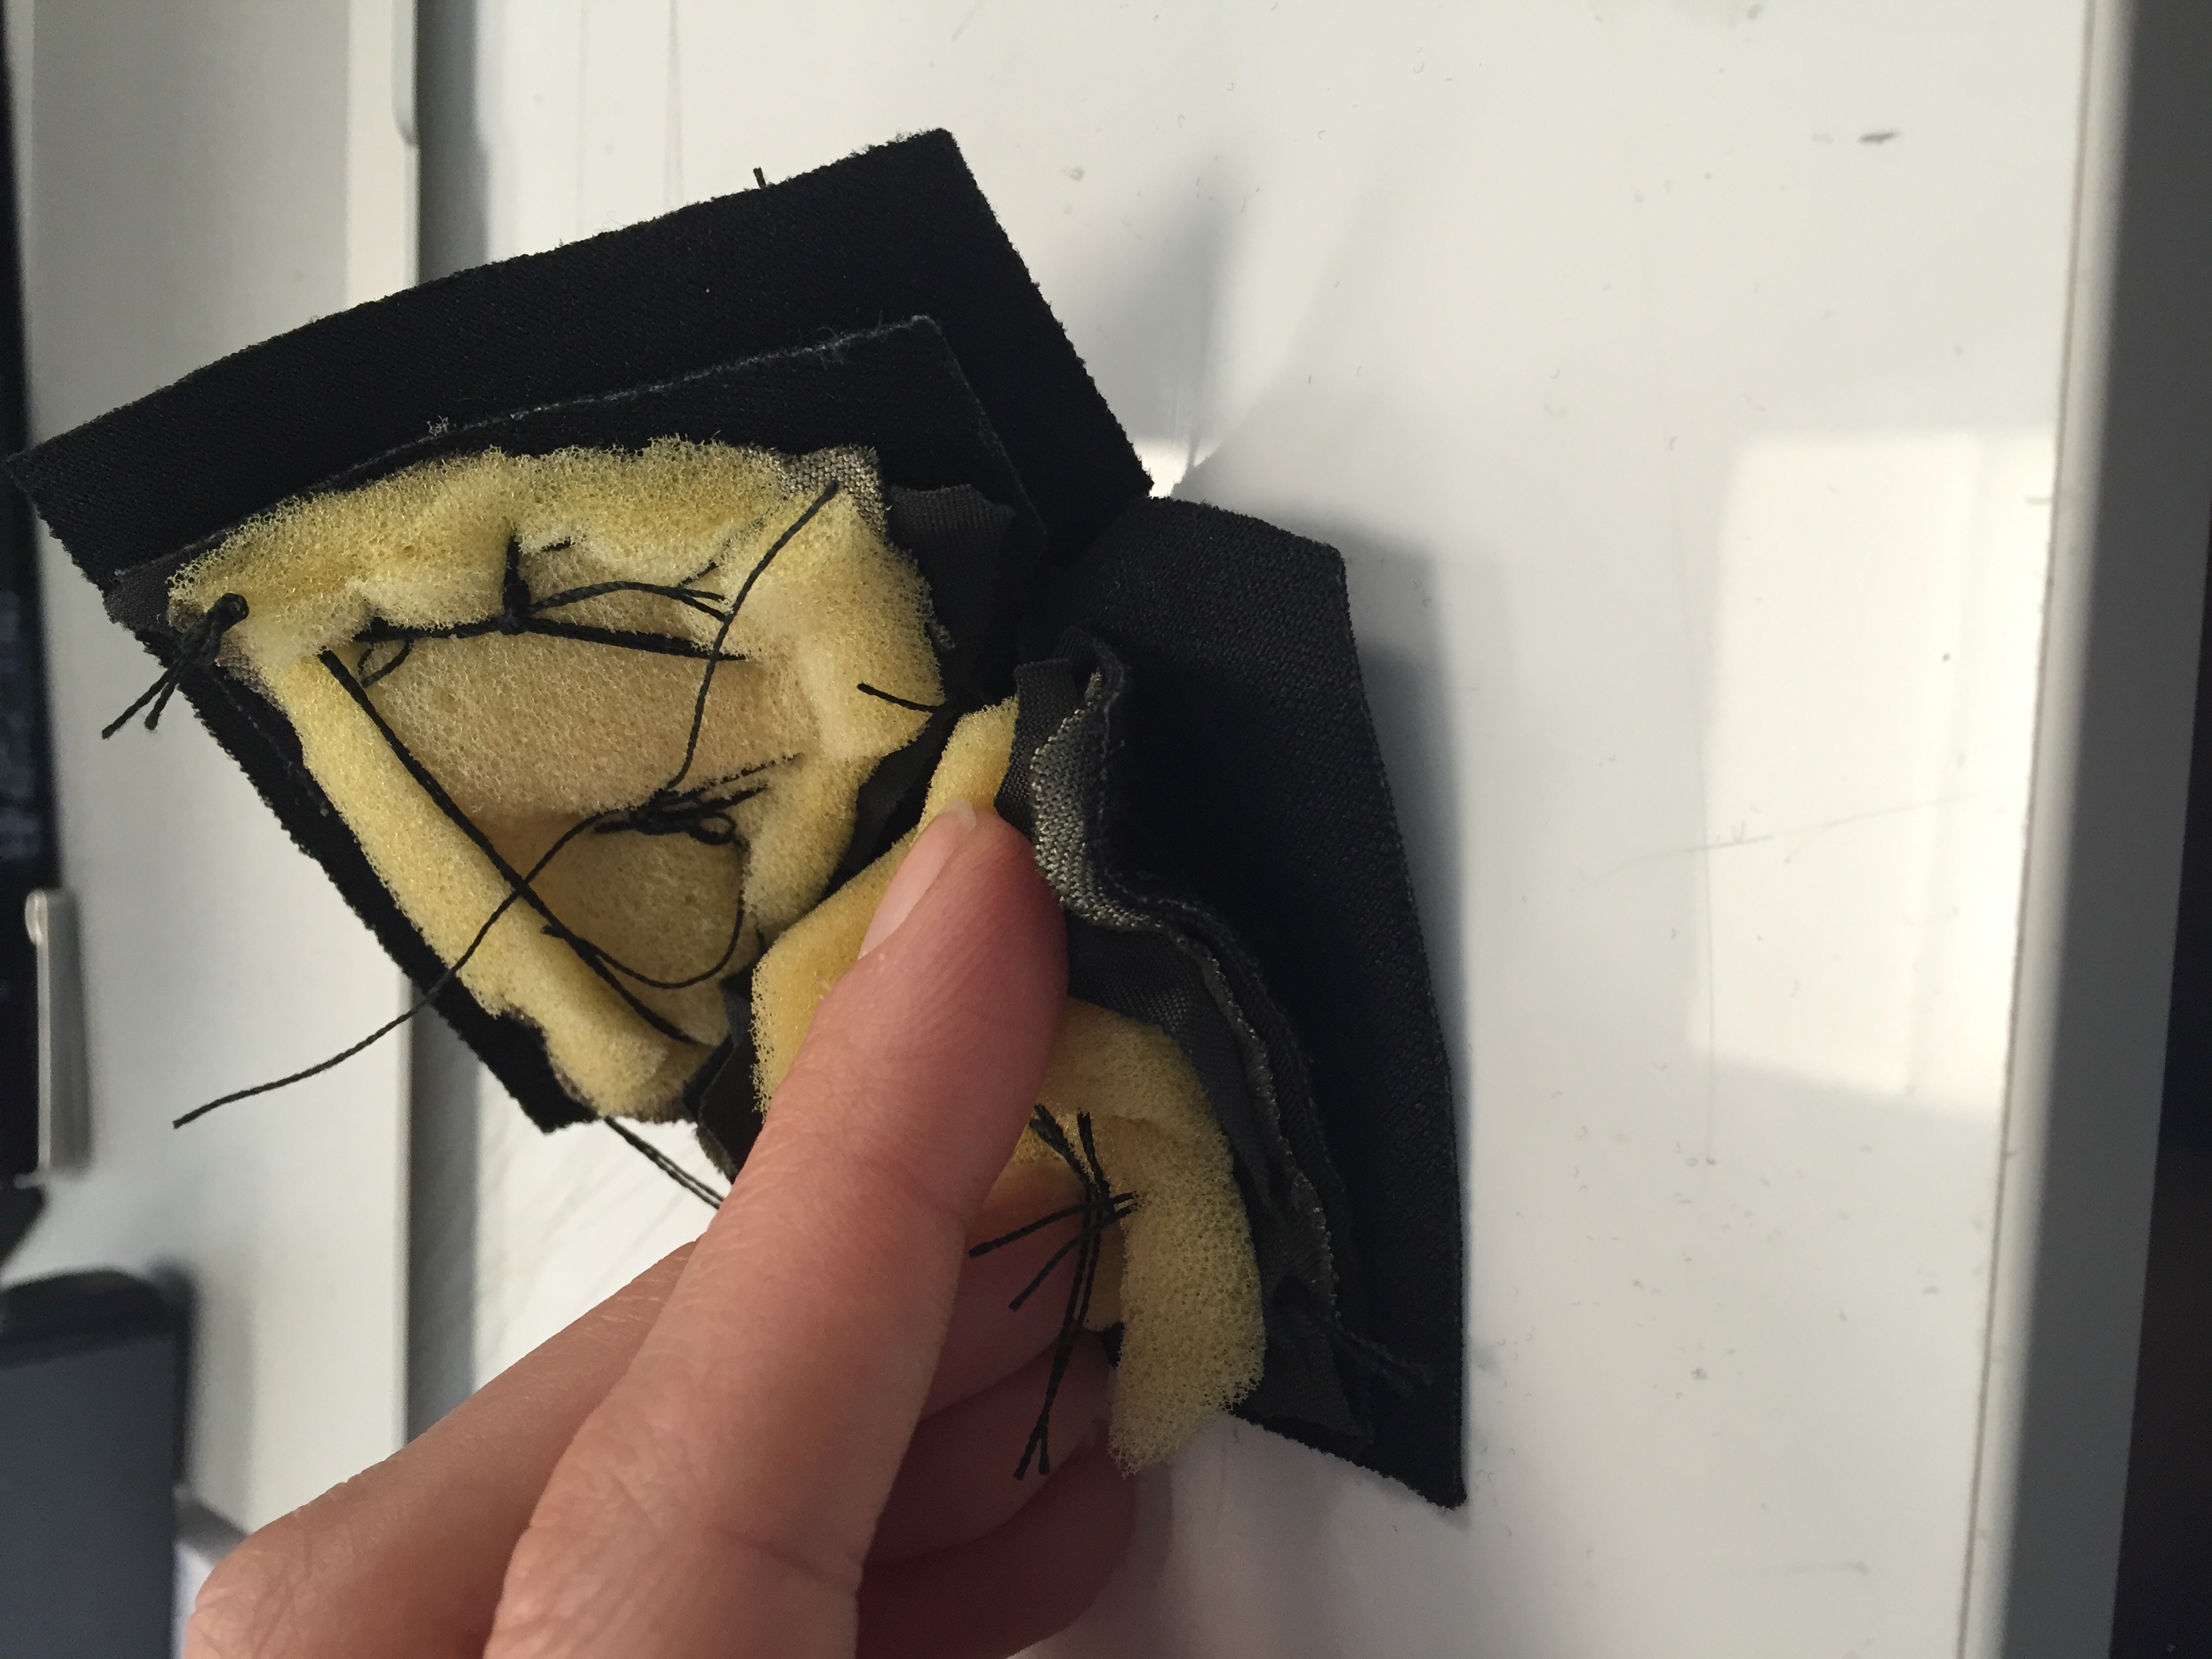
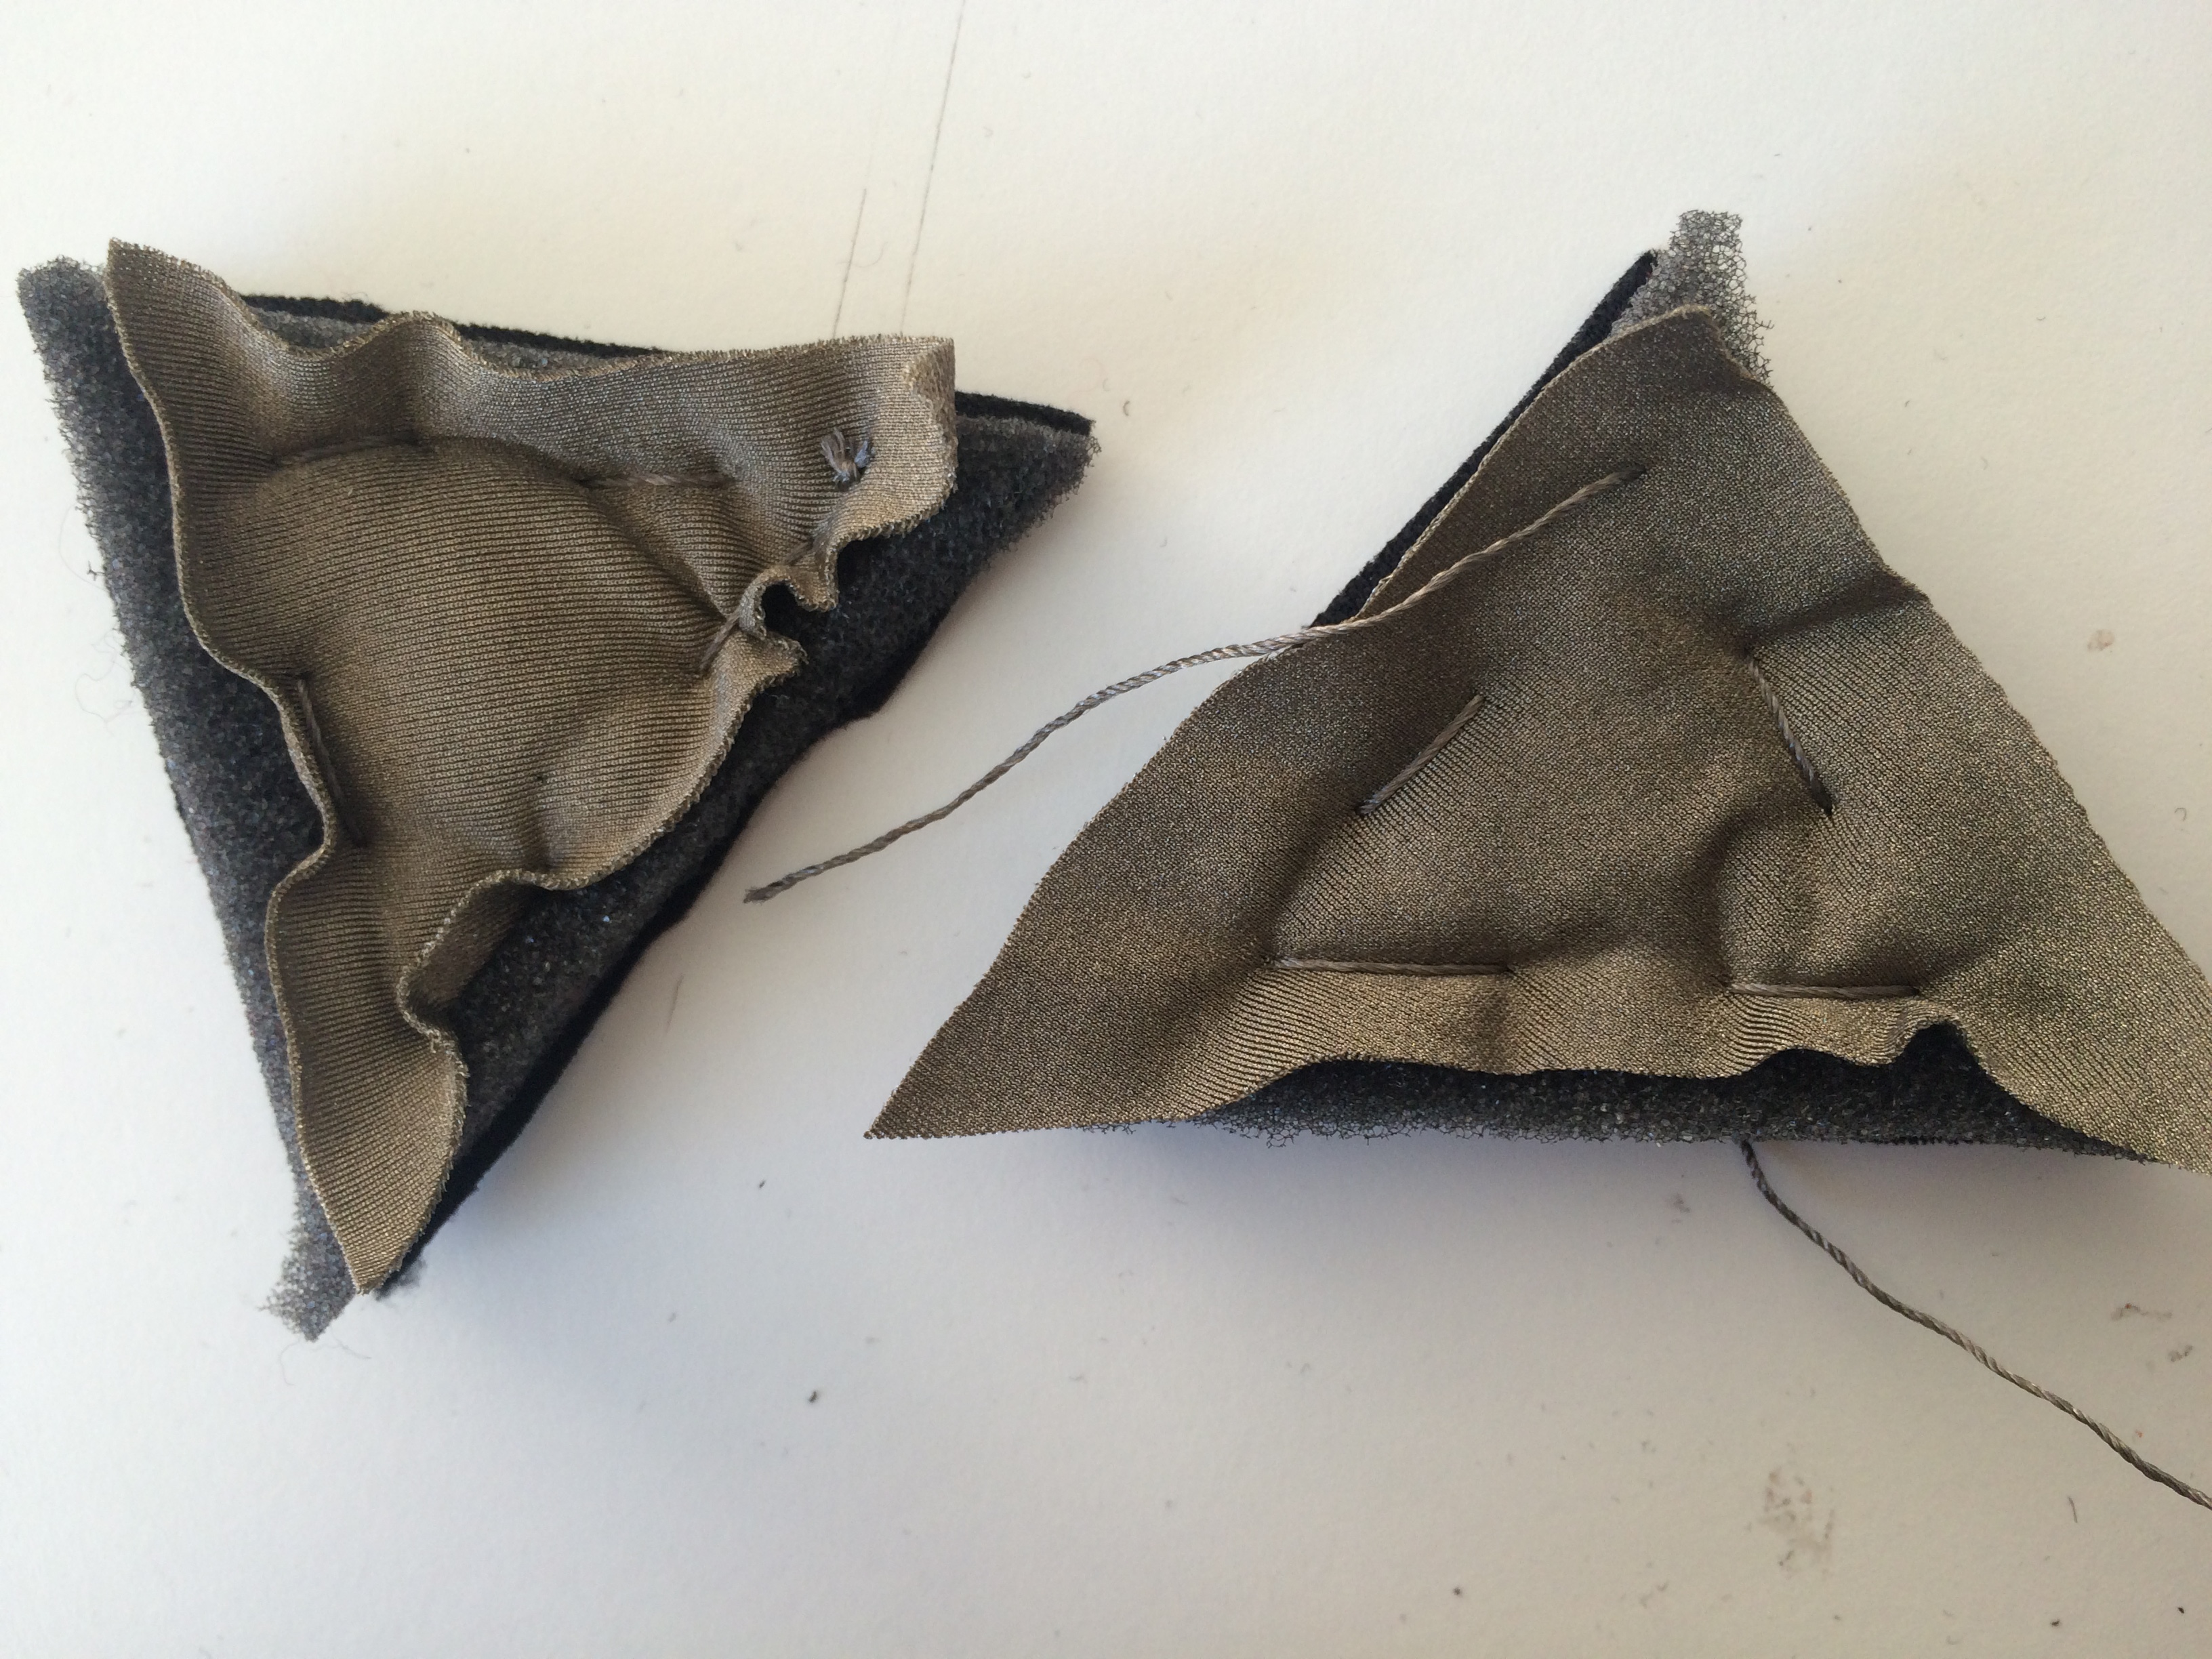
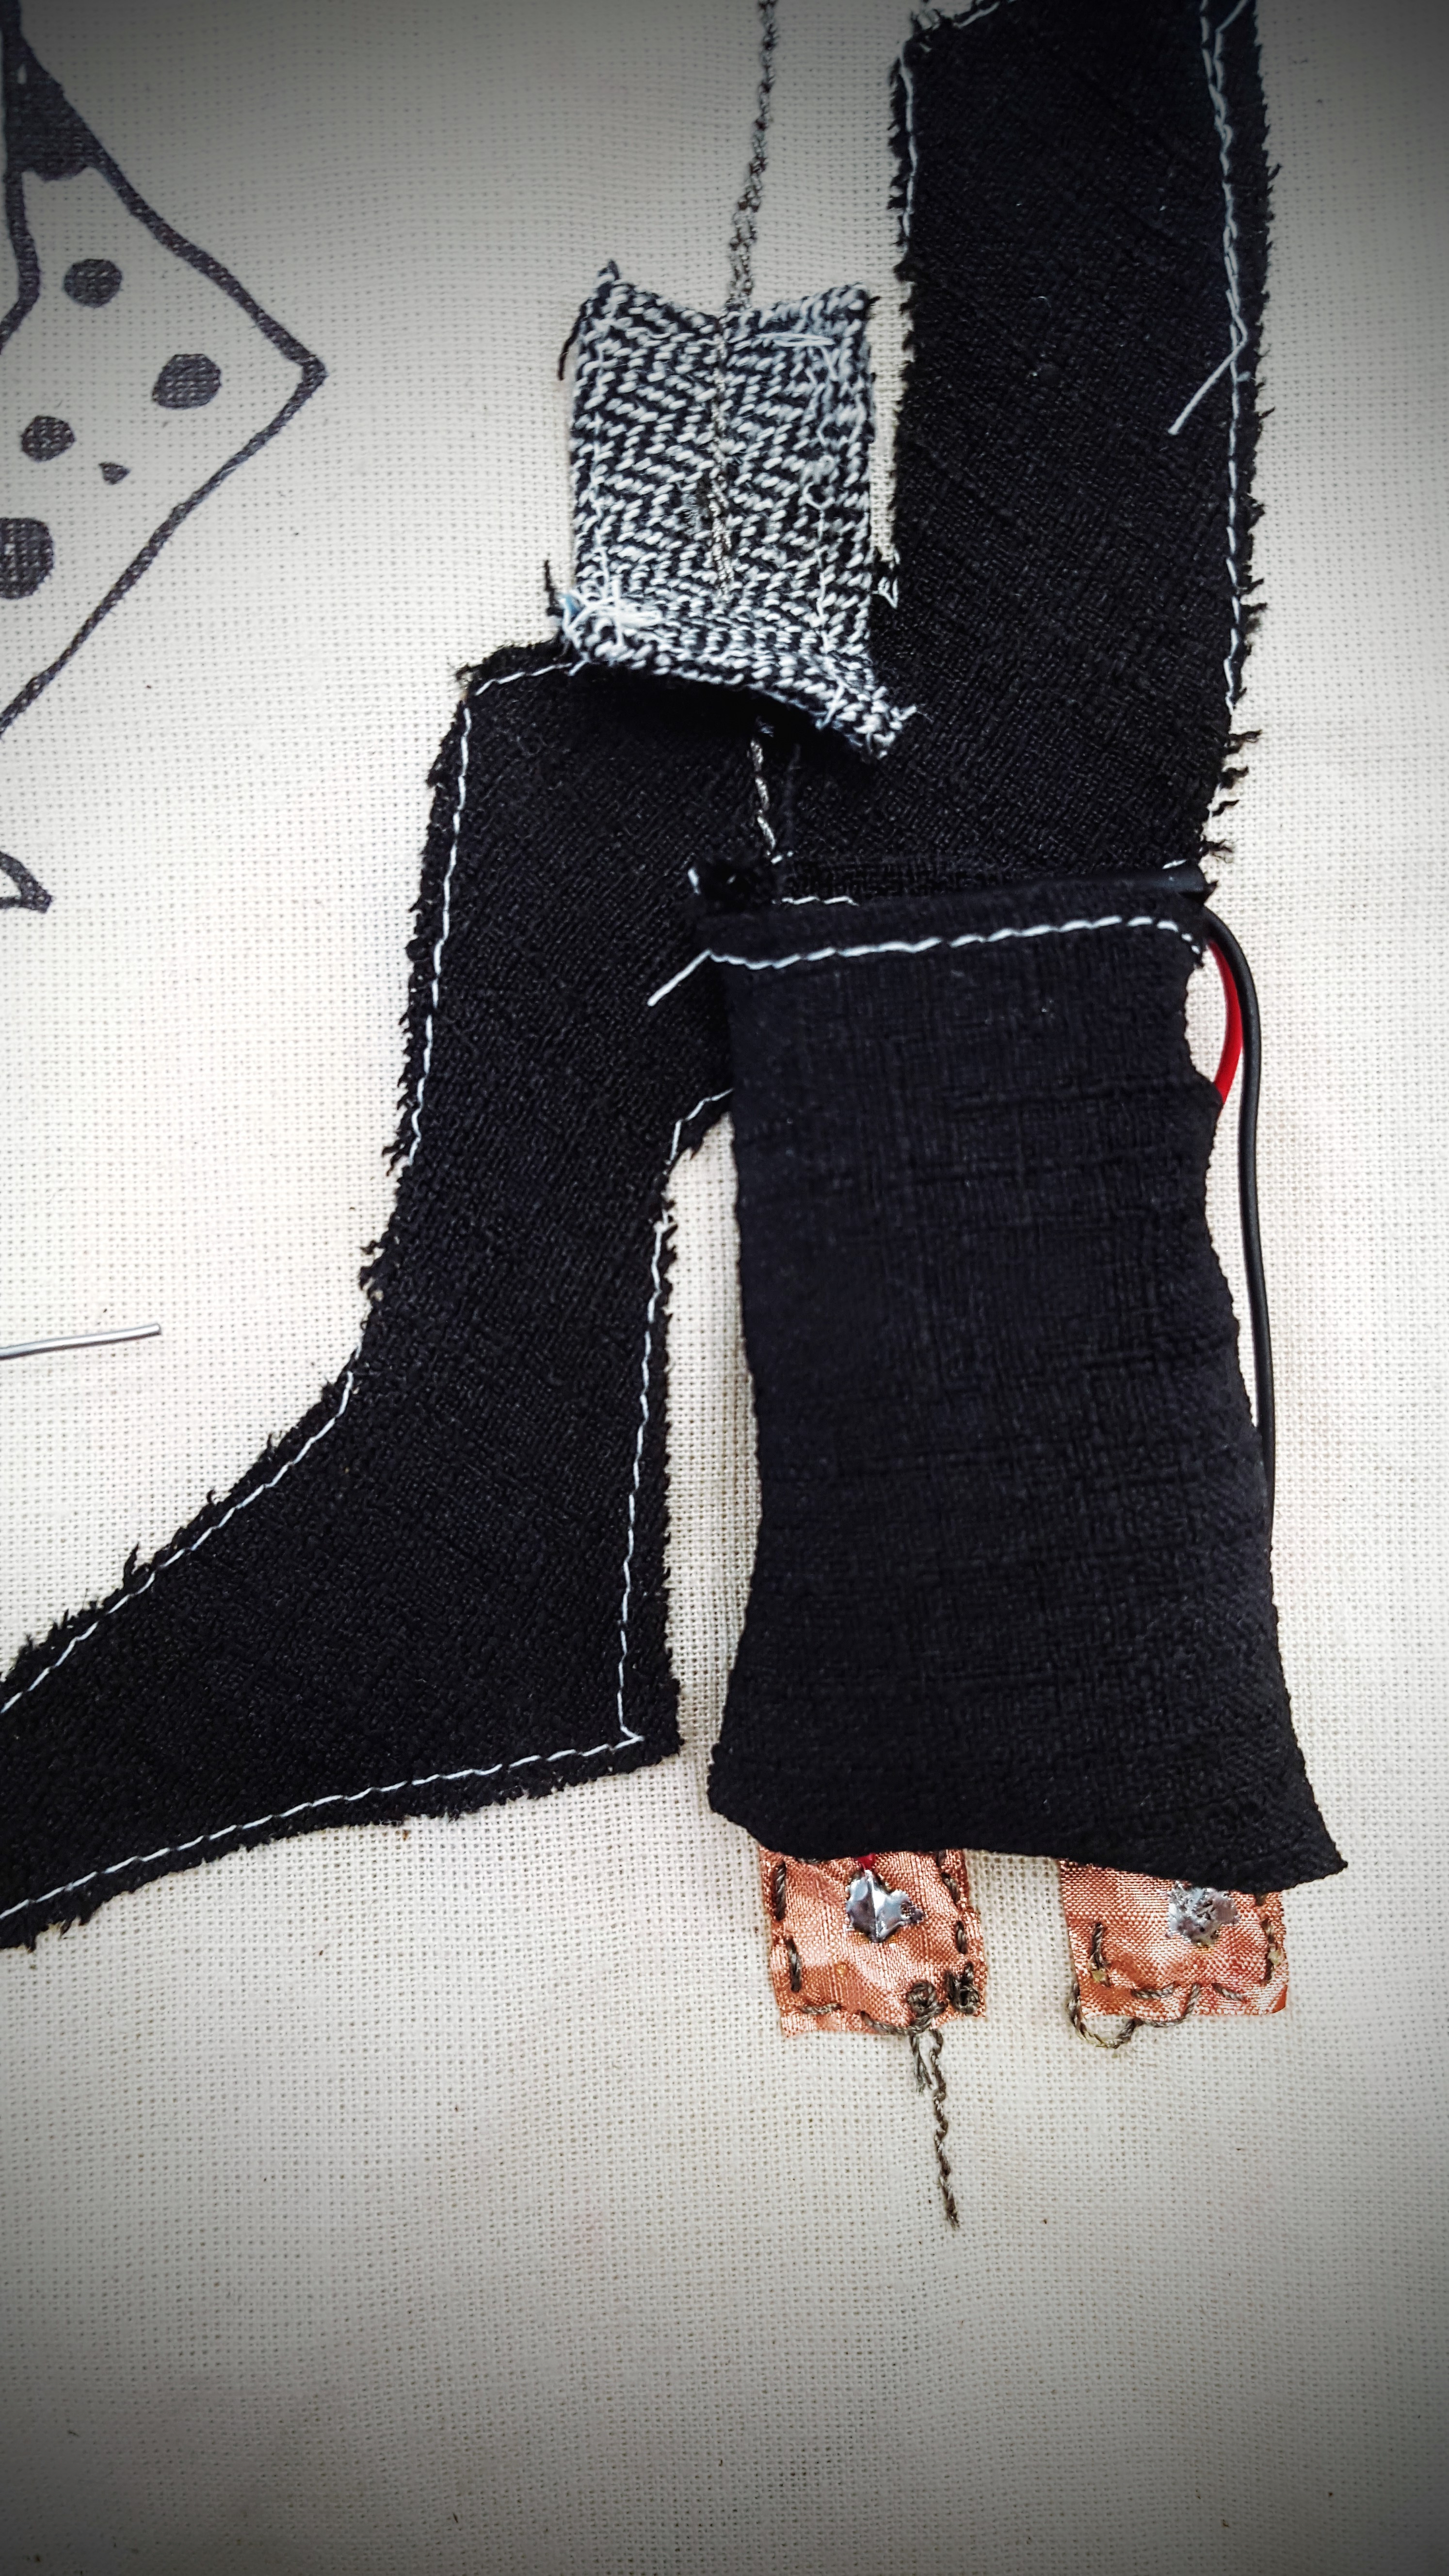
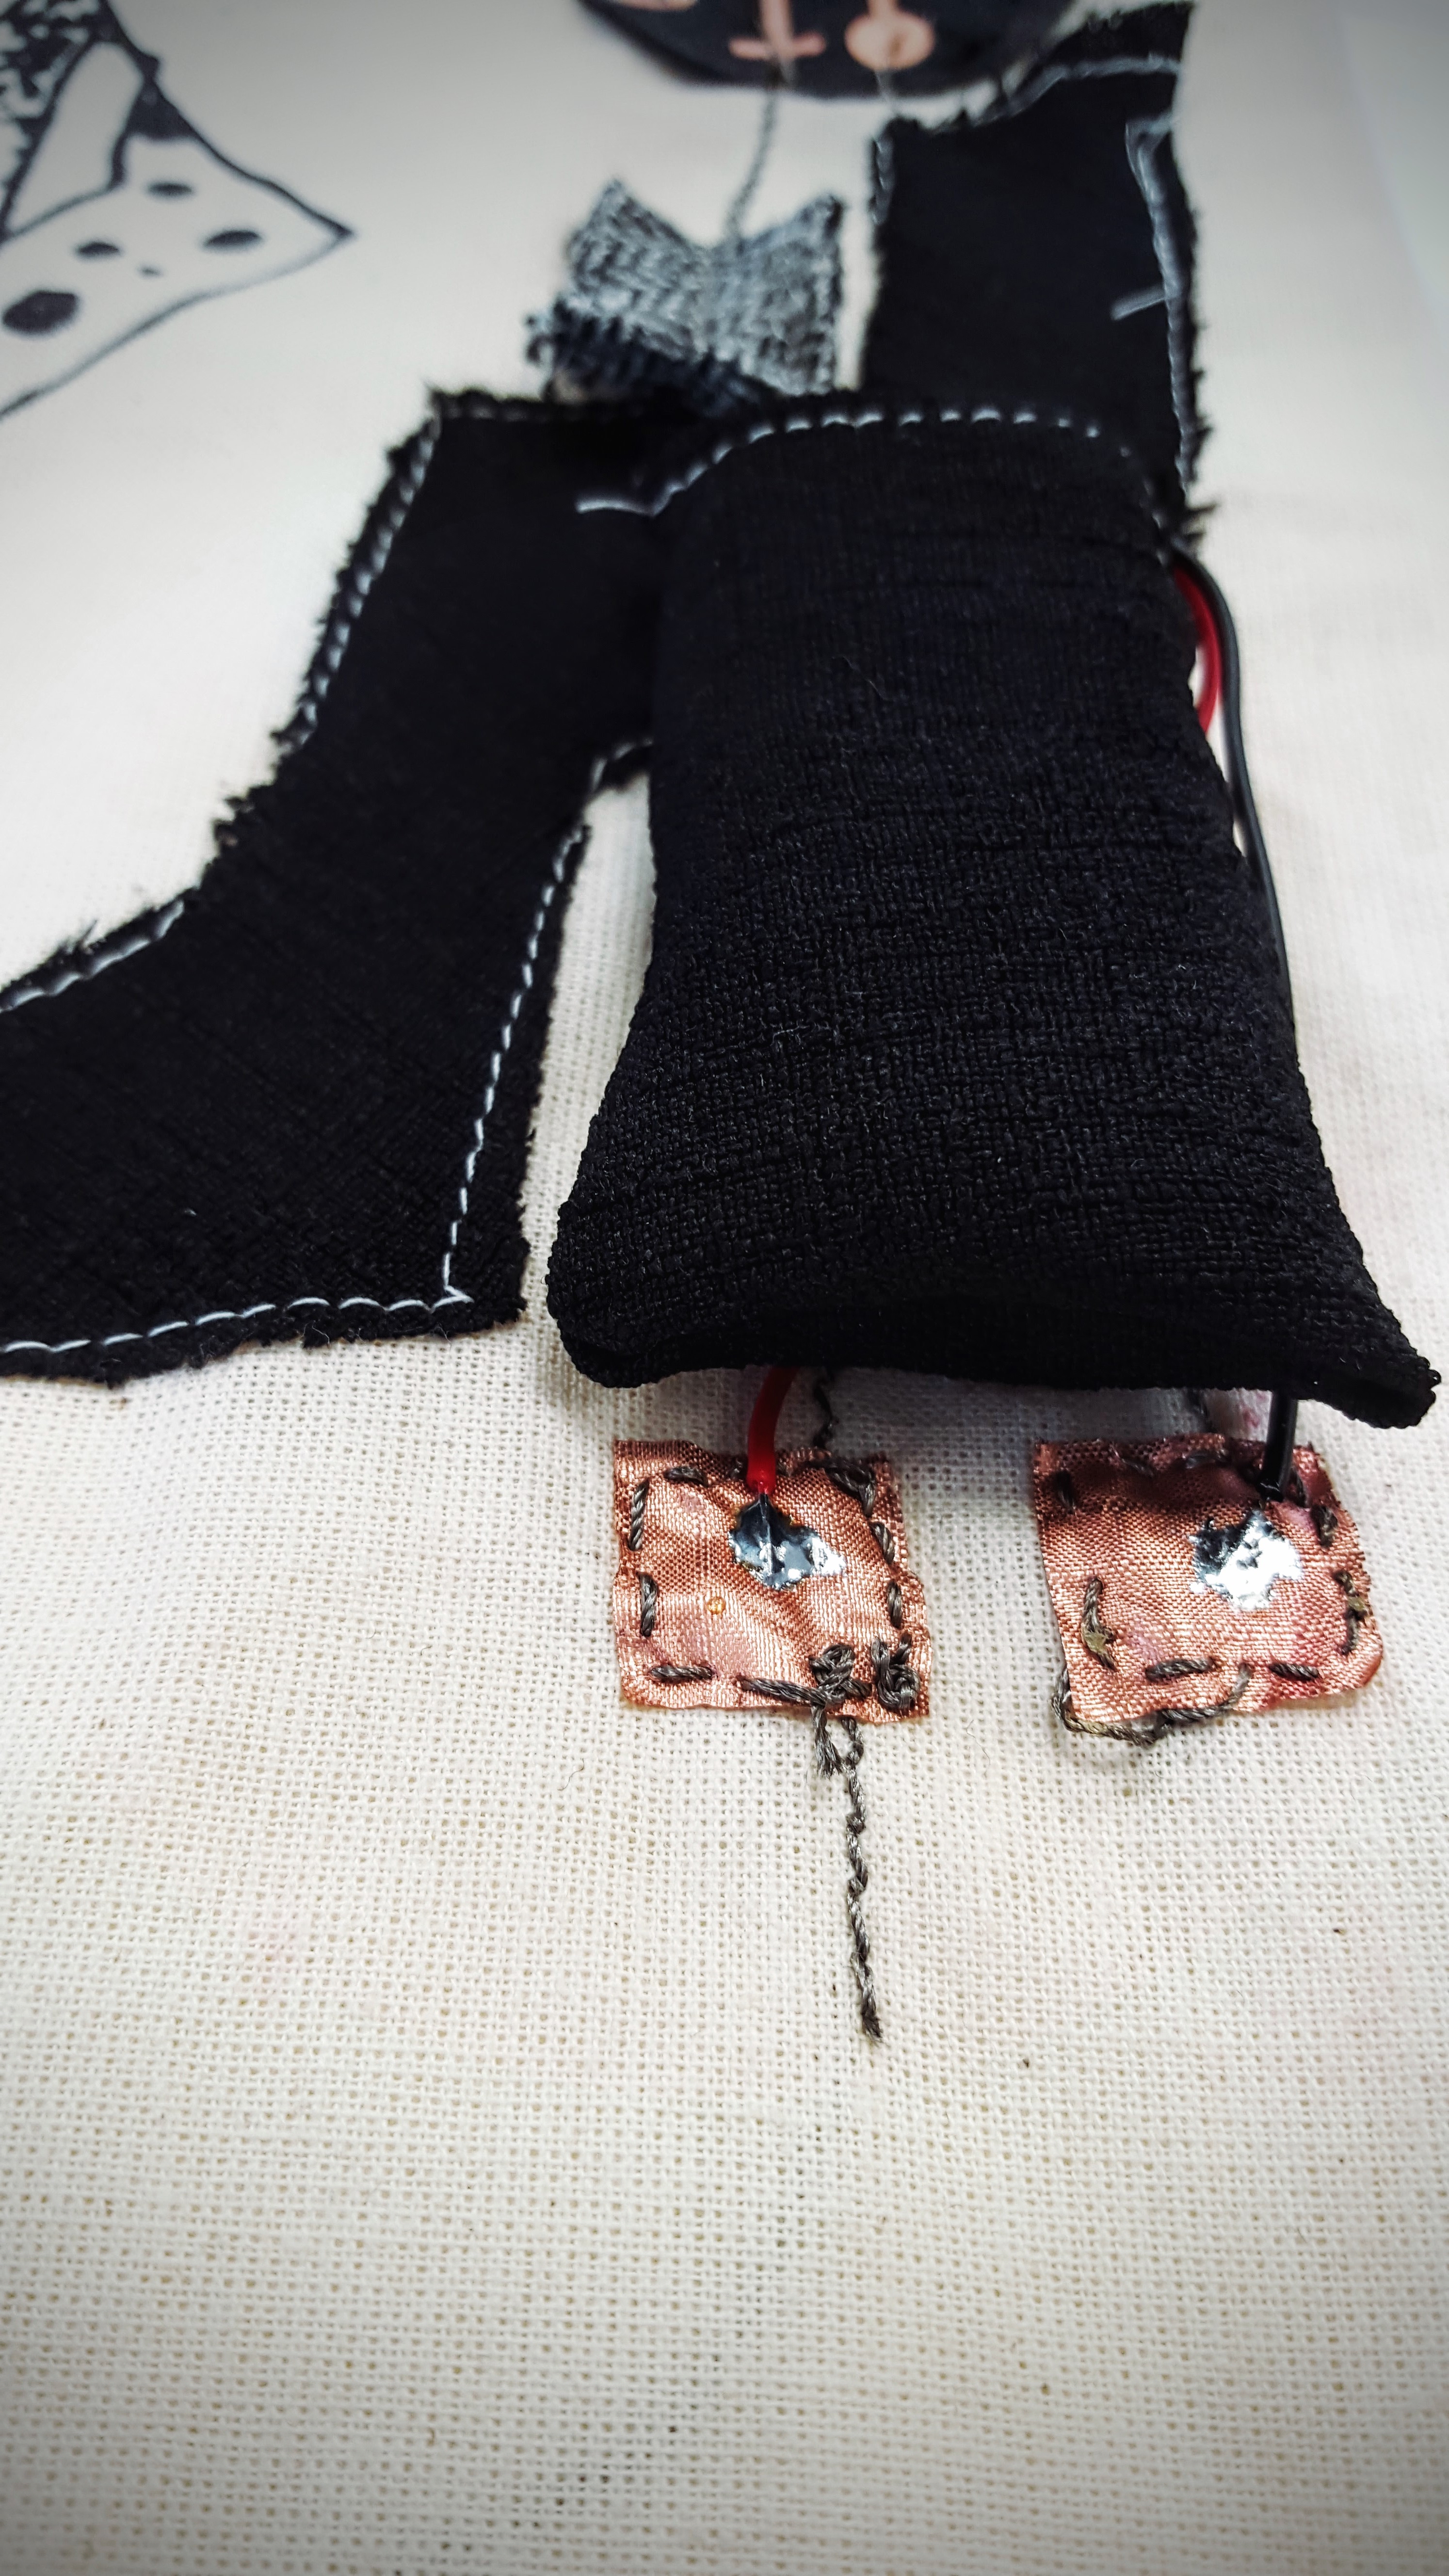
Pressure button made out of conductive fabric. First layer is normal fabric, like neoprene. The second one is a piece of conductive fabric (silver one) that is then covered by a resistive fabric made out of carbon. On the other half of the ray, another piece of conductive fabric is sew. Then the two sides are put together.
ruler, sketchbook, scissors, foam, any type of fabric, conductive fabric, and resistive fabric, sewing needle, thread
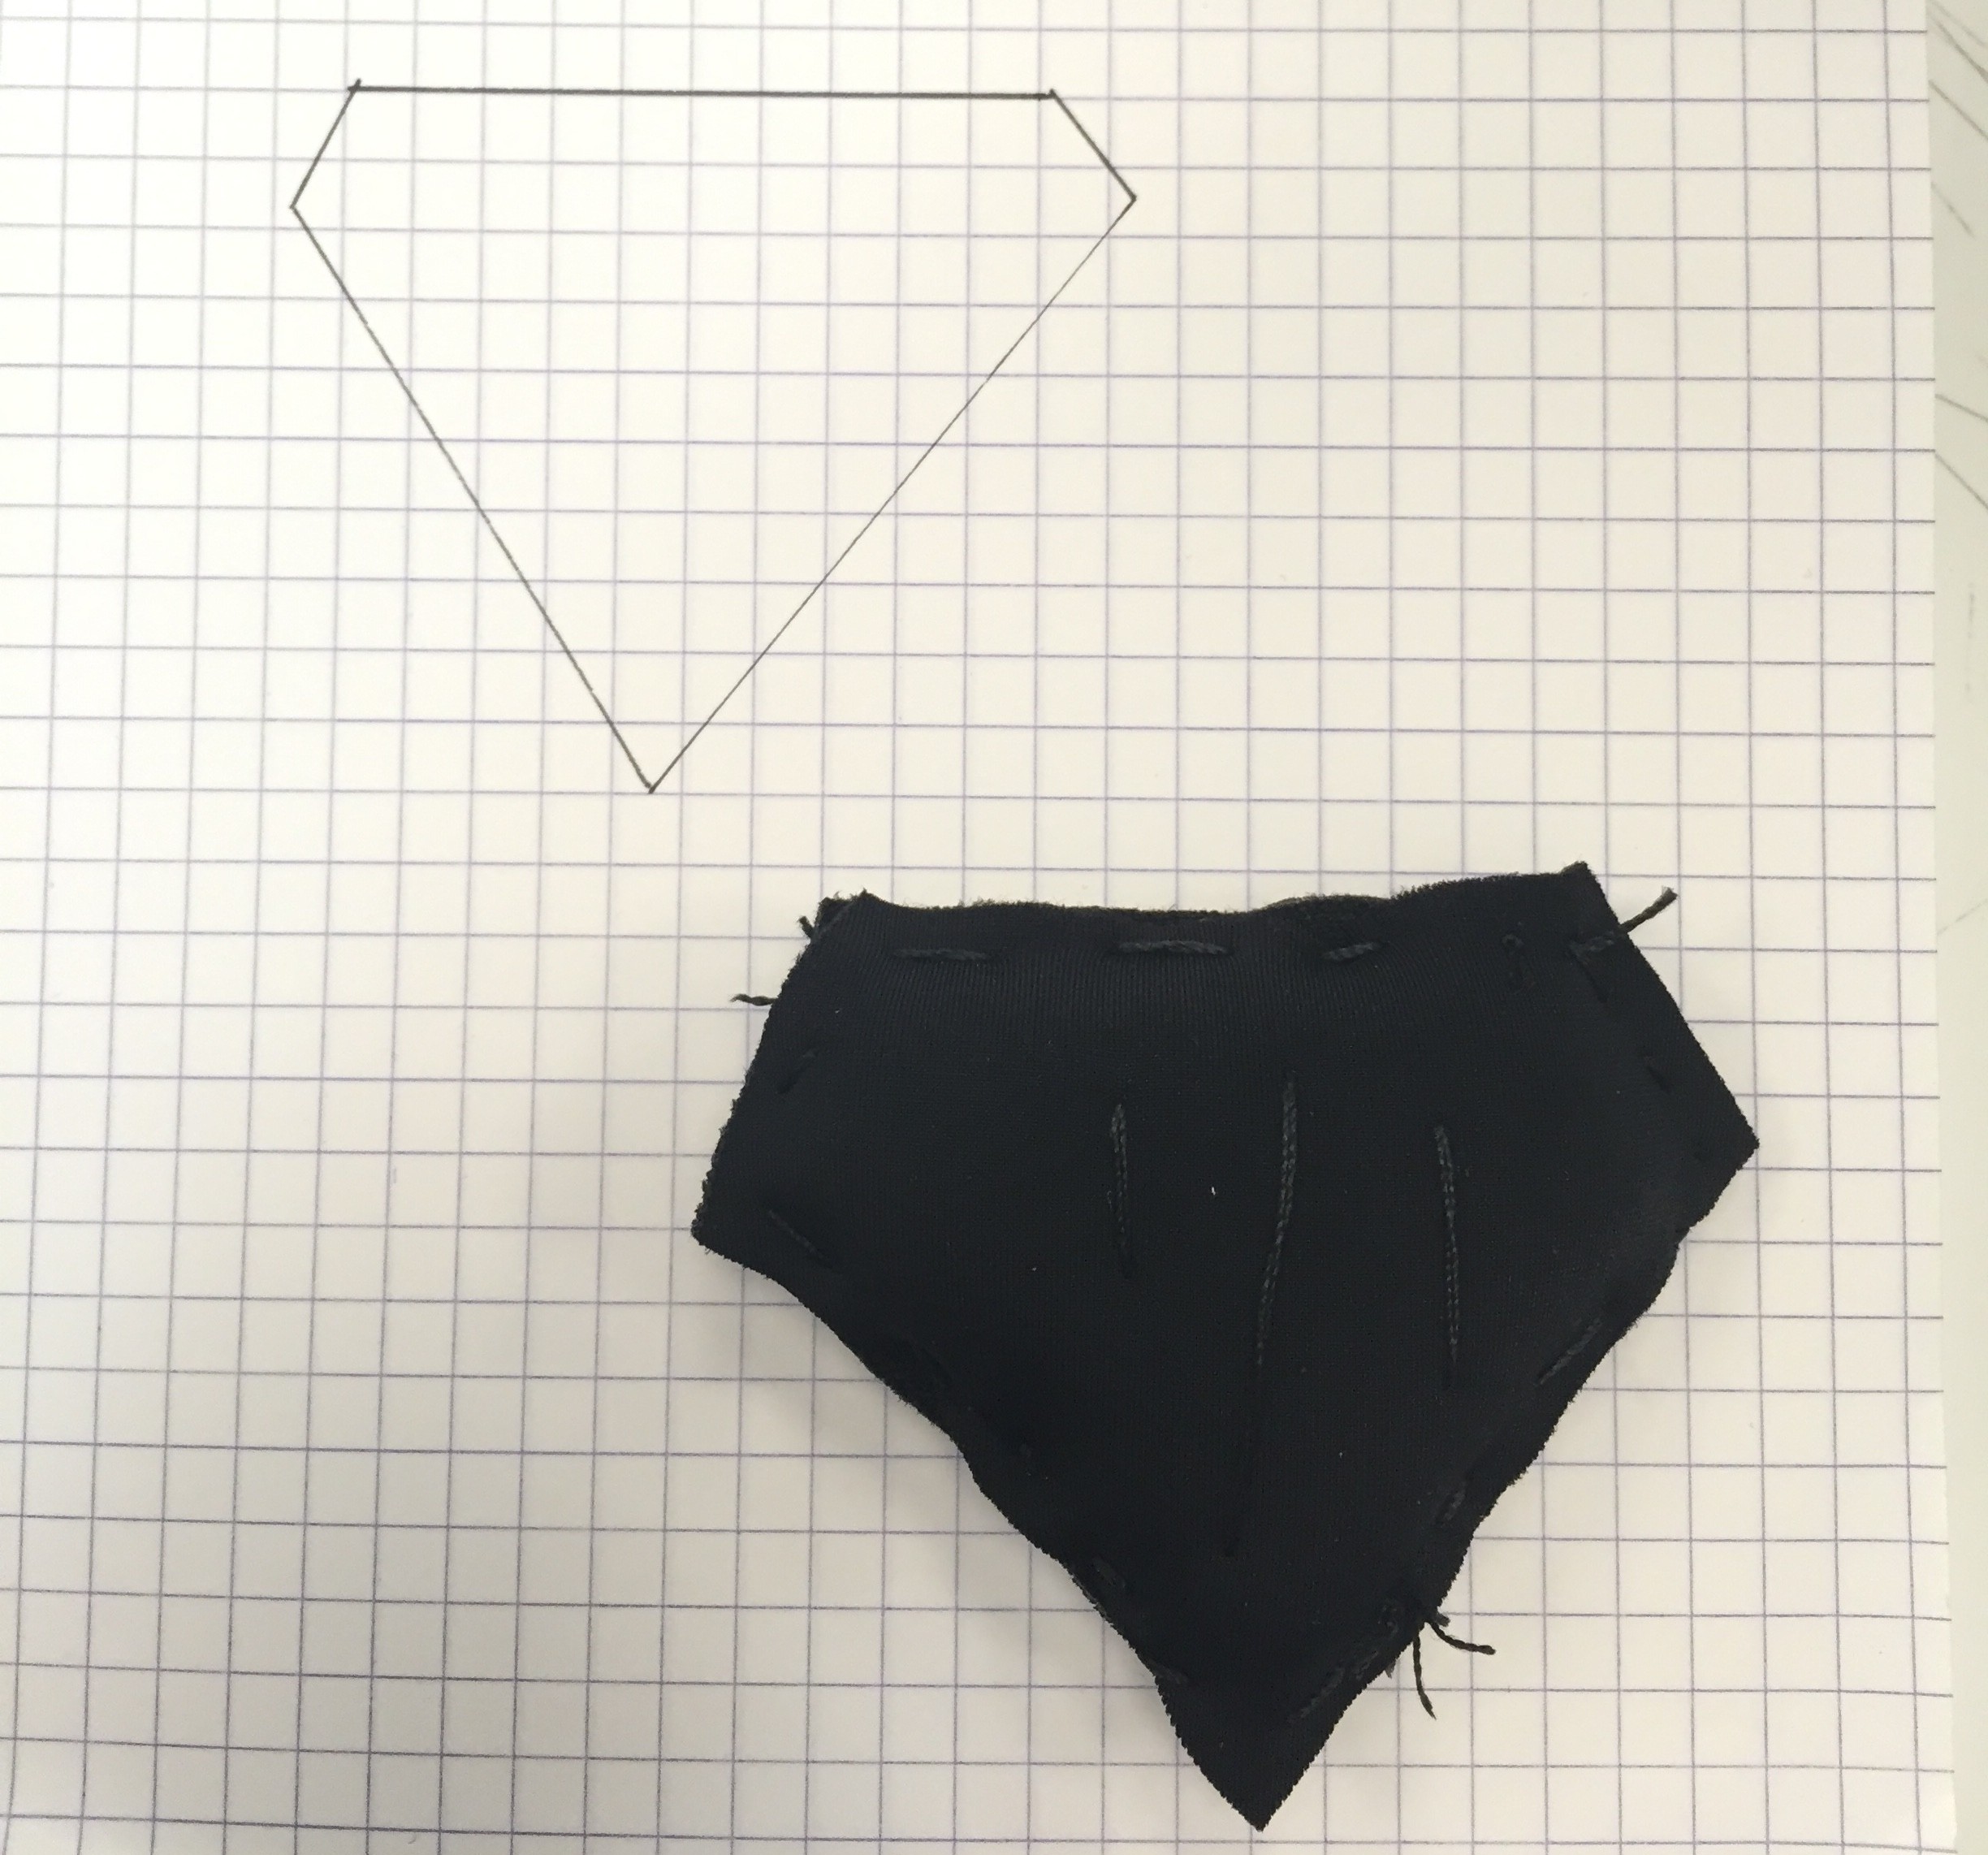
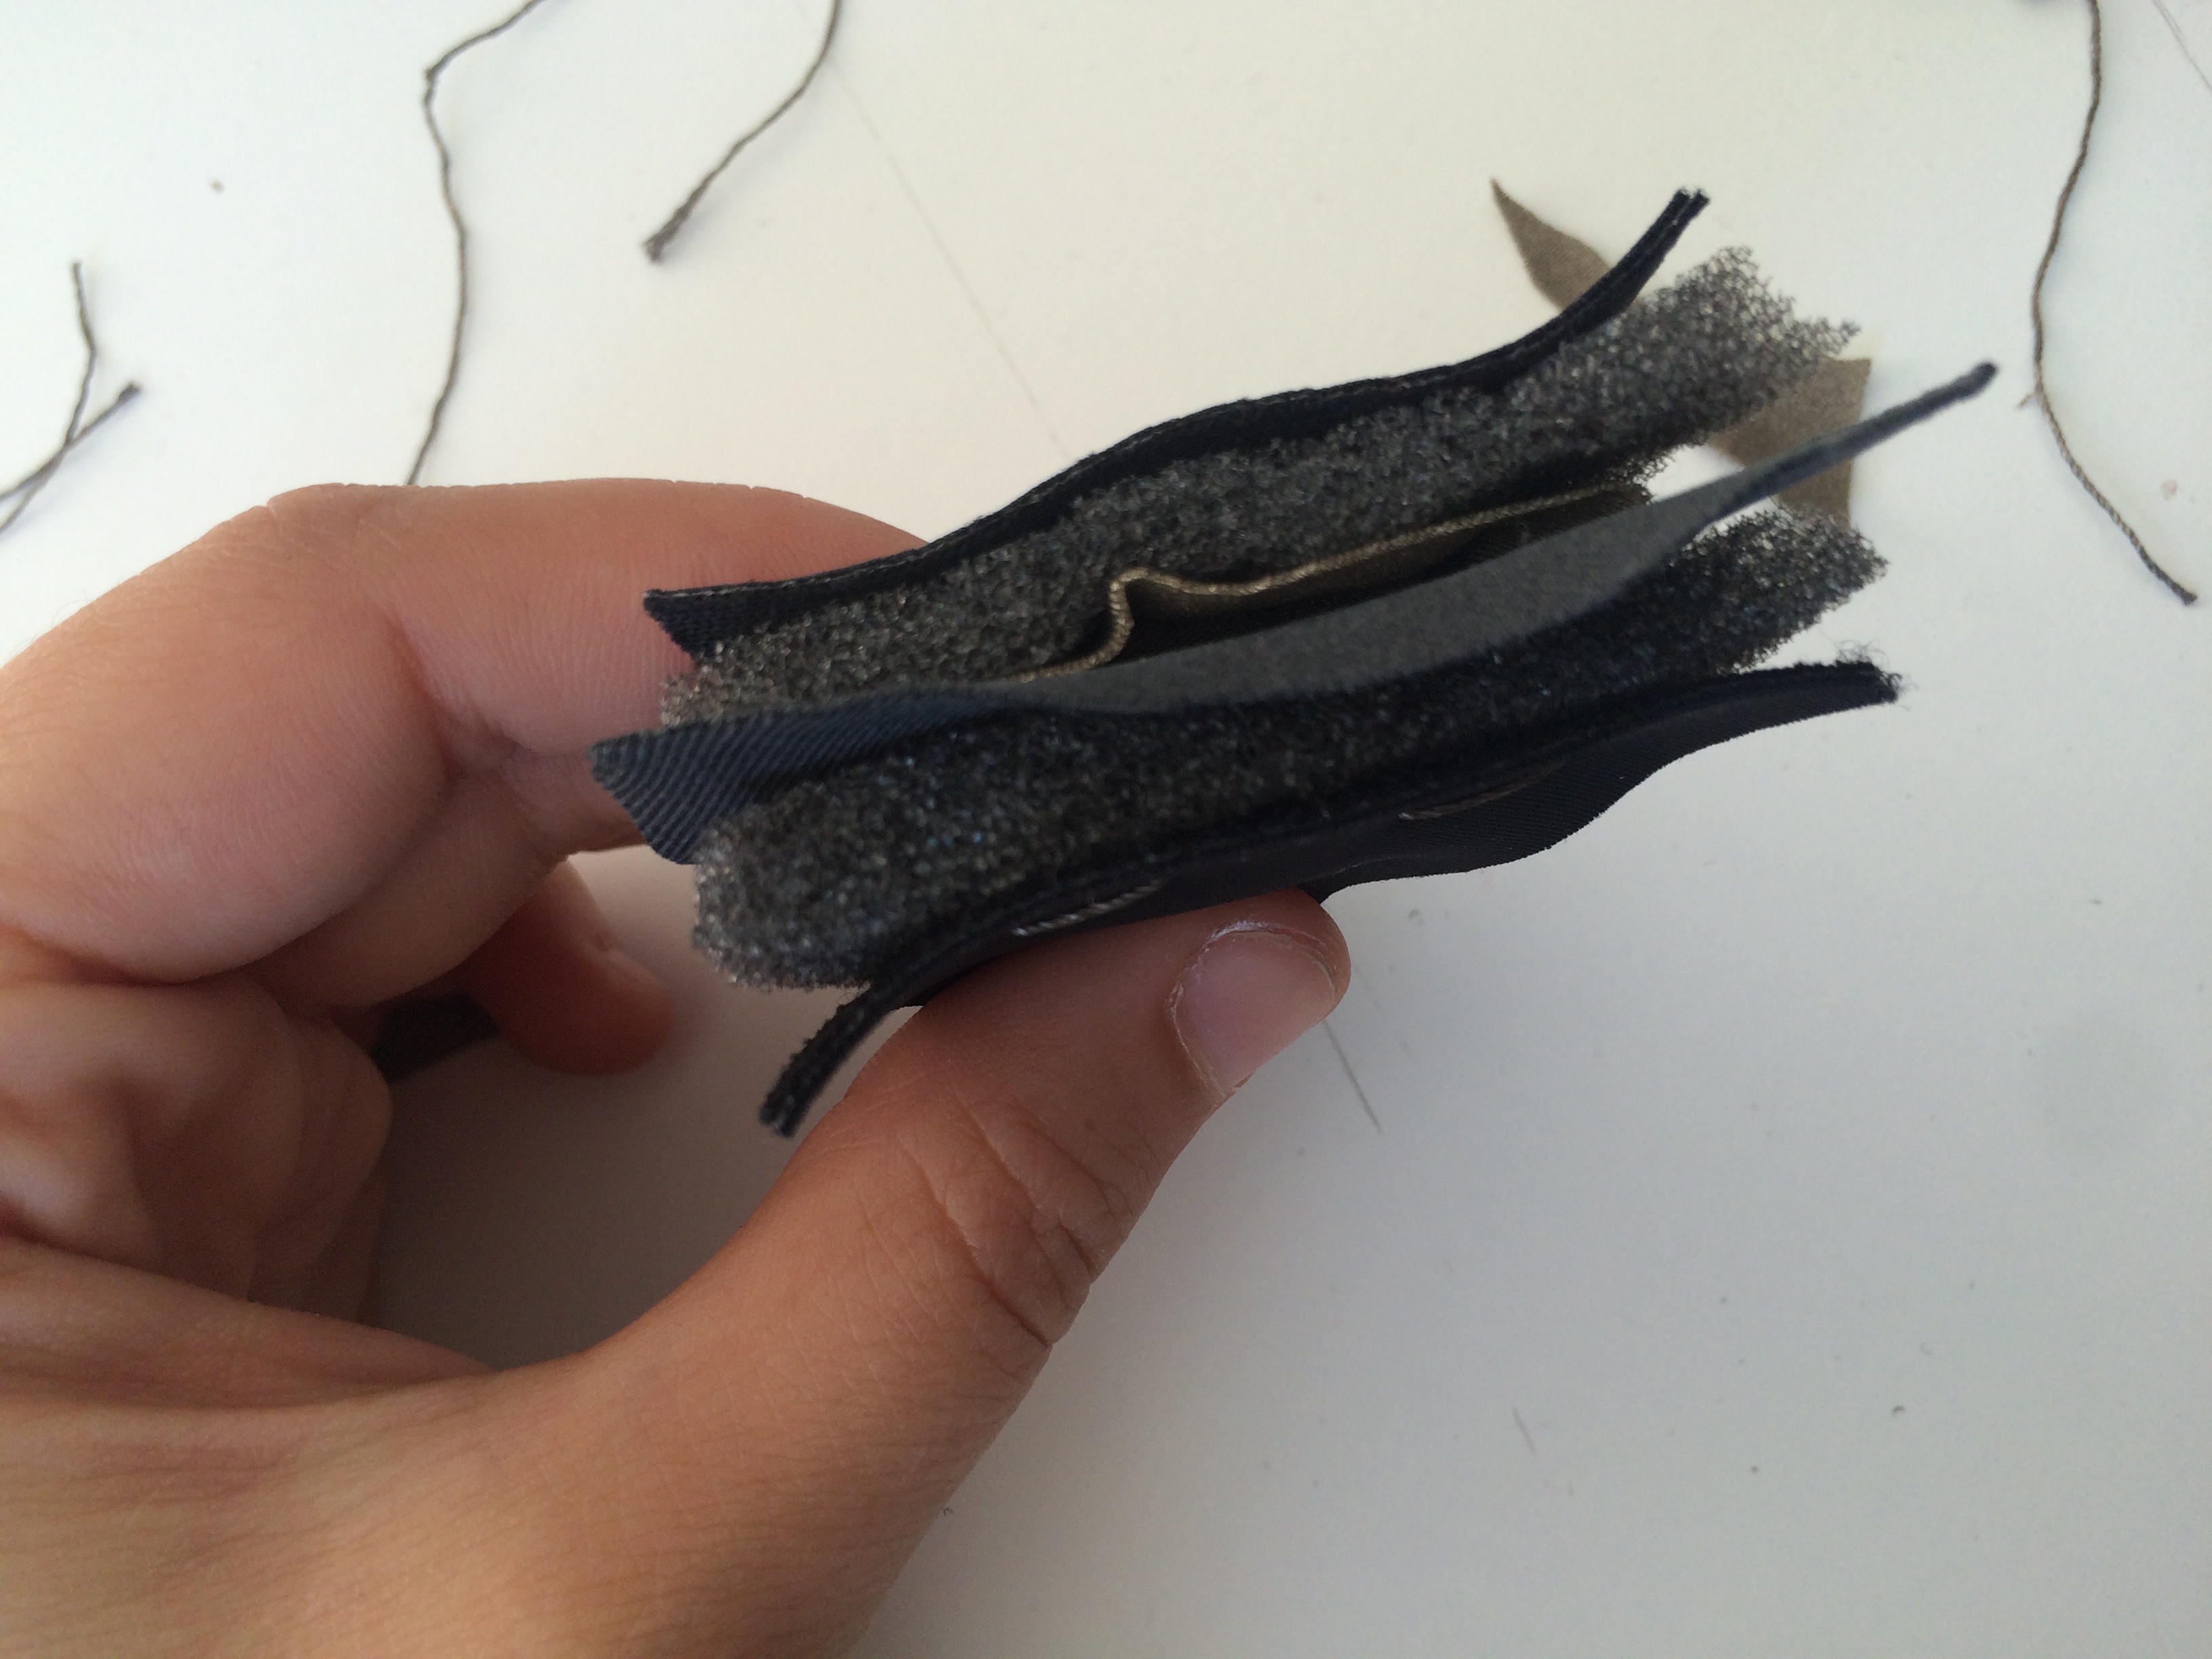
Step 1. Choose a shape, sketch, scale and cut out materials accordingly. Do not cut one large shape and sew together. It is crucial to create two parts which we will later sew together to create the one shape.
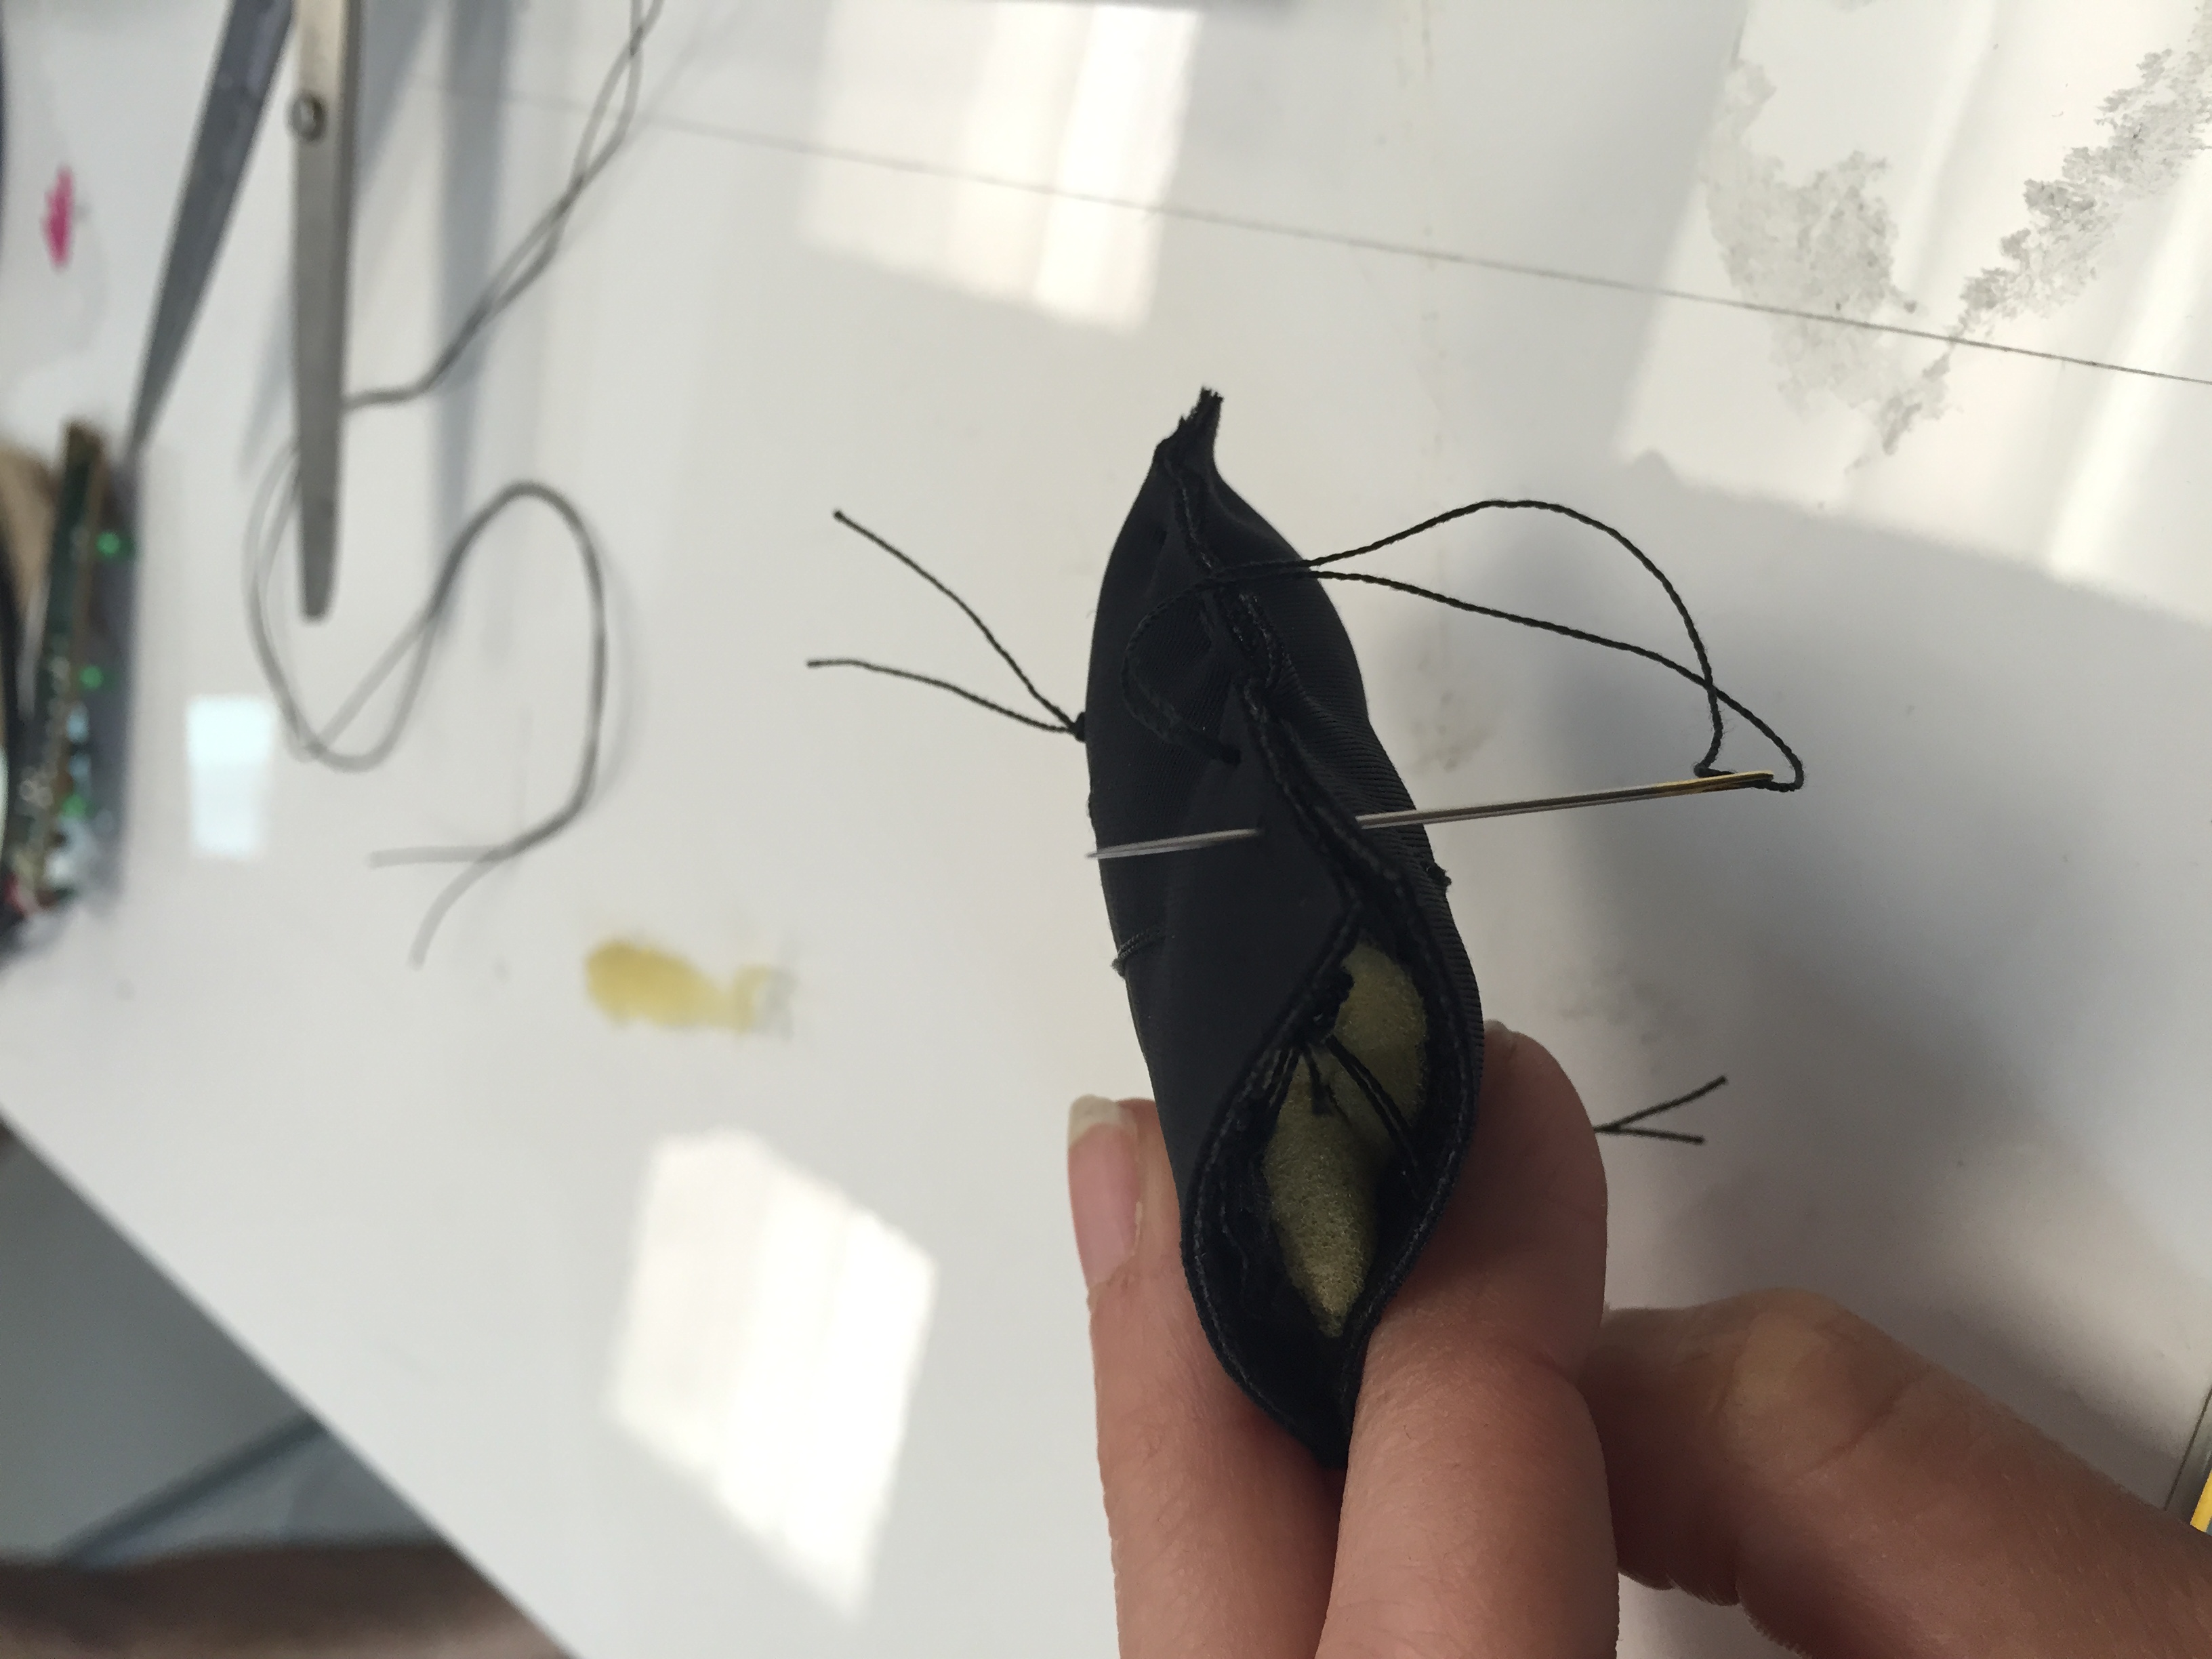
Step 2. Layer your materials in order of regular fabric, conductive fabric, restive fabric and lastly foam. Sew layers together and repeat.
Step 3. Sew the two halves of your shape together.
Create two separate shapes of your choice (I decided to make a triangle), because we’ll work on two layers of conductive fabric and they shouldn’t touch each other.
Follow this order: regular fabric, conductive fabric, restive fabric and foam. Sew them with conductive thread twice.
So this past week, we worked on touch sensors made out of textiles. It was interesting to learn that you can create electronics from seemingly simple fabric, but the possibilities are endless with conductive fabric.
So for this project, I layered my fabric and sponges and sewed it all together (except for the main resistive piece in the middle because I was unsure where exactly to sew it, so I left it so I could move in the right position).
The first layer is nonconductive outside of two pieces of lycra, two pieces of foam, and then two pieces of (4 altogether) conductive silver fabric on top of the sponge, with the resistive piece of fabric right in the middle of it all, touching both sides of the conductive fabric.
Here’s what it looked like (I know my sewing skills could use some work, but it is all attached as I wanted):
So, that’s the touch sensor before I sewed it-I wanted to make sure it worked, so I did not sew it right away. So, when I checked it, it worked! So then I sewed all the pieces together.
The LilyPad Arduino is a variation of a classic arduino platform designed for e-textiles and wearables projects. It can be sewn to fabric and similarly mounted power supplies, sensors and actuators with conductive thread. It has been created by Leah Buechley at the MIT MediaLab in the High-Low Tech research group.
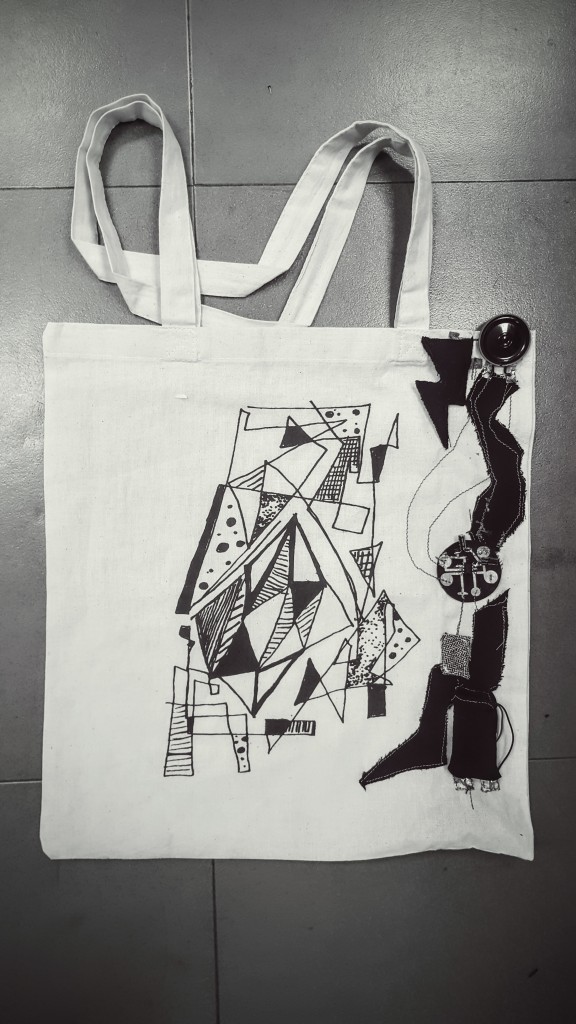
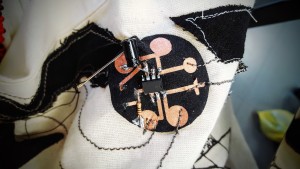
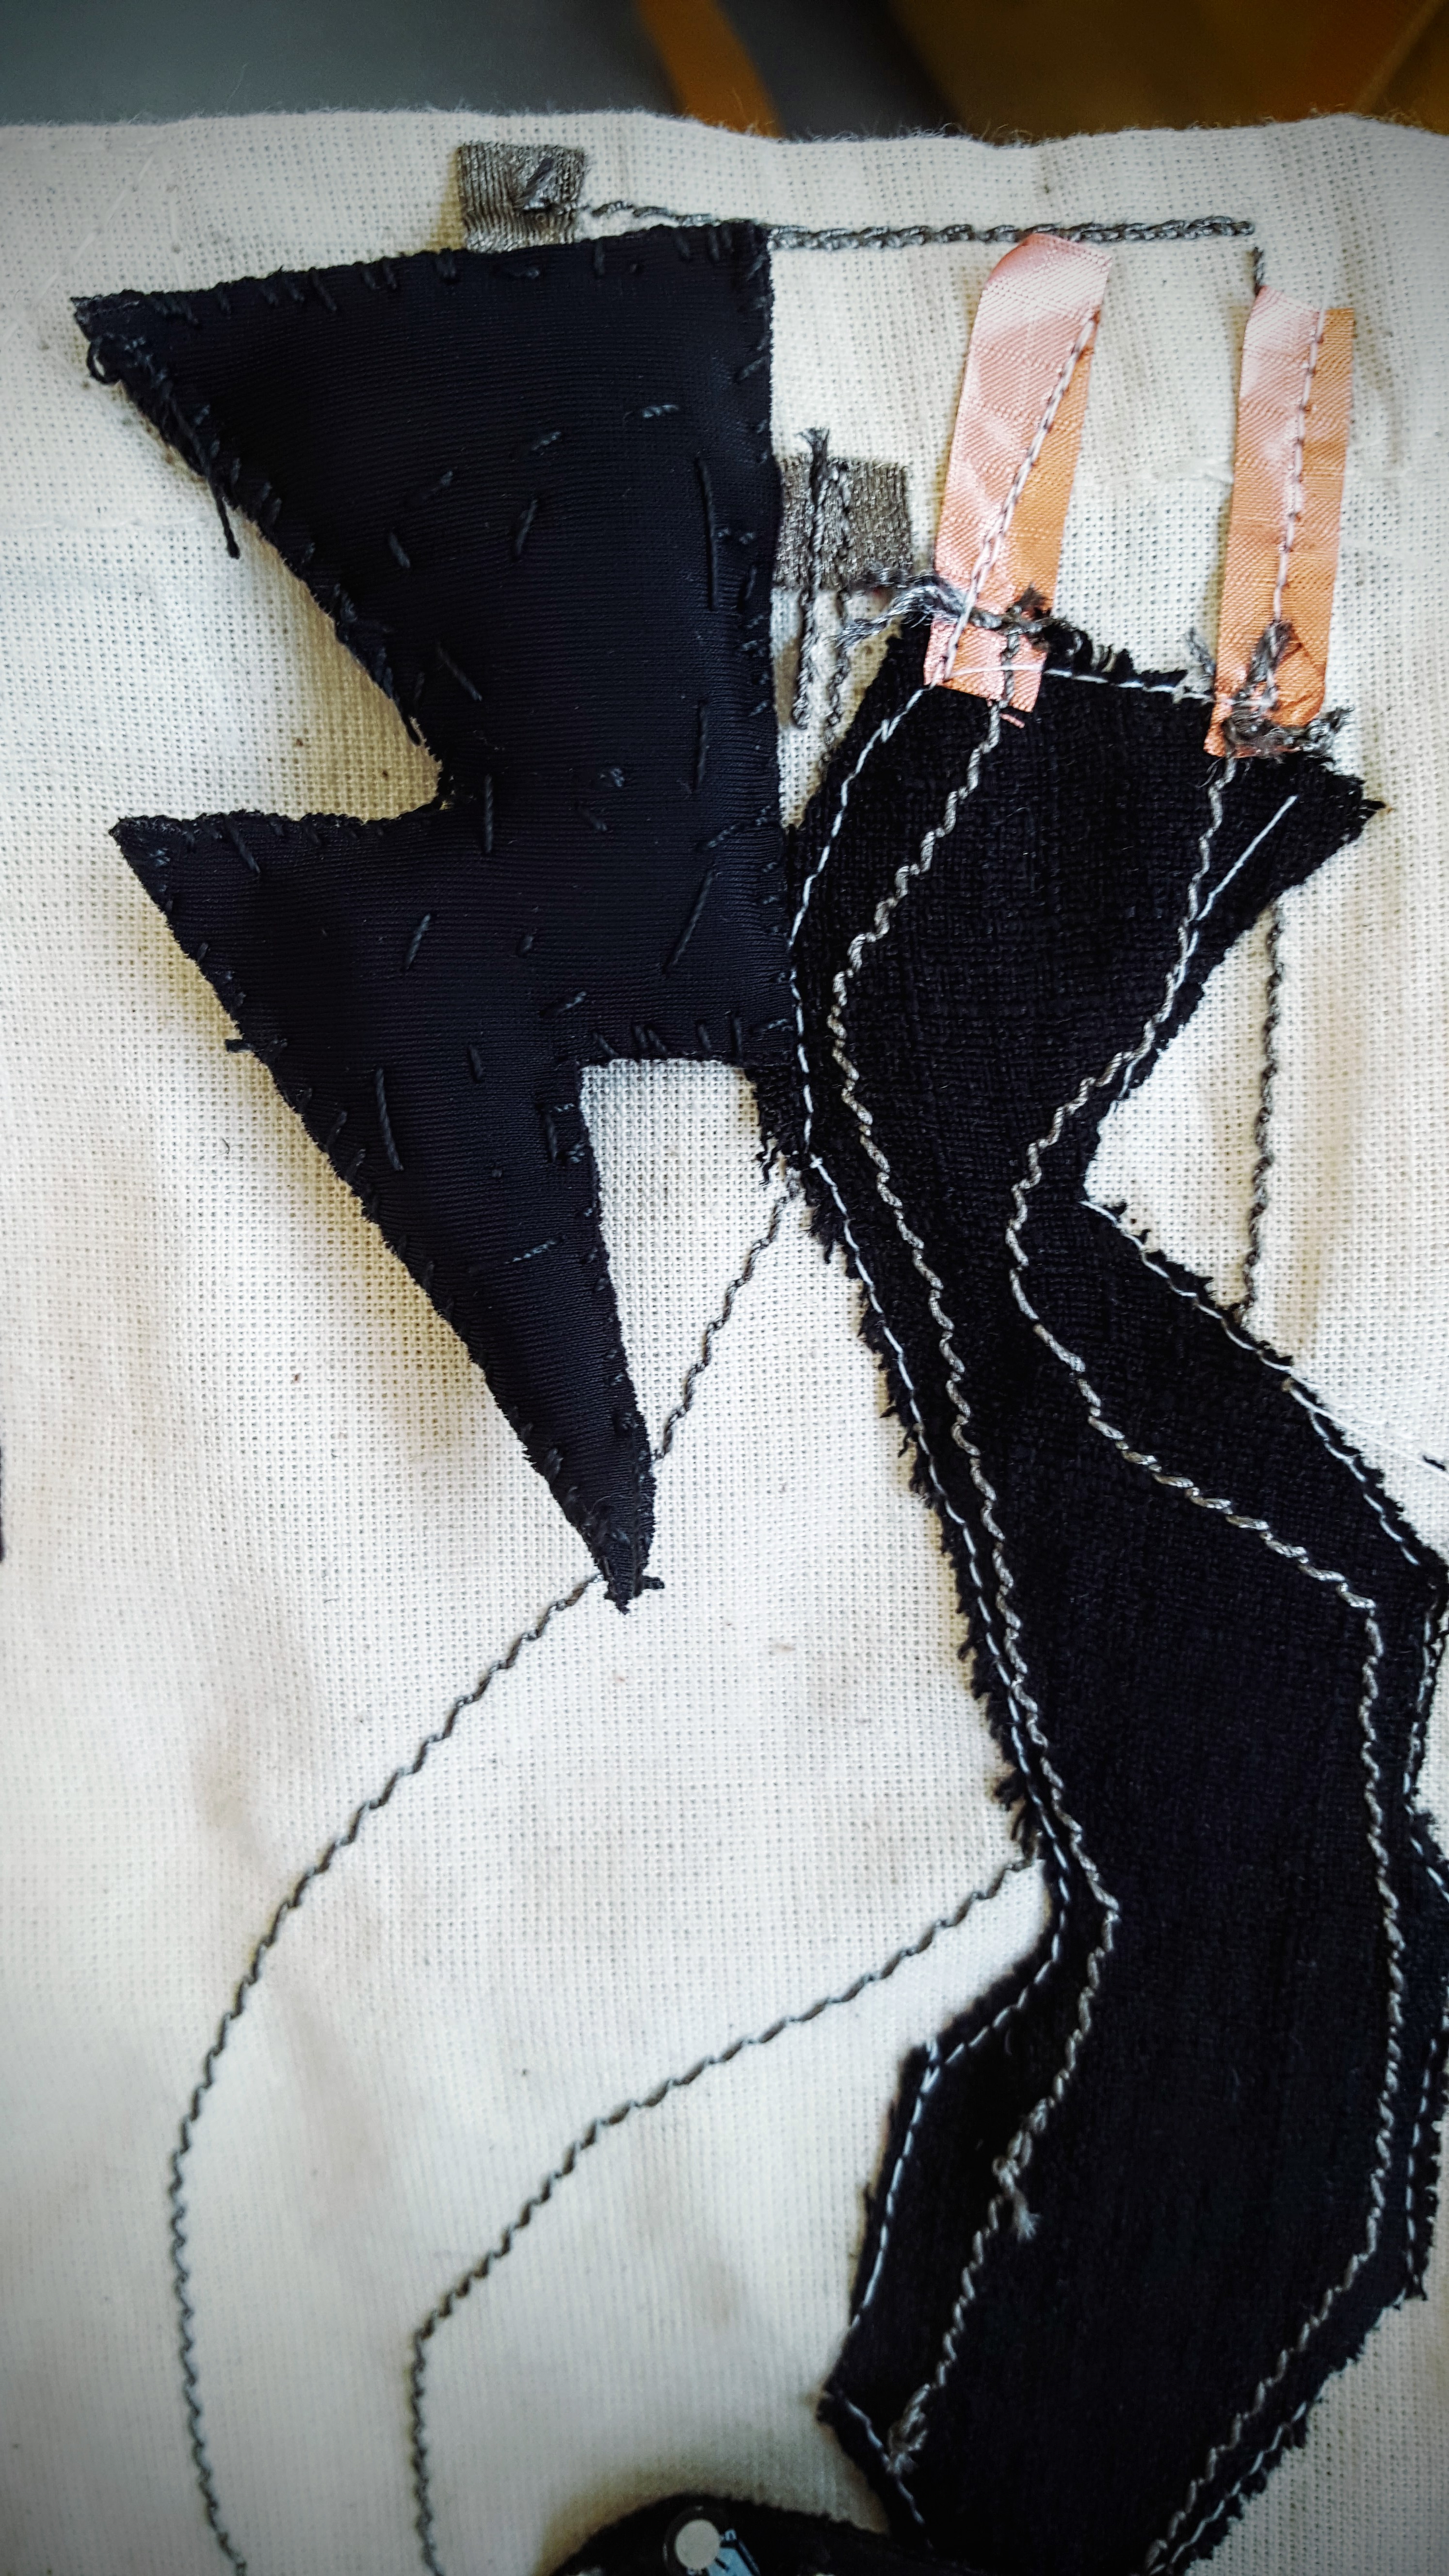
The ” I hate you – noisy totebag” is made with a Textilo: circuit fabric board ideal for sewing on garment.
A pressure sensor is attached on the side with the resistance with conductive thread:
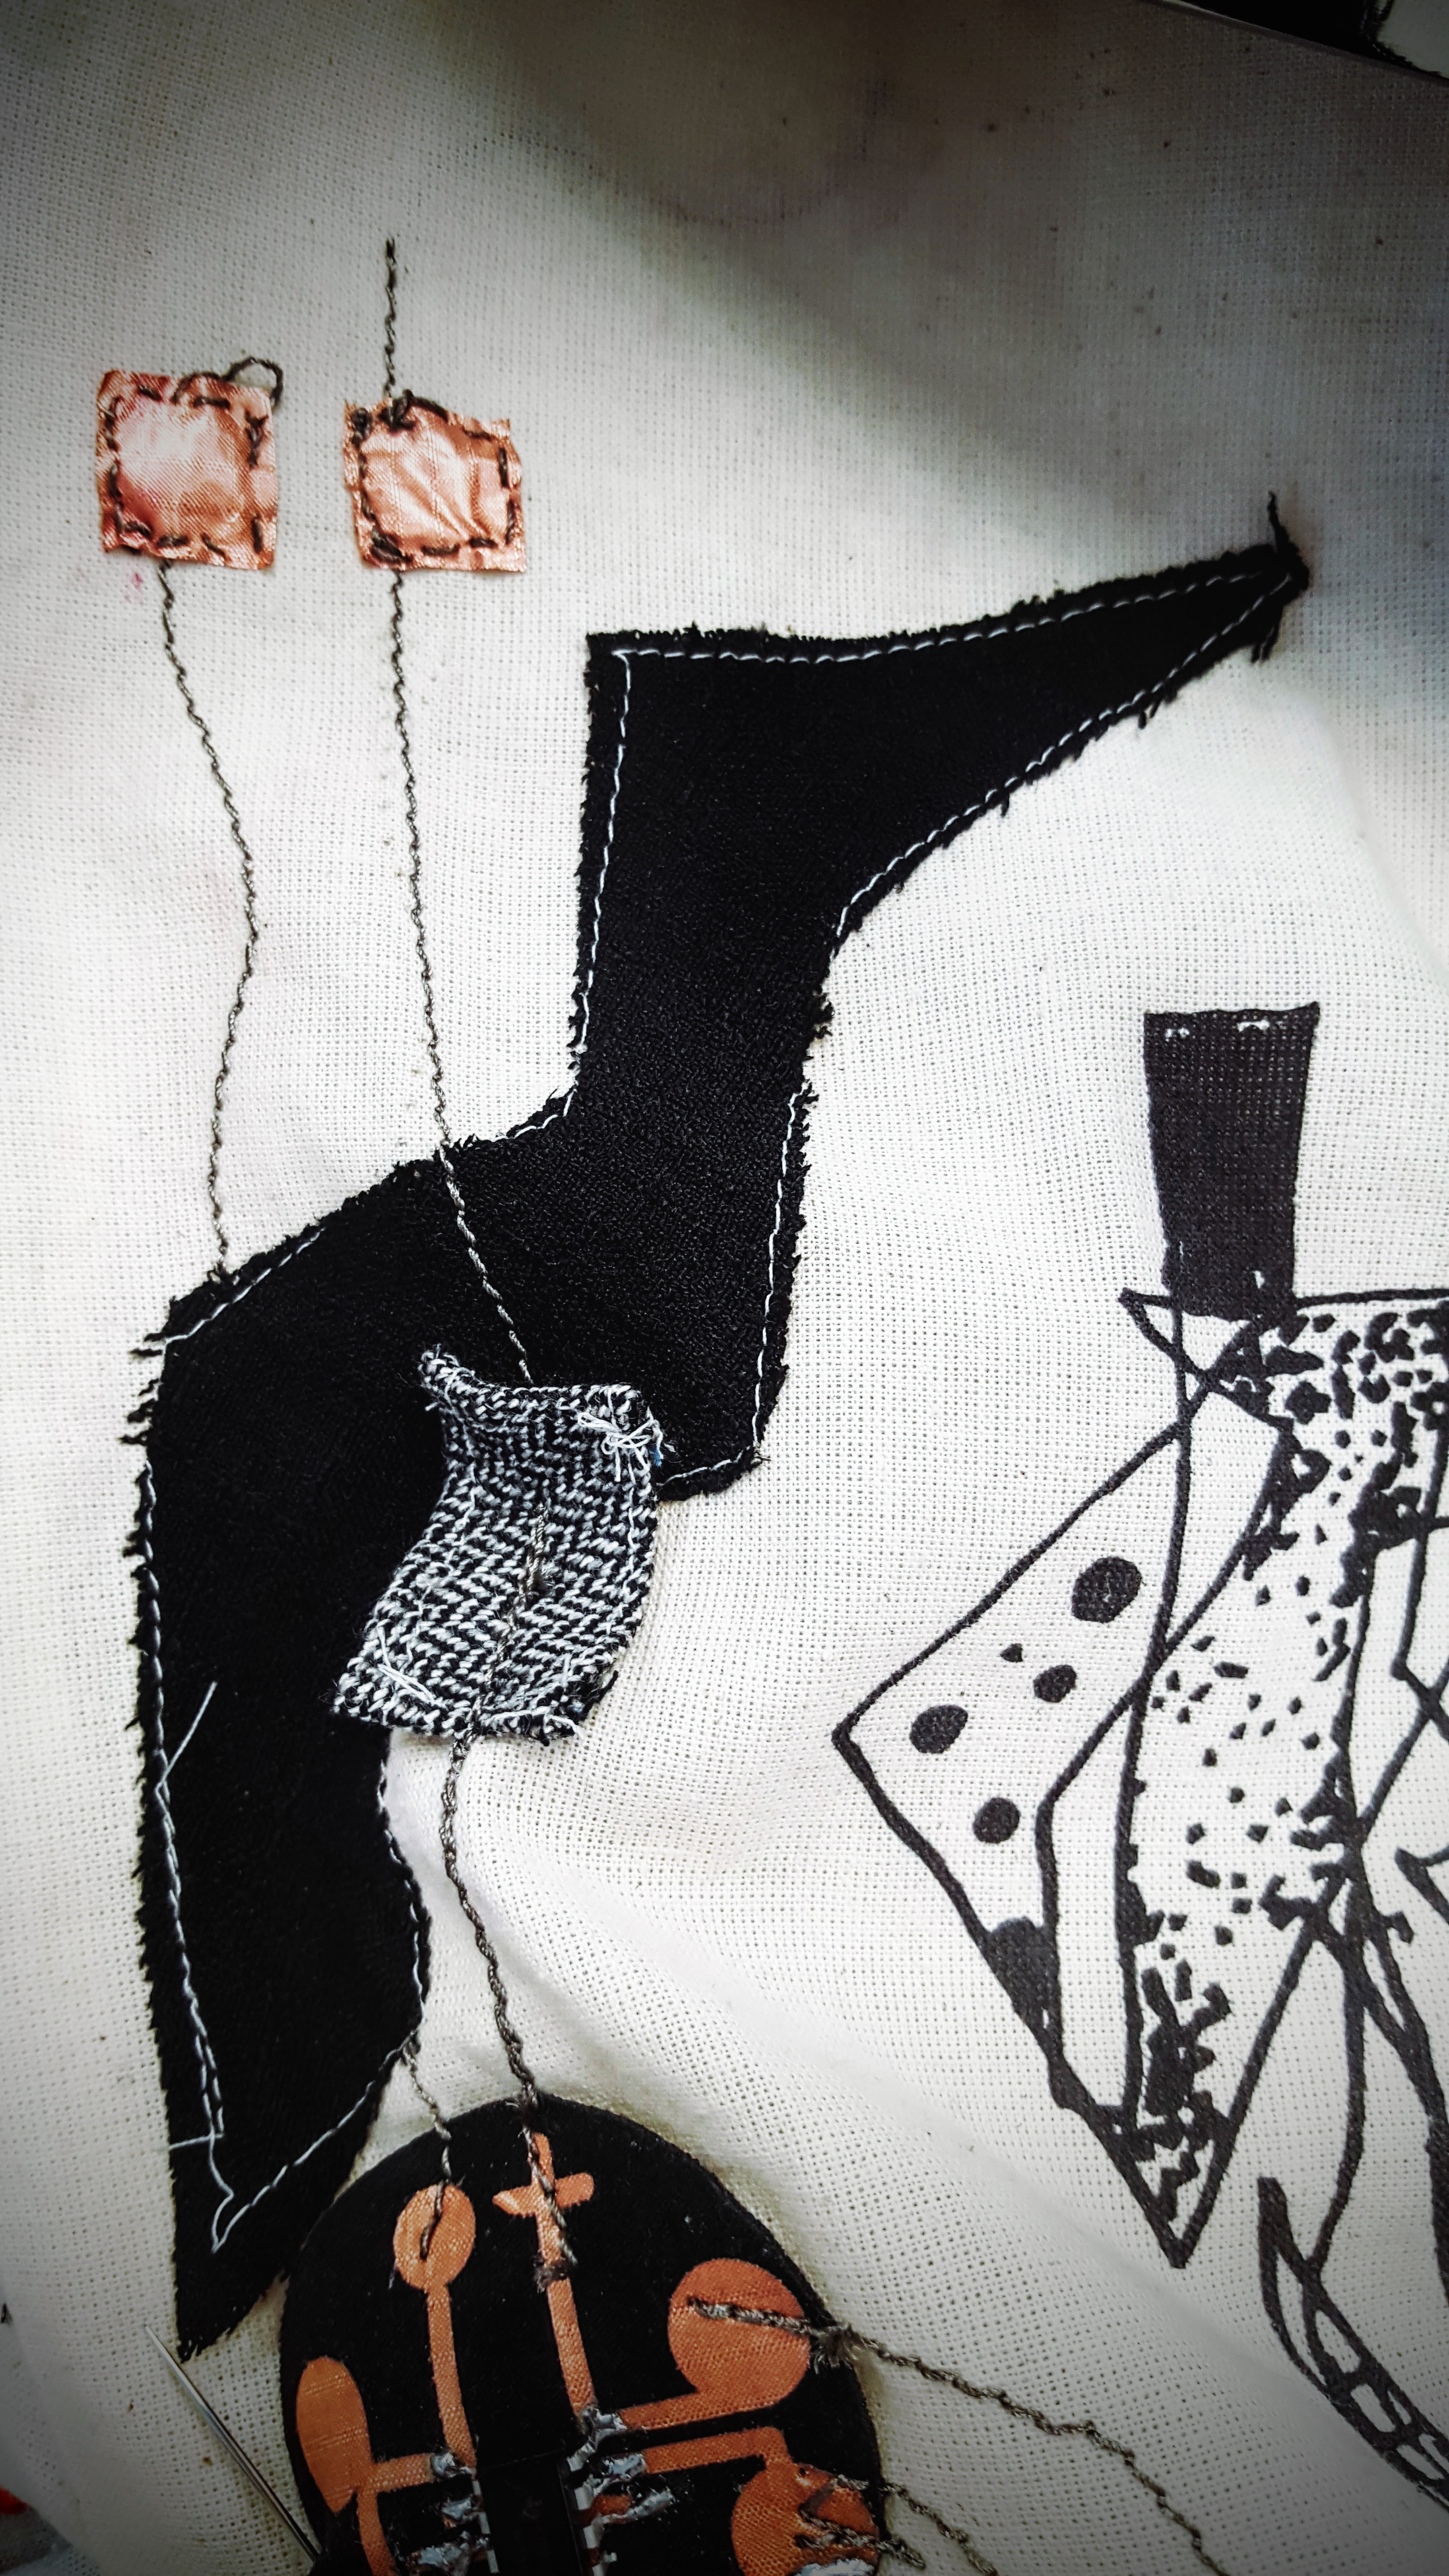
The side with the capacitors is connected to a little speaker with conductive thread. Adding extra bits of copper fabric allows to solder the speaker. To maintain it in place and avoid it from falling, I also added some velcro.
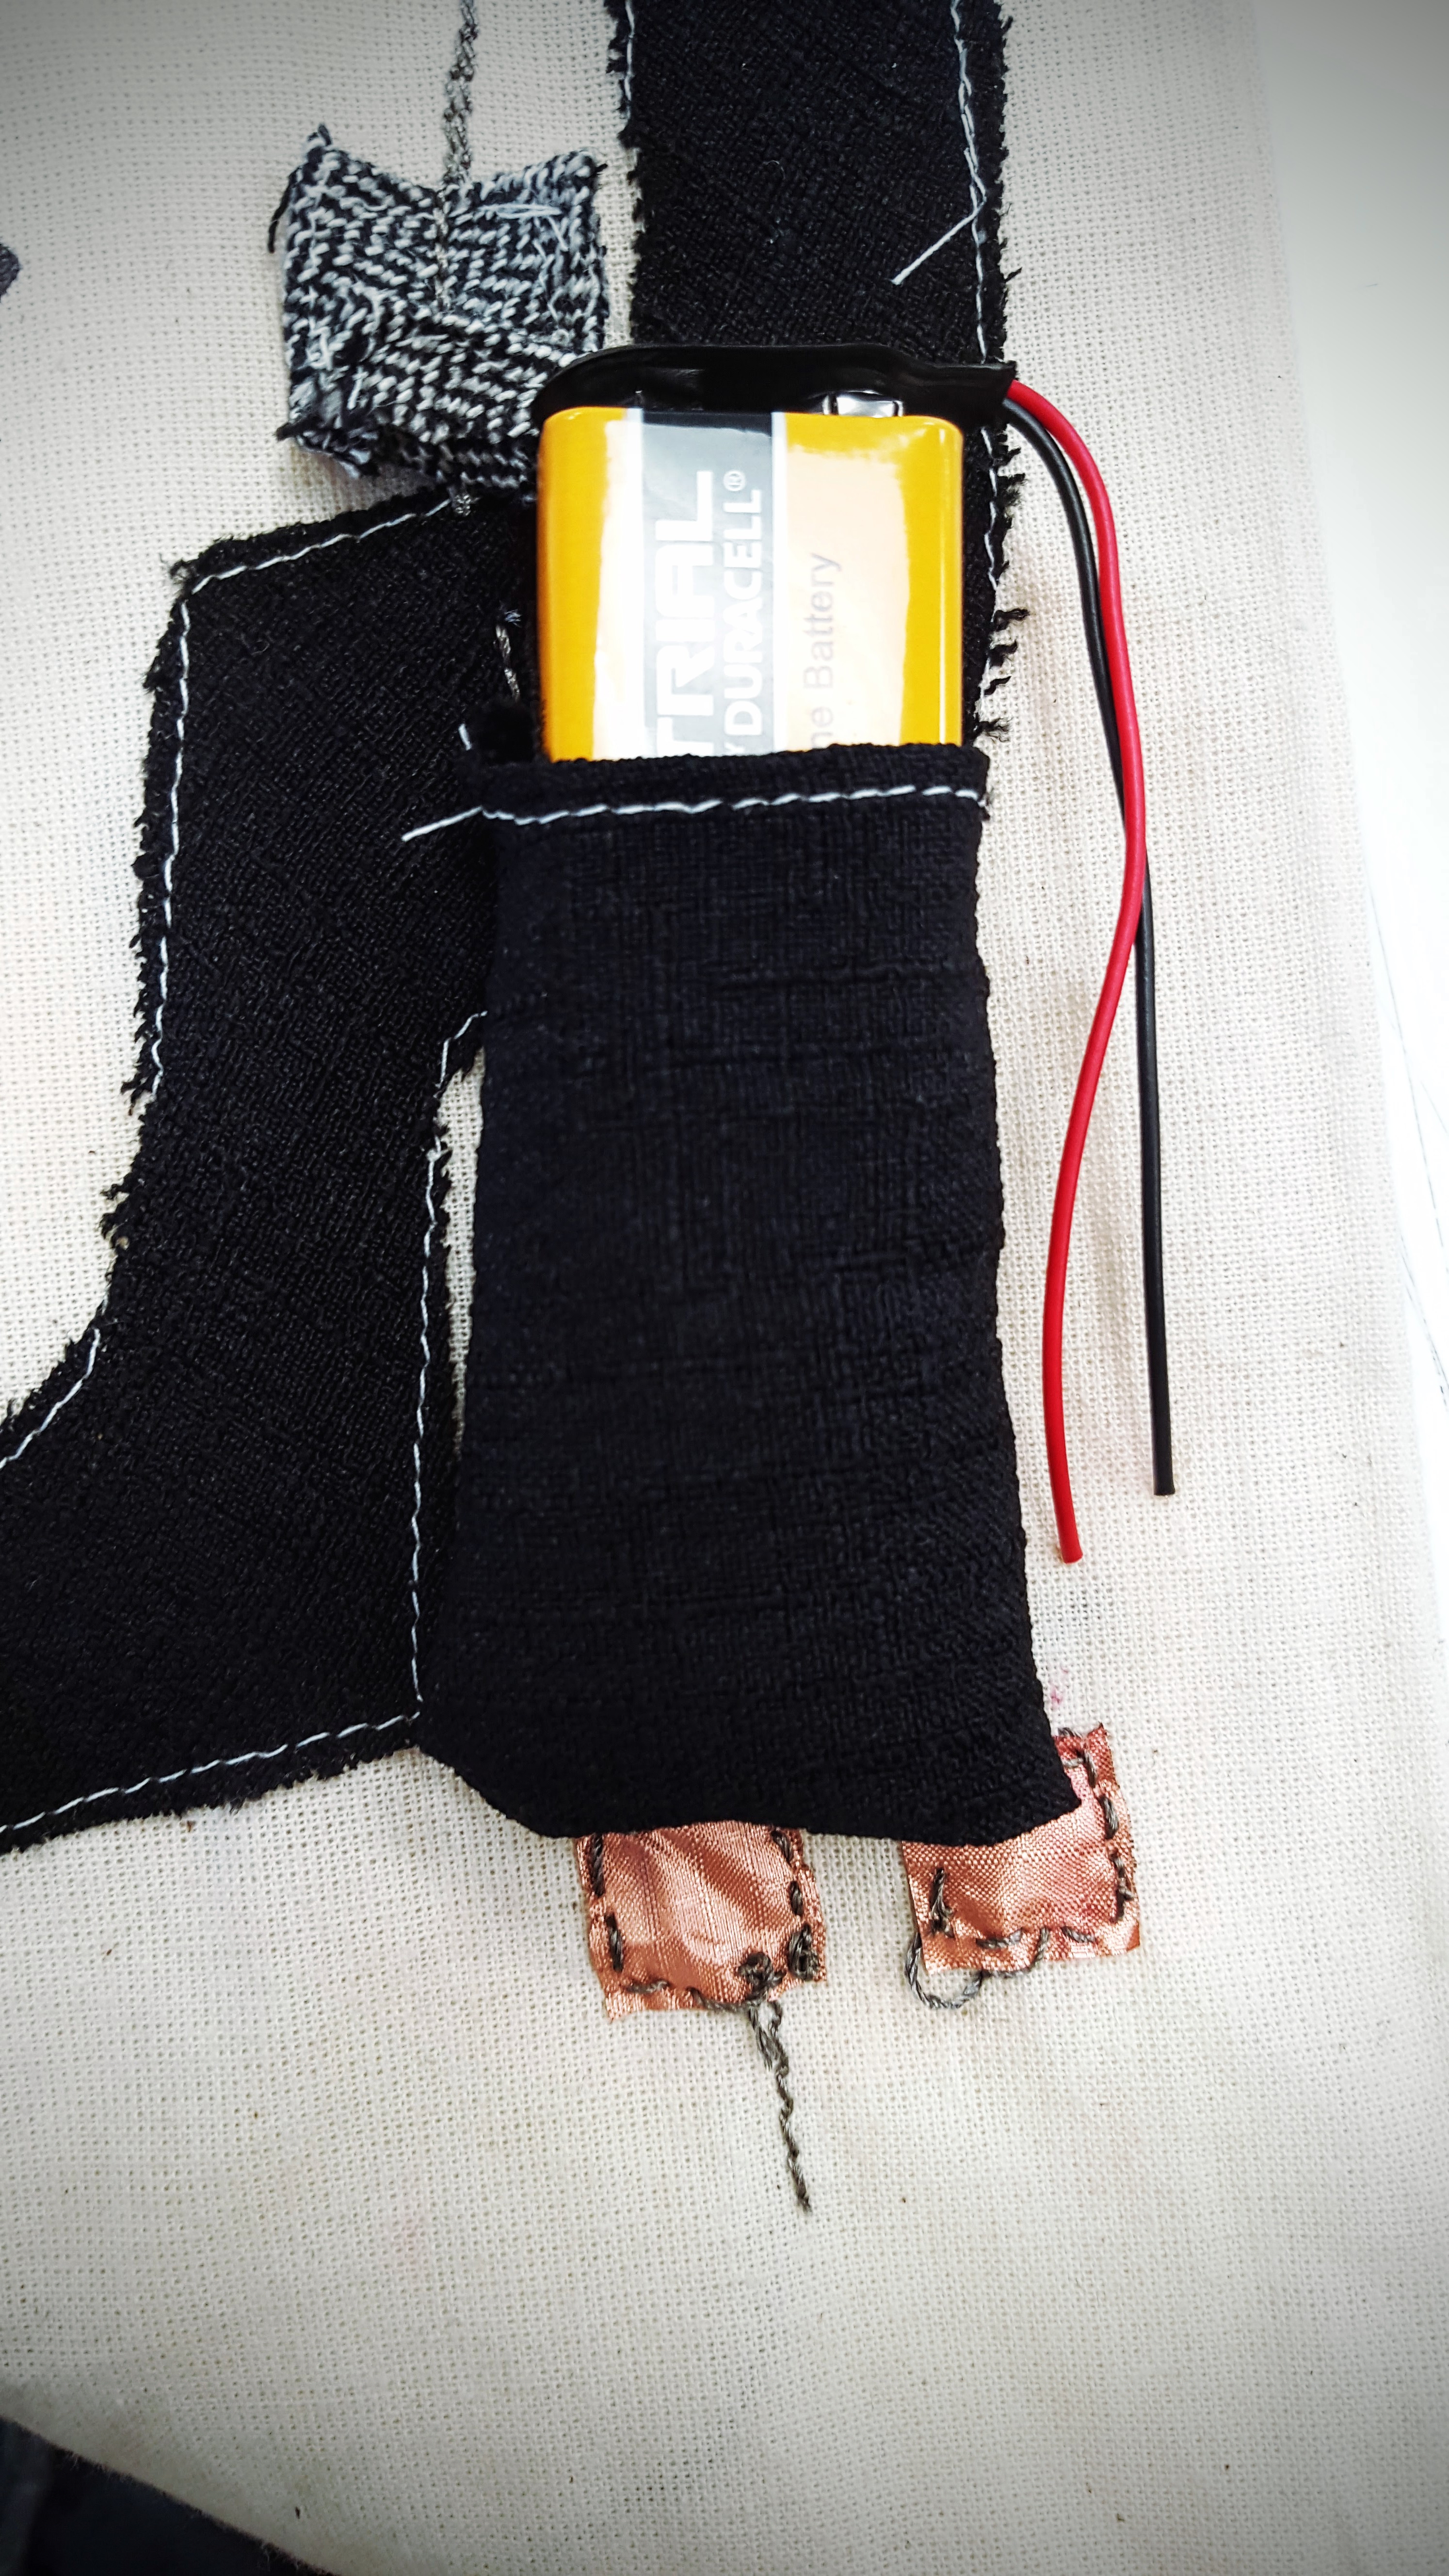
The battery is hidden in a little pocket. The wires are soldered to the extra copper fabric, connected with conductive thread to the + and – of the Textilo board.
The ” I hate you – Noisy Totebag” is activated with a button.


